Supporting imagery
Models
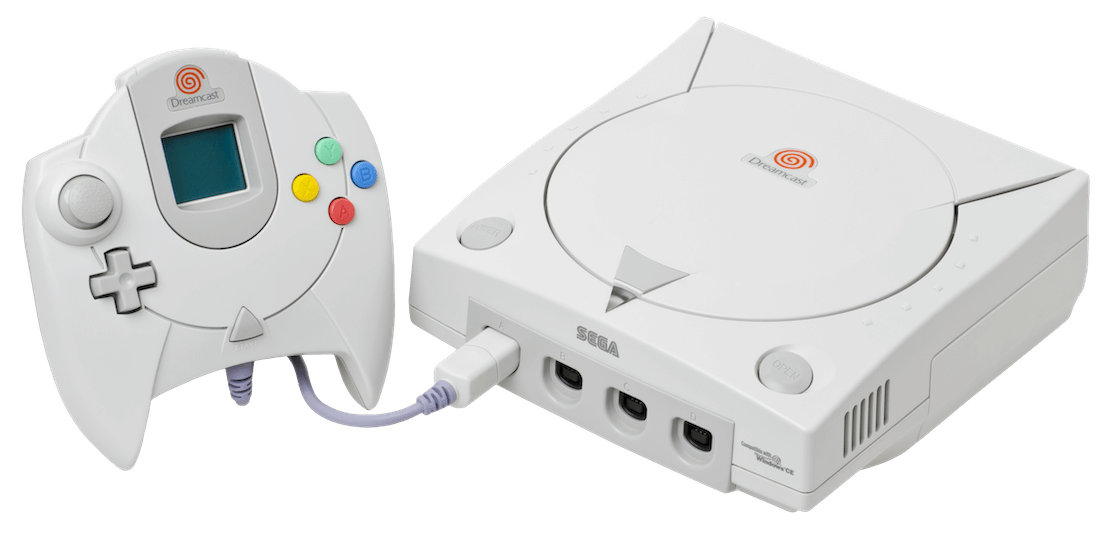
Released on 27/11/1998 in Japan, 09/09/1999 in America and 14/10/1999 in Europe.
Motherboard
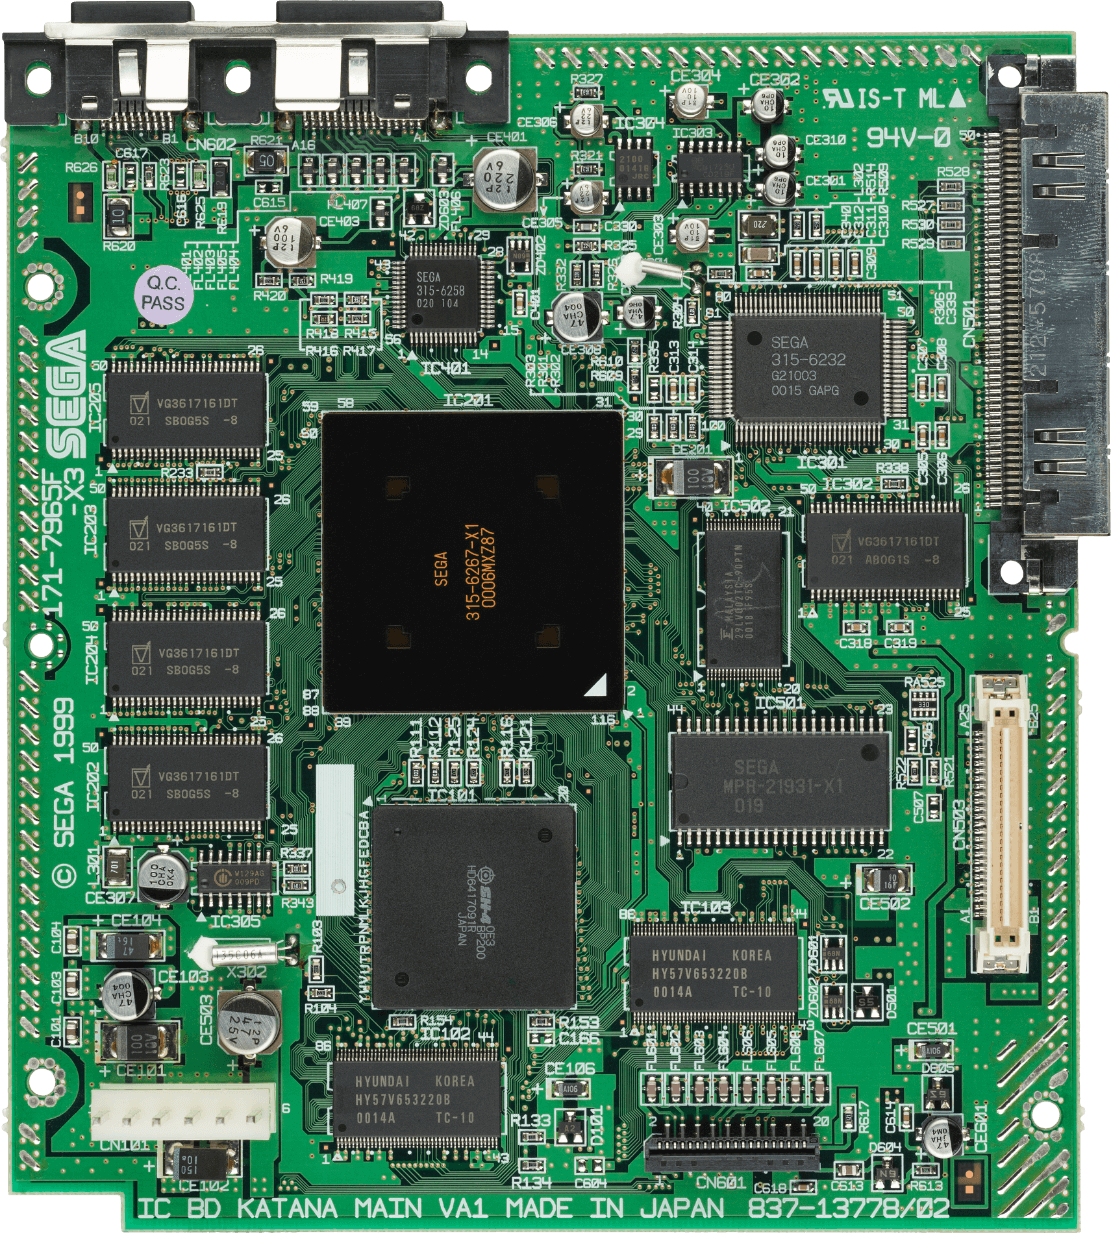
Showing revision 'VA1'.
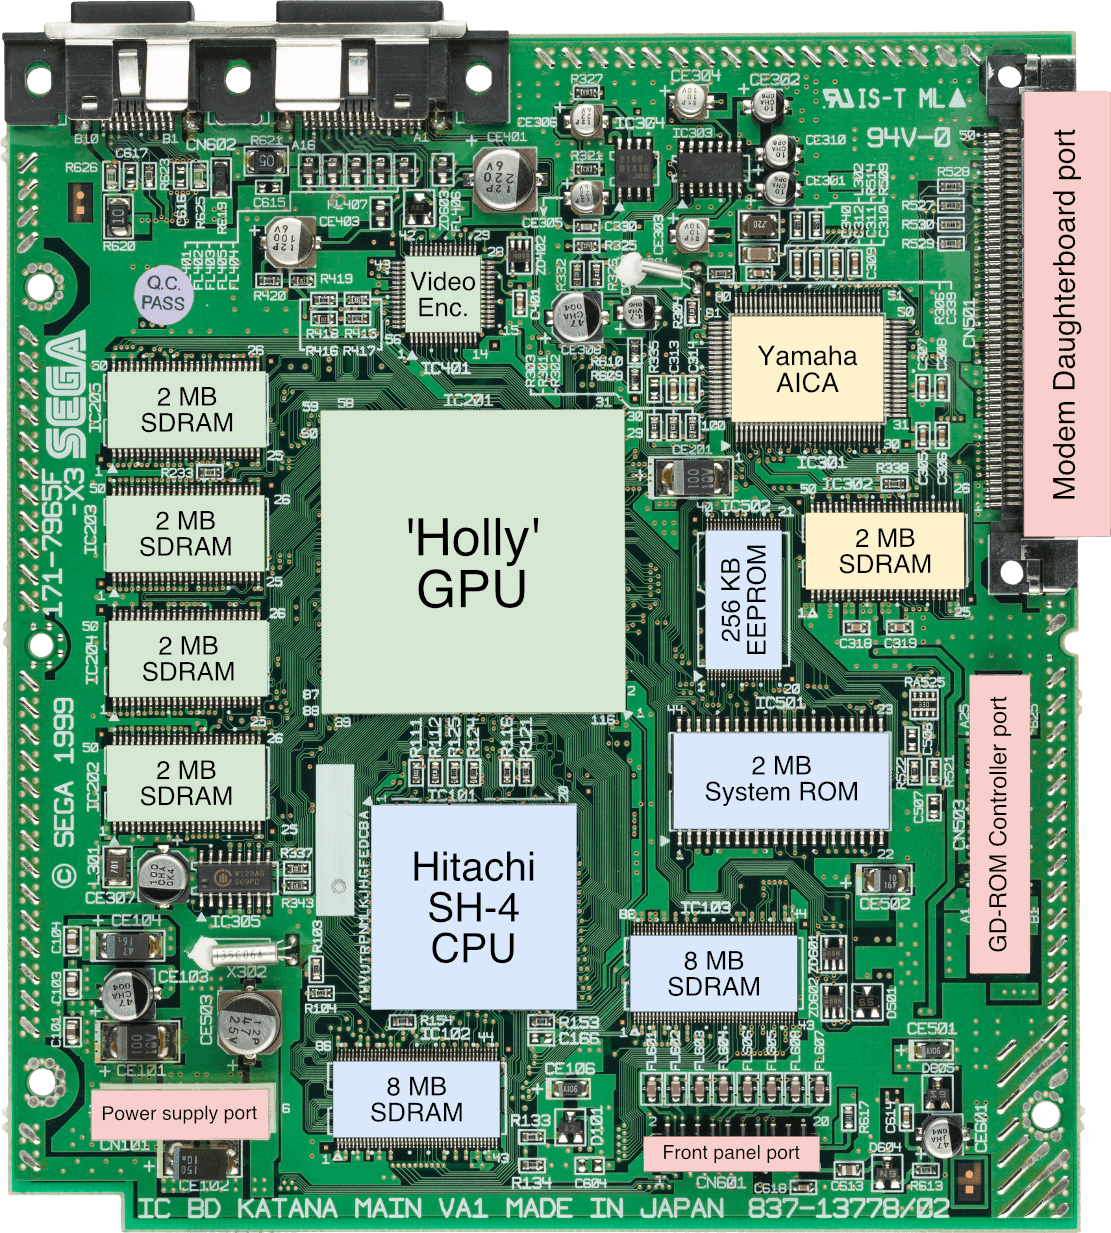
While the official docs state that the system contains 128 KB of flash memory, this motherboard happens to include a 256 KB EEPROM chip for some reason instead.
The battery and controller ports are found on a daughterboard called 'Front panel'.
Diagram
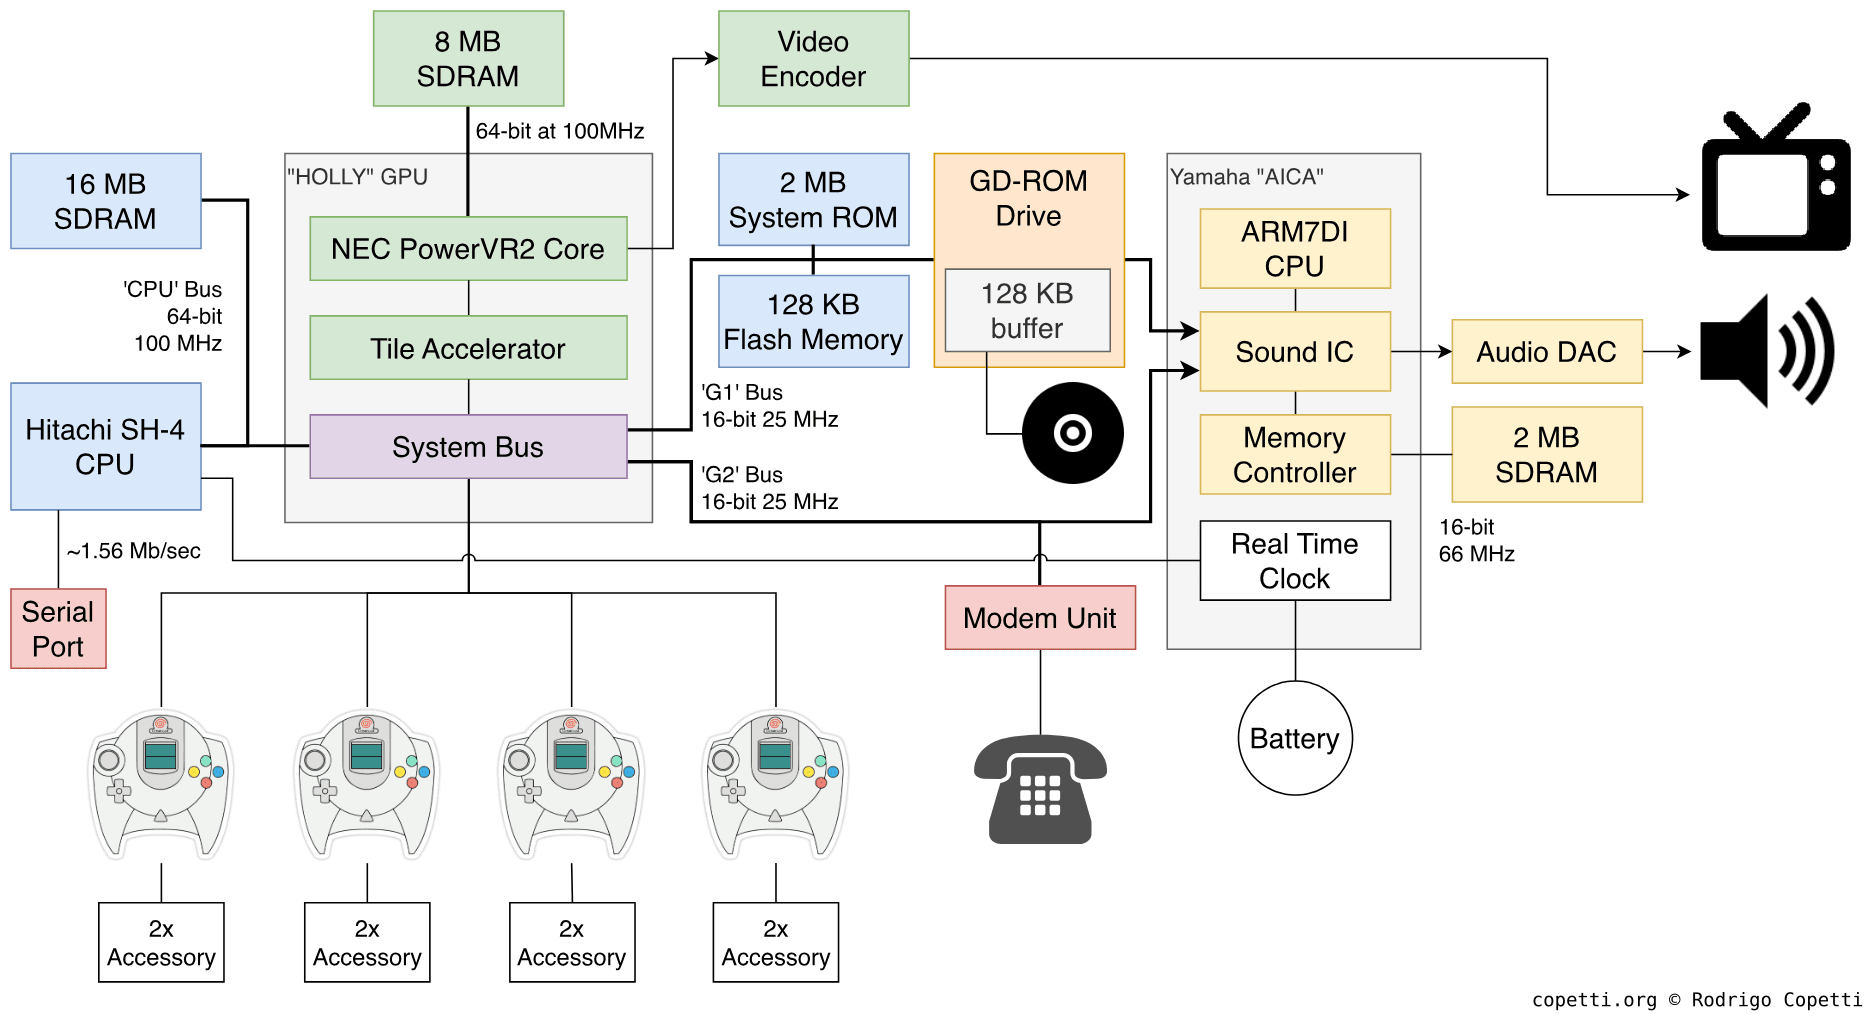
Important data buses are labelled with their width and speed.
Introduction
The Sega Dreamcast introduced many new features over its predecessor (the Saturn) to appeal to both game developers and console gamers. While this was Sega’s last attempt to conquer the console market, some of the technologies that were pioneered in the Dreamcast carried on into future mainstream devices.
CPU
Things were progressing smoothly for Hitachi; their iconic SuperH chips had found multiple clients, and the company was now ready for a fourth instalment of the series. Their new entry would combine embedded capabilities with functionality enjoyed by 3D games.
Sega, being one of the early adopters of the SuperH, unsurprisingly selected Hitachi’s latest shipment to power their new console. Hence, the Dreamcast carries an SH-4 CPU running at a whopping 200 MHz [1]. Also, to address previous shortcomings, there’s only one fully equipped CPU.
The offering
That being said, what’s interesting about this new processor?
Well, to start with, the SH-4 serves as a superset of the previous models, meaning it inherits all the existing features of the SuperH line, including a 32-bit RISC architecture, a 5-stage pipeline, and a 16-bit instruction set. Alas, it also inherits control hazards.
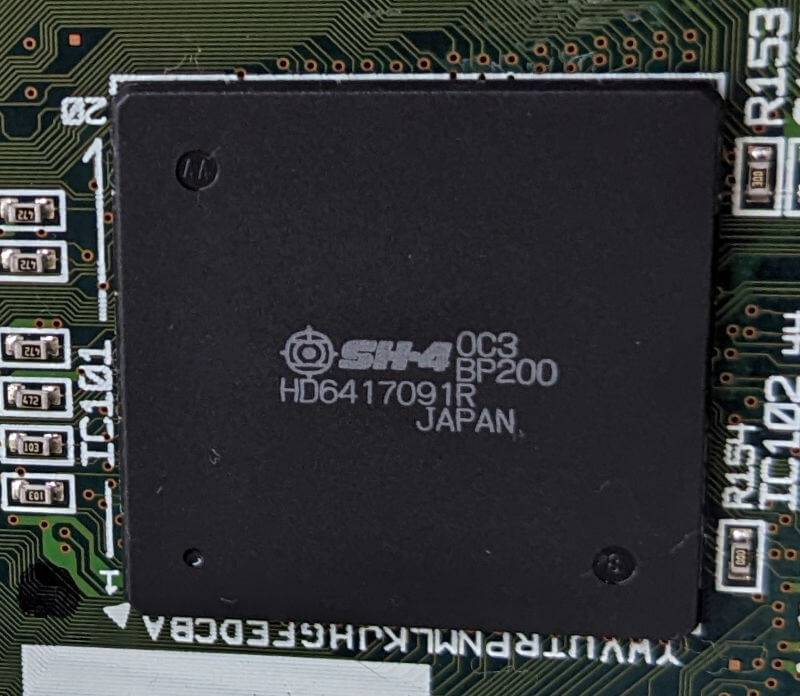
On top of that, as the next-generation CPU, it debuts many improvements that extend beyond the scope of embedded applications [2]:
- A 2-way superscalar pipeline: A novel parallelism technique in which the CPU can process more than one instruction (two, in this case) in each stage of the pipeline. This results in more instructions executed per second.
- Behind the scenes, the CPU distributes the two instructions to two different (and available) execution units. Therefore - with the exception of a very small group - all instructions must be of different types (i.e. branching, arithmetic, etc.) to be parallelised [3]. Otherwise, they can only be executed sequentially. Be that as it may, the SH-4 also exhibits a subset of instructions that can never be parallelised, as they contain too many dependencies to make it feasible.
- 8 KB instruction cache and 16 KB data cache: This ratio is rather curious, as consoles typically include more instruction cache than data cache. However, the SH-4 allows the data cache to be split into two sections: 8 KB of scratchpad memory (fast RAM) and 8 KB of data cache.
Special work
Common chores of a game-console CPU include handling the game’s logic, running the enemy AI, and keeping the GPU fed with drawing tasks.
With the Dreamcast, you will see that the GPU only covers the tasks of a rasteriser. So, the CPU must get involved with the majority of the graphics pipeline. This means the CPU will be processing vast amounts of geometry data (such as computing animations and perspective transformations). Now, to ensure the CPU can sustain this role, Sega and Hitachi collaborated to incorporate two crucial extras into the SH-4.
The first addition is a dedicated 64-bit Floating-Point Unit (FPU). This component computes 32-bit decimal numbers (the so-called ‘single-precision’ or ‘floats’) or 64-bit ones (the ‘double-precision’ or ‘doubles’ type) in accordance with the IEEE-754 standard. Its register file is made of thirty-two 32-bit registers, but they can also be combined into a different group of sixteen 64-bit registers; this is what enables the unit to operate on doubles.
If that wasn’t enough, Hitachi took a step forward with the FPU and implemented extra logic to form another register group, this time made of eight 128-bit registers. In it, each register now stores four 32-bit floats or, in other words, 128-bit vectors. This format is optimal for graphics-related operations.
To make good use of the new vectors, the FPU includes specialised instructions for operating on them, much like those provided by the Saturn Control Unit, except the industry is now a bit more standardised. These new instructions constitute what is often known as Single Instruction Multiple Data (SIMD) and may perform the following algebraic operations:
- Dot product.
- Sum of squares.
- Matrix multiplication.
The second addition is the SH-4’s external bus, which is now 64-bit wide, enabling the CPU to transfer pairs of 32-bit values at the same time. This is another improvement that adds up to the overall performance of this CPU.
Main memory
The Dreamcast houses 16 MB of Synchronous DRAM (SDRAM), and it’s directly connected to the CPU using a 100 MHz bus (half the CPU speed).
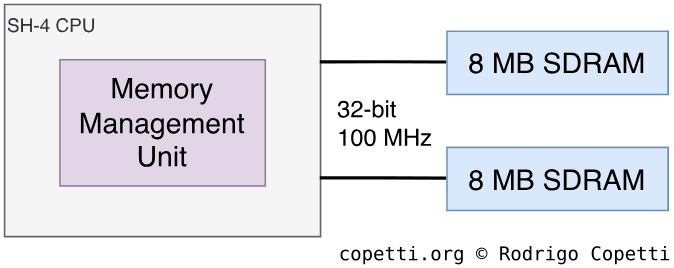
Conversely, the memory’s data bus is only 32 bits wide [4]. Does this mean the CPU’s shiny 64-bit bus is wasted? No, because the RAM is arranged as two 8 MB banks, with each chip connected to half of the CPU’s bus lines.
Customised access
To access this memory, the CPU allocates a 29-bit physical address space together with a Memory Management Unit (MMU) to provide 32-bit virtual addressing [5]. Additionally, thanks to the inclusion of a Translation Lookaside Buffer (TLB), programmers can use 32-bit addresses without incurring performance penalties.
Now, since only 29 bits are used to access memory, the remaining three bits are leveraged to provide memory protection, alter the memory map, and bypass the cache [6] [7].
Ultimately, programmers may decide whether to use these features. Games for this system certainly don’t require memory protection, and the MMU must be manually enabled during boot.
Large package deliveries
When it comes to transferring large amounts of data to, let’s say, feed the graphics chip with geometry, the SH-4’s mov.l instruction can only operate up to 32-bit chunks (the size of the CPU’s main registers) at a time. This means that wide blocks would require many individual mov.l calls. Consequently, the memory bus would be congested with unnecessary overhead.
Sega previously alleviated this with the Saturn Control Unit. Now, with the Dreamcast, the same CPU can additionally perform memory transfers using burst transactions: the SH-4 houses a 32-byte queue that can be filled with data, and then commit as a single big transfer [8]. Nevertheless, the programmer is in charge of filling the queue, assigning the destination, and triggering the exchange.
Moreover, to avoid stalling the CPU while the queue is being transmitted, a second one is available to alternate.
All in all, this is very similar to the traditional Direct Memory Access (DMA) model - which the Dreamcast also features. However, burst transactions are simpler to operate albeit less versatile (the queues can only write data from the CPU to the outside). This console’s DMA controller, on the other hand, supports variable-length transfers, multiple data sizes, and provides four channels for parallel operations (with many restrictions) [9].
No UMA but…
While this system is not built around the strict Unified Memory Architecture (UMA) like a well-known competitor, it does delegate I/O access to the GPU. This implies that whenever the CPU has to fetch anything beyond its dedicated RAM or the serial interface (which is also connected), it must issue a request to the GPU and wait if necessary.
The CPU also provides a unique functionality called Parallel Input/Output (PIO). It’s used to manipulate multiple I/O locations at the same time. Sega wired these pins so that the CPU can control the GPU’s video mode - I explain more details in the ‘Graphics’ section.
End of the line
Even with all the advantages described, I’m afraid the SuperH series didn’t progress significantly after its last major adopter, the Dreamcast, left the stores. Following the popularity of the SH-4, Hitachi (and later Renesas Electronics, the current owners) were unable to replicate the same level of success, and considering the embedded/handheld market has since favoured ARM (thanks to StrongARM), I don’t see Renesas continuing Hitachi’s invention anytime soon.
The encouraging aspect of computing, however, is that technological progress often spreads beyond the boundaries of individual brands and companies. For instance, the SH’s compressed-instruction technique lives on ARM’s Thumb mode (a secondary 16-bit instruction set) [10]. Furthermore, in 2012, a volunteer-driven initiative began work on a modern, SuperH-compatible CPU, called the ‘J2’ [11].
Graphics
The GPU package is a custom-made chip called Holly running at 100 MHz. Unlike previous in-house designs, Sega partnered with VideoLogic (now known as Imagination Technologies) to provide them with a competitive 3D accelerator.
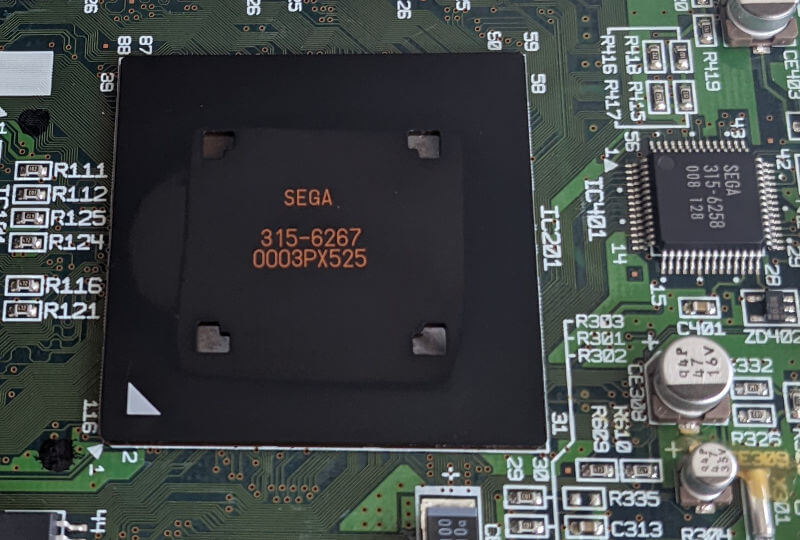
Inside Holly, we can find VideoLogic’s exclusive graphics circuit: the PowerVR2 (also referred to as PowerVR Series2 and CLX2). It’s based on their earlier PowerVR GPUs but specifically tailored for the Dreamcast.
Organising the content
8 MB of Video RAM (VRAM) are provided to store the materials that Holly needs to draw on the screen (e.g. textures, frame-buffers, commands, etc.) [12]. The block is installed as four SDRAM chips using a 64-bit bus.
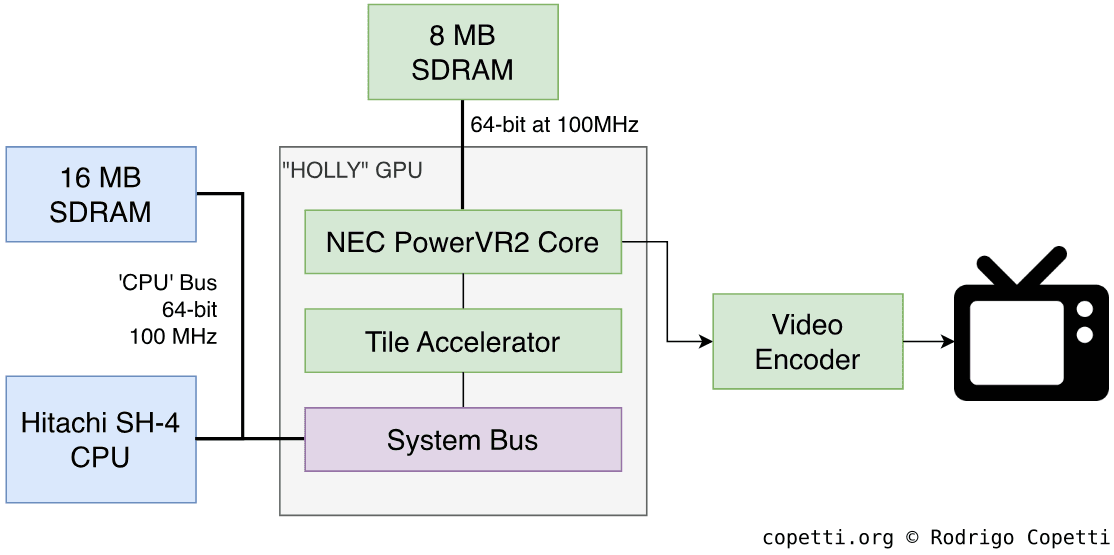
This memory is only accessed by Holly; the CPU fills it by talking to Holly or the Direct Memory Access (DMA) unit.
Architecture
VideoLogic chose an alternative approach to the construction of their 3D engine called Tile-Based Deferred Rendering (TBDR).
Instead of rendering a whole frame at once, as traditional Immediate Mode Renderers (IMRs) do [13], TBDR divides the rendering area into multiple sections called ‘tiles’. It then carries out the rendering process on each tile individually, and the results are combined to form the final frame [14].
This innovative design brings interesting advantages:
- It can be greatly parallelised, which significantly reduces bandwidth and power usage.
- It implements an elegant solution to the visibility problem by automatically sorting polygons from front to back and then performing z-tests at the first stages of the pipeline. The combination of these tasks not only solves the original issue, but also prevents overdraw (the rasterisation of hidden polygons), which wastes resources and degrades performance.
It’s no surprise that Imagination took this efficient technology forward to build the Series 4 PowerVR cores, which powered a remarkable number of devices, including the first-generation iPhone, the Nokia N95, and the Dell Axim x51.
Construction
Let’s take a look at the two main components of the Dreamcast’s GPU [15]:
Tile Accelerator
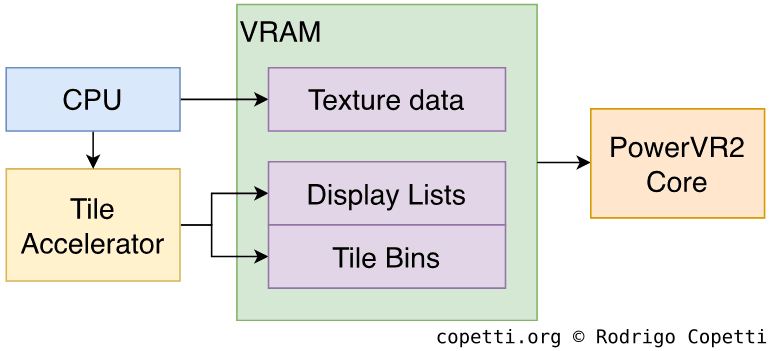
Before the rendering process begins, a component known as the Tile Accelerator (TA) performs pre-processing. It starts by allocating several 32 x 32 tile bins into which the geometry will be rendered.
Then, the Tile Accelerator:
- Grabs the geometry data and drawing commands issued by the CPU.
- Converts this data into an ‘internal’ format.
- Distributes the geometry to each bin according to its coordinates, discarding any clipped geometry.
- Generates the Display Lists, which instruct the subsequent components on how and where to draw the geometry.
The resulting Display Lists are then interpreted by the 3D engine: The PowerVR2.
PowerVR2 Core
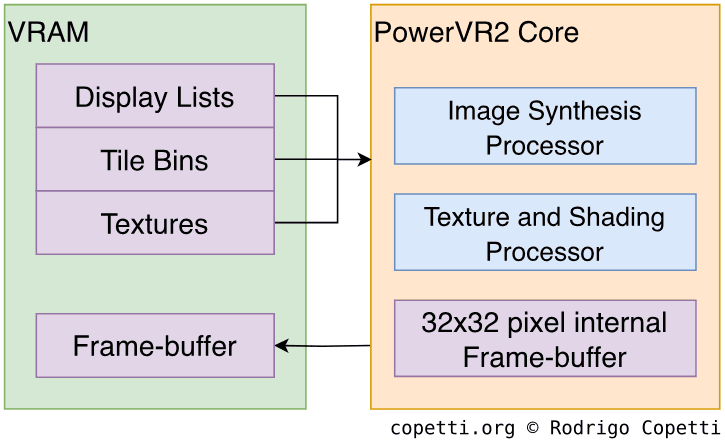
Here is where the graphics are brought to life. The Display Lists received from the TA tell the core to render the geometry of a single tile using an internal frame-buffer. The process is as follows:
- The Image Synthesis Processor (ISP) fetches the primitives (either triangles or quads) and performs Hidden-Surface Removal to remove unseen polygons. Then, after calculating its Z-buffers and stencil buffers, the data goes through Depth Testing to avoid rendering polygons that would appear behind others, and Stencil Tests to cull geometry that won’t be visible if it lies behind a 2D polygon (also called Mask).
- Notice how these tests are effectively carried out at the start of the pipeline. In contrast, previous consoles using late z-buffering discard the geometry at the end of the pipeline. The ISP approach prevents processing the geometry that will ultimately be discarded [16], thereby saving resources.
- The Texture and Shading Processor (TSP) applies colouring, shading, and multiple effects across the tile area.
- Textures are not applied until the tile is exported, meaning that emerging overdraw (if any) will not reduce the fill rate.
Once the operation is complete, the rendered tile is written to the main frame-buffer in VRAM. This process is repeated until all tiles have been rendered. When the full frame is ready, the resulting frame-buffer is picked up by Holly and passed on to the Video encoder, which sends it through the standard video signal.
The big picture
Apart from the clear architectural difference, the Texture and Shading Processor comes with many capabilities that highlight the substantial leap this console makes over the old Saturn. Here are some notable examples:
- Alpha blending: Combines colours of overlapping layers to achieve transparency effects.
- The process used for applying transparency in this system is called order-independent transparency. The algorithm automatically sorts primitives before blending their colours, and while this slows down the rendering process, it removes the need for games to perform manual sorting. For this reason, Dreamcast titles excel at displaying transparent objects.
- When combined with the tile-based rendering system, order-independent transparency completely addresses earlier mishaps.
- Mip-mapping: Automatically selects a scaled-down version of the texture depending on the required level of detail. This is done to prevent processing large textures that appear far from the camera (which would be a waste of computation and would produce aliasing).
- Environment mapping: Applies reflections on textures.
- Bilinear, Trilinear, and anisotropic filtering: These are different algorithms used to smooth textures and reduce pixelation. They are ordered from ‘worst’ to ‘best’, with resulting quality directly proportional to the computational cost.
- This is a major improvement over the Saturn, which offered no texture filtering at all!
- Bump mapping: Simulates defects on surfaces without spending extra polygons.
- Vector Quantisation (VQ): A compression technique in which texture data is stored as pattern indices, reducing its size along the way [17]. The processor decodes this format seamlessly, meaning there are no performance penalties [18].
Gaining detail
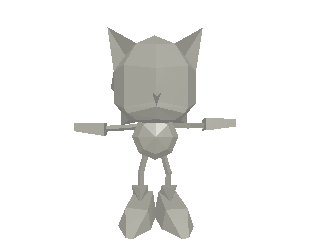
Holly can now draw roughly ten times more polygons than its predecessor. Here’s a Before & After example that shows how model designs are no longer as constrained. I encourage you to take a closer look at them!

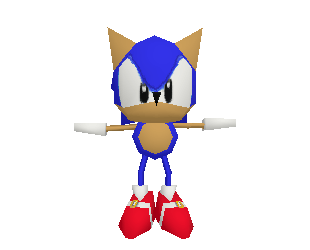 Interactive model available in the modern edition
286 triangles (or 185 quadrilaterals).

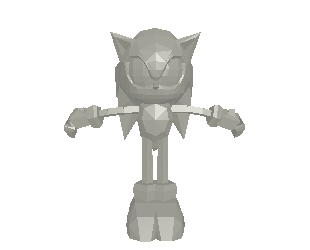
 Interactive model available in the modern edition
1001 triangles.
Video Output
There are two big milestones to unpack here. So, I’ve split this section into two parts.
Bridging the divide
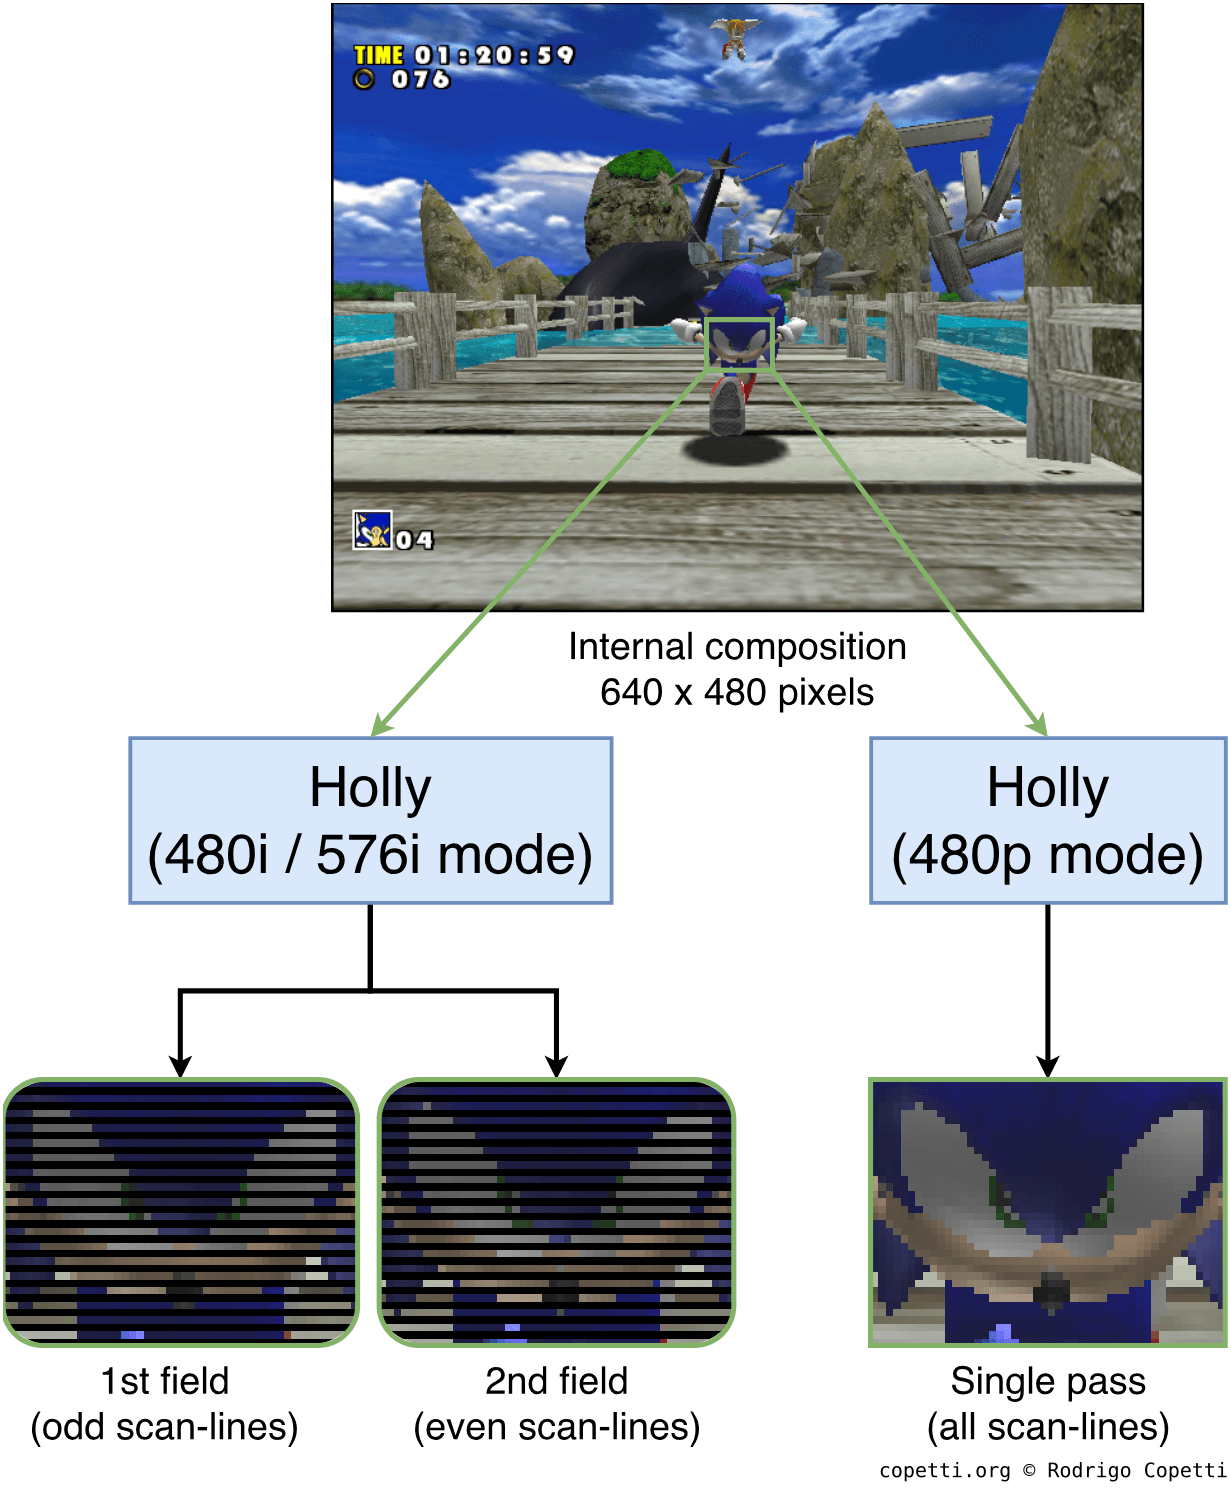
We’ve come a long way since consoles first began broadcasting 240p signals, a clever compromise between bandwidth and picture quality. Then, when 240 lines could no longer display enough detail, interlaced modes were introduced to increase detail without departing from the standard. Yet, the added flicker and lack of a common aspect ratio made it increasingly clear that PAL and NTSC standards were bottlenecking the visual fidelity developers were striving for. Entering the fifth generation, you might expect the new power to translate into better video output, but instead found further inconsistency as 3D graphics battled for limited resources.
Well, for the first time in this series, Holly has managed to break through the PAL/NTSC barrier and deliver a modern format that games could actually use: 480 progressive scan-lines (also referred to as 480p or 31 kHz, due to the horizontal scan frequency) - the same format adopted by computer VGA monitors.
For this reason, the Dreamcast’s video system brings VGA-quality output to TVs that may support it, with games typically rendering 640 x 480-pixel frame-buffers. Additionally, thanks to these dimensions, 1:1 pixel ratios have finally become the norm.
Be that as it may, 480p does place additional strain on Holly, potentially reducing the frame rate and visual detail. To alleviate things, Holly offers to reduce the rendering resolution to 320 × 240 (Nintendo 64 style), and then upscale the output. However, this is predominantly useful for 2D arcade games.
It’s important to note that 480p was mainly popularised in the NTSC market. Modern European sets, on the other hand, debuted PAL60 - an interlaced PAL signal comprising 480 scan-lines and a 60 Hz refresh rate (in other words, PAL with the perks of NTSC). This is why American games started asking, ‘Enable progressive scan display?’ (which switched from NTSC to 480p), while European versions asked, ‘Would you like to display in 60 Hz mode?’ (which switched from PAL to PAL60).
The accompanying socket
To provide both modern and traditional signals, Sega fitted a unified socket that carries the following signal types:
- Composite: Combines the three signals needed for video (chroma, luma, and sync) into a single line, requiring only a one-pin cable.
- This format is used by old PAL and NTSC tellies with an RCA connection.
- S-Video: Separates the chroma signal from the combined signal, resulting in two video lines.
- RGB: Sends separate red, green, and blue signals, along with selectable sync types (composite sync, sync extracted from composite video, or sync extracted from S-Video).
- The SCART cable uses this format.
- VGA: Provides RGB with two dedicated sync signals (horizontal and vertical), resulting in five video lines in total. This is the only one that can output 480p.
- To use this output, Sega offered a VGA adaptor as an optional accessory.
- For some reason, the VGA output employs Digital Television (DTV) timings rather than VESA (as used by computer monitors) [19]. This means that the Dreamcast sends a 720 × 480-pixel signal, of which only 640 pixel columns are utilised. If the display is not aware of this, it will interpret the signal as VESA, resulting in an undersampled, narrow, and blurred image.
Now, the Dreamcast can’t encode all of these formats at the same time, so both the GPU and the audio processor contain a register named Image Mode. This coordinates which video and audio buses are activated to generate the requested output signal. The CPU detects the type of cable inserted by checking which ‘select bits’ on the video connector are active, then writes the appropriate values to the GPU. Finally, these values are forwarded to the audio processor.
Because VGA is strictly a progressive-scan format (as opposed to the traditional interlaced video), some compatibility issues arose with games designed exclusively for interlaced timings. Such games explicitly indicate in their code that they can’t display on VGA, so the CPU displays an error screen until the user swaps the VGA cable with another type.
Audio
The audio functionality is handled by a custom chip called AICA. It was designed by Sega’s long-term partner and audio industry leader, Yamaha.
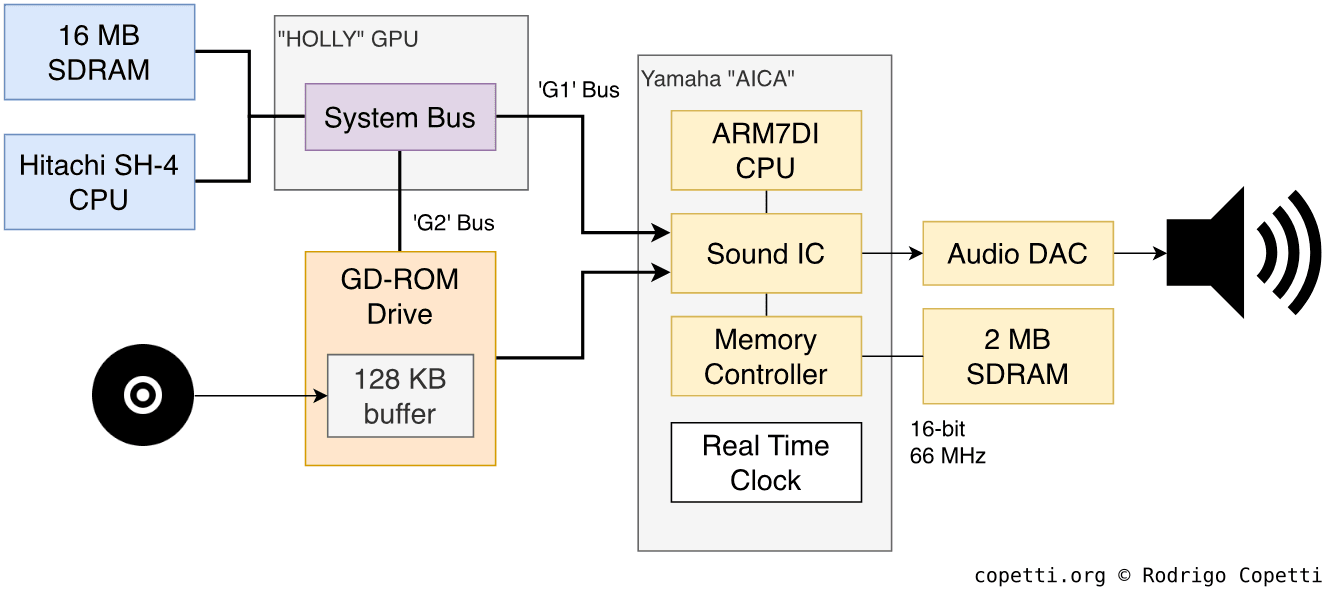
This is a continuation of the SCSP found in the Saturn, in the sense that it’s fundamentally the same architecture, but with modernised parts. That being said, AICA is composed of four components [20]:
- The Sound Integrated Circuit (IC): A set of modules (synthesiser, digital signal processor, and mixer) that generates the audio signal and applies effects to it. It supports up to 64 channels, either Pulse-Code Modulation (PCM) with a resolution of 16 or 8 bits and a sampling rate of 44.1 kHz, or 4-bit Adaptive Differential PCM (ADPCM). Overall, this provides optimal quality for playing audio.
- Notice how Frequency Modulation (FM) is now a thing of the past. Originally adopted to overcome the constraints of 80s technology, FM has now been completely superseded by sample-based channels, granting free rein to music composers.
- Curiously enough, it also provides two MIDI pins for connecting a MIDI instrument, although these are intended during development.
- 2 MB of SDRAM: Stores sound data and programs. It’s filled by the main CPU using DMA.
- An ARM7DI running at ~2.82 MHz: Controls the Sound IC. This CPU is programmed by booting a small piece of software (called driver) stored in SDRAM, which interprets the audio data and manipulates the Sound IC accordingly.
- If you’re wondering, a similar but beefier CPU is also found in the Game Boy Advance.
- Memory Controller: Interfaces the 2 MB of SDRAM.
To help with development, the official SDK included multiple sound drivers for different needs (e.g. sequencing, decoding, etc.).
The great leap
We’ve come so far since the days of the Mega Drive/Genesis. In order to show how much progress has been made in sound synthesis, here is an example featuring two games, one for the Mega Drive and the other for the Dreamcast, that used the same musical composition.
The predecessor performs FM synthesis to generate audio signals on the fly.
The new audio subsystem processes PCM samples without any hassle.
You can also try this widget if you want to switch between the two on-the-fly:
MegaDrive / Genesis: Sonic 3D Blast (1996).
Dreamcast: Sonic Adventure (1999).
Behind the scenes
Rather than dealing with hardware-specific FM arrangements, the composers of Sonic Adventure were free to produce their soundtrack in-house. It also didn’t matter how many instruments the track used as, in the end, the score would always be mixed down before being exported as stereo PCM audio.
If you look at the contents of the game disc, the music is encoded in ADX, a lossy format developed by CRI Middleware. This extra layer enables the game to decode and stream audio data from the GD-ROM to the Sound IC without running out of memory or bandwidth. Furthermore, the respective driver could be implemented in many ways, as multiple approaches existed to balance the workload between the main CPU and ARM7.
Staying alive
For some reason, AICA is also responsible for providing the system with a Real Time Clock (RTC), and is connected to a clock battery to continue working without AC power.
Operating System
The motherboard contains 2 MB of ‘System ROM’, which stores a ‘Basic Input/Output System’ (BIOS). This is the first location from which the CPU reads when starting up. The ROM contains code that instructs the CPU to either bootstrap the game or load the interactive shell.
Furthermore, the BIOS also contains routines that games may use to simplify I/O operations [21], such as reading from the GD-ROM drive.
Boot process
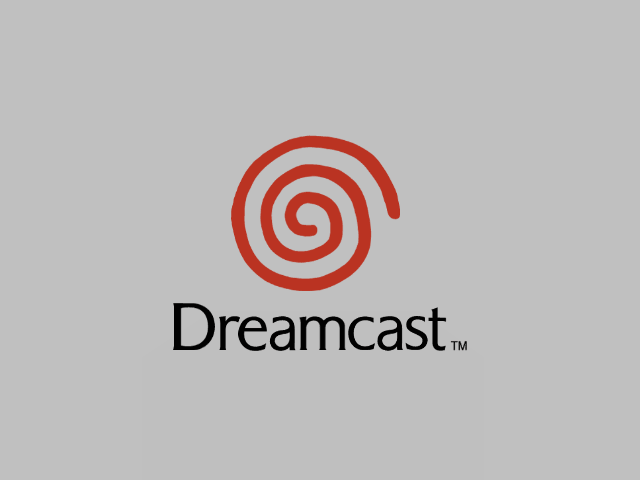
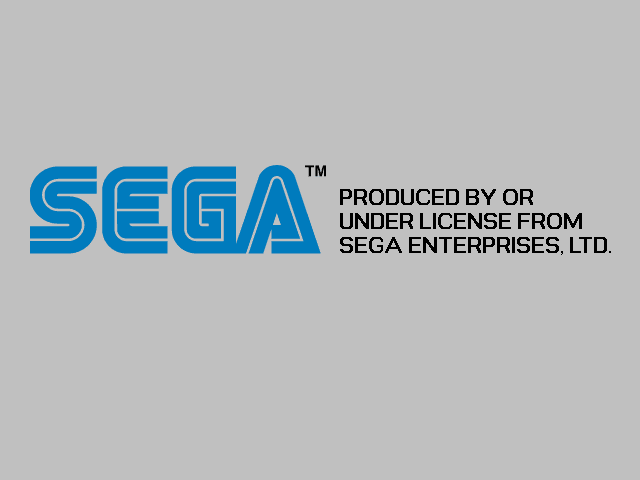
When the SH-4 CPU gets power, it looks for a program at address 0xA0000000 [22]. On the Dreamcast, this points to the 2 MB of System ROM [23], meaning the system will follow these steps [24]:
- BIOS stage.
- Execute the BIOS bootloader, initialising the hardware in the process.
- Display the iconic Dreamcast splash animation.
- IP.BIN stage.
- Check for a valid disc (GD-ROM or MIL-CD) in the drive. If one is present, read the metadata sectors (called
IP.BIN); otherwise, skip to the ‘No-disc’ stage.- At some point, the drive authenticates the security ring on GD-ROMs, presumably after identifying the disc as a GD-ROM and before reading
IP.BIN, although it’s not publicly known exactly when this occurs.
- At some point, the drive authenticates the security ring on GD-ROMs, presumably after identifying the disc as a GD-ROM and before reading
- Using the contents of
IP.BIN, verify that the disc matches the console’s region. - Validate and display the ‘SEGA’ licence screen stored in
IP.BIN.- A custom ‘MR’ image can also be bundled to display a logo below SEGA’s [25]. It may be up to 320 x 90 pixels in size.
- This was a classic leverage of trademark laws to control distribution.
- Execute the initialisation code stored in
IP.BIN[26].
- Check for a valid disc (GD-ROM or MIL-CD) in the drive. If one is present, read the metadata sectors (called
- 1ST_READ.BIN stage.
- With the hardware ready, load the game’s entry point (called
1ST_READ.BIN) from the disc into memory and execute it. Behind the scenes, the exact loading process varies depending on the type of disc. I explain this in more detail in the ‘Games’ section. - The game is now in control.
- With the hardware ready, load the game’s entry point (called
- No-disc stage.
- When the disc is not inserted or invalid, the BIOS loads the interactive shell.
- The user is now in control.
Interactive shell
Much like the Sega Saturn, when there is no valid game disc inserted, the console launches a visual shell.
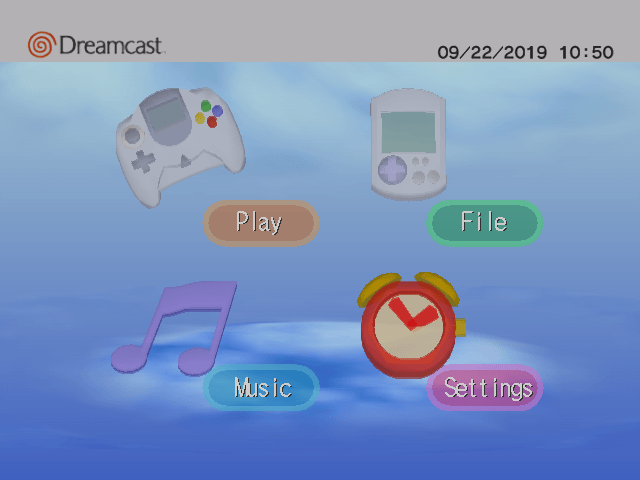
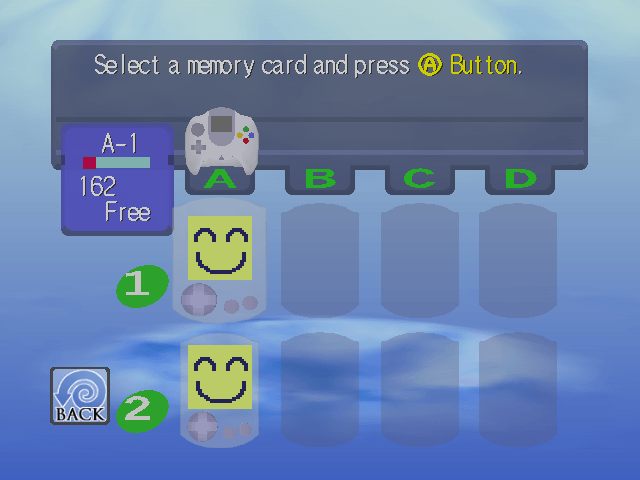
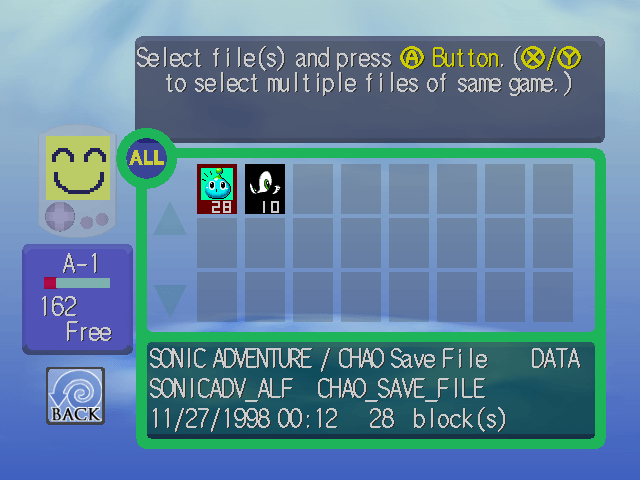
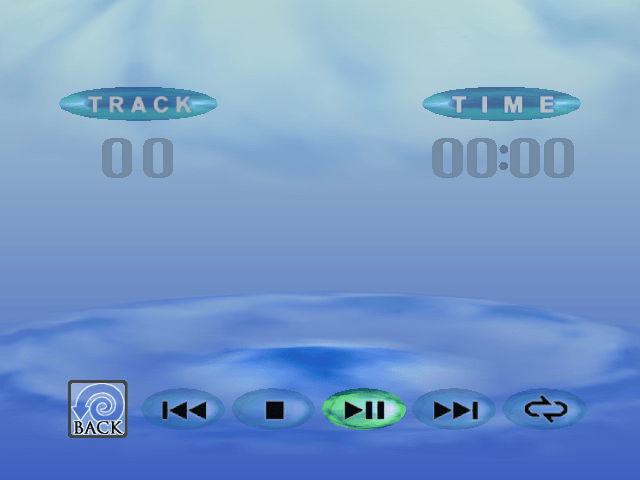
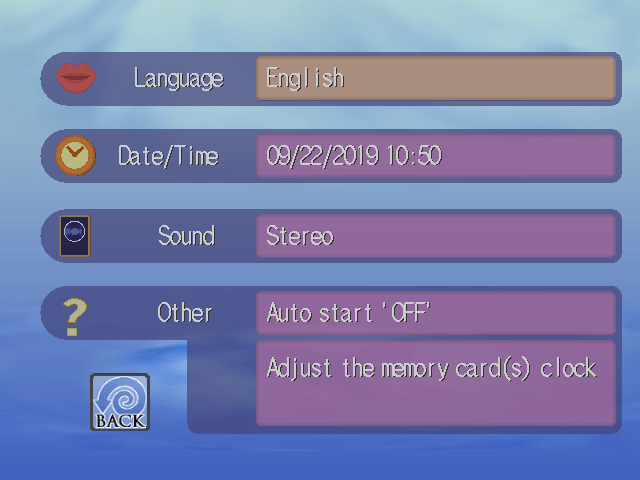
The shell provides a simple graphical user interface that enables the user to perform basic but essential tasks, including:
- Starting the game, if it hasn’t already.
- Managing the save data stored on the VMU (this device is described in more detail later).
- Playing music from an Audio CD, if one is inserted.
- Tweaking certain settings like the date, time, sound and, so forth.
Windows CE
Ever since the Dreamcast’s announcement, Sega and Microsoft revealed that the console could run Windows CE [27]. In fact, you only have to look at the console’s front to notice a Microsoft stamp… So, what’s going on here?
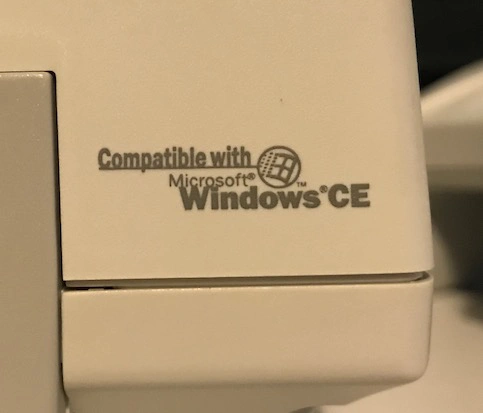
First things first, what exactly is ‘Windows CE’? Well, it was one of the many projects Microsoft embarked on during the mid-90s to conquer territories beyond the conventional PC market. In the wake of more efficient CPU architectures than x86 and the emergence of handheld computing, a new team at Microsoft was tasked with bringing the Windows ecosystem to those new devices [28].
This led to the creation of Windows CE: a complete operating system, developed from the ground up, that provided a subset of the existing Windows APIs, development tools, and services.
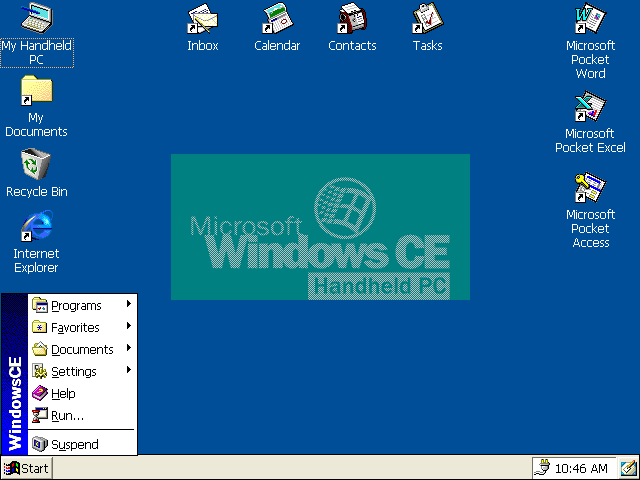
Unlike Windows 95 or NT, the new operating system presented the following advantages:
- It ran on a wide range of CPU architectures [29], including the SuperH and even the NEC/MIPS VR4300, which was adopted by the Nintendo 64.
- It was designed with constrained hardware in mind, such as limited power sources (AA batteries), memory (2 MB of RAM) and storage (4 MB of ROM).
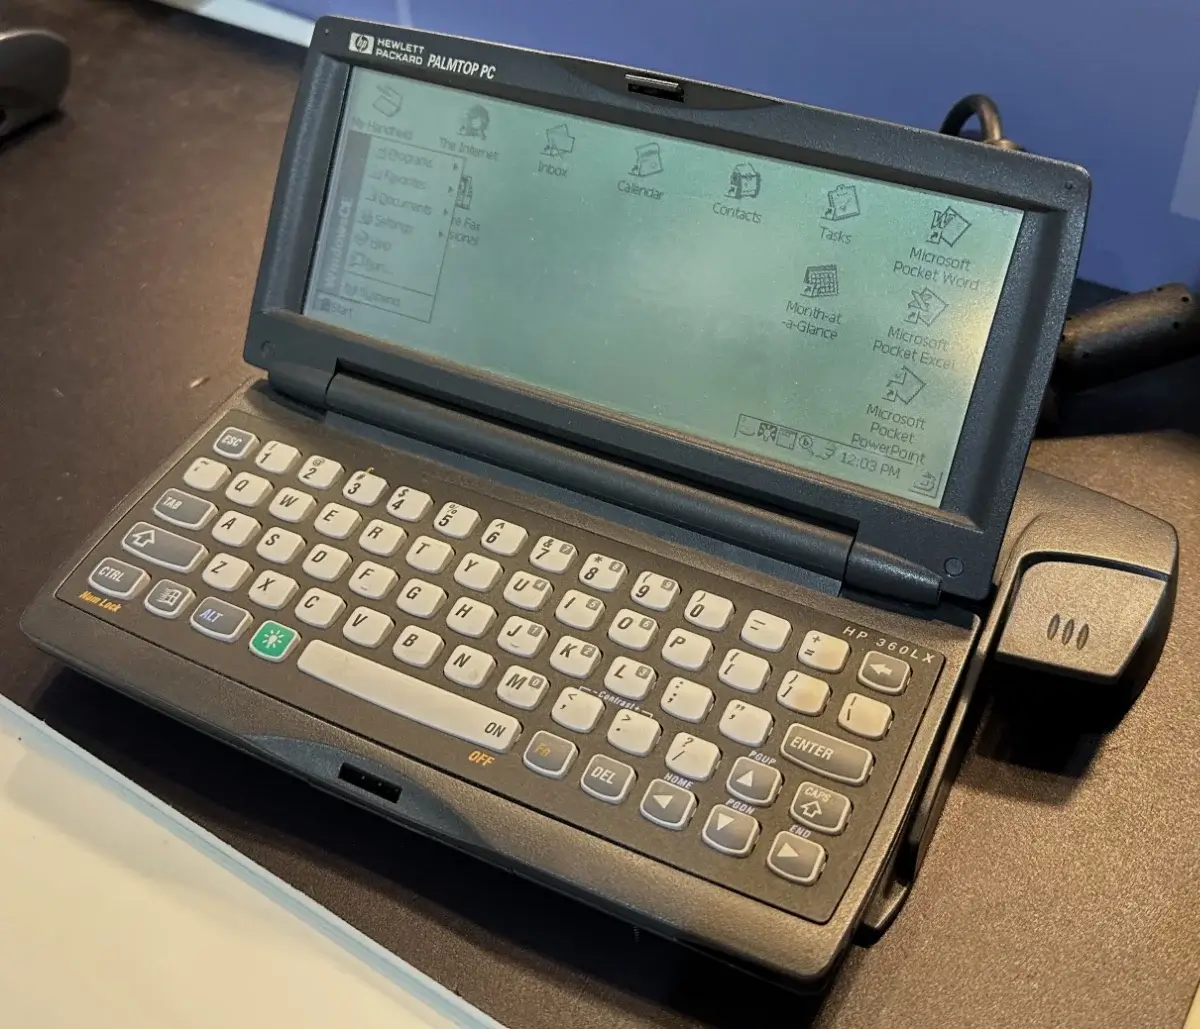
Moreover, Windows CE was sold as a set of building blocks for manufacturers, allowing them to cherry-pick which components to bundle. Manufacturers could then integrate it into a variety of hardware (such as handhelds, point-of-sale terminals, and even automotive systems). Nevertheless, Windows CE gained significant notice as the OS powering palmtops (the precursors to PDAs), effectively competing with the Apple Newton and Palm.
As the cellphone industry surged throughout the late 90s, Microsoft leveraged Windows CE’s modularity to develop PocketPC, another operating system (later renamed Windows Mobile) focused entirely on PDAs and mobile phones.
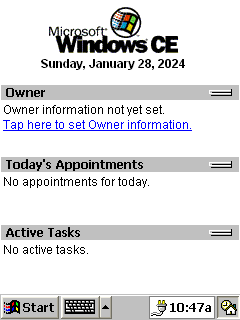
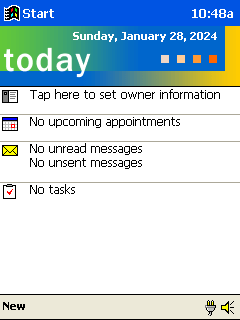
Now, what does all of this have to do with the Dreamcast? At some point, Microsoft and Sega ventured the idea of producing a Windows CE package for the Dreamcast [30]. After all, Windows CE was already running on top of Hitachi’s CPUs. In the end, this didn’t materialise into a full desktop interface or integration with Microsoft’s online services. Instead, it served as an optional layer of abstraction to simplify hardware operations.
Similar to what Nintendo provided with the Nintendo 64, Microsoft shipped an SDK (commonly referred to as Dragon SDK), based on Windows CE, for developing applications on the Sega Dreamcast. The libraries comprised a subset of CE with the minimal components needed to assist with graphics, audio, and debugging. As part of ‘joining the Microsoft club’, developers could now make use of Microsoft’s star IDE (Visual Studio 6.0) and Visual C++ 6.0.
Some developers found this option very attractive. Since the audio/graphics framework included with CE was none other than DirectX 6, plenty of PC games could, in theory, be easily ported to the Dreamcast. However, the architectural differences between the Dreamcast and conventional PCs were too great to ignore. So, in the end, programmers had to go through a great deal of optimisation to reach optimal performance [31]. Furthermore, since the Dreamcast’s BIOS didn’t include any of Microsoft’s frameworks, the SDK had to be statically linked with the game. Thus, compared with Sega’s closer-to-metal libraries, Dragon SDK increased the game’s loading times (after all, a separate ‘OS’ had to be loaded from the game disc) and, throughout execution, the Windows CE layer happened to eat a substantial amount of resources.
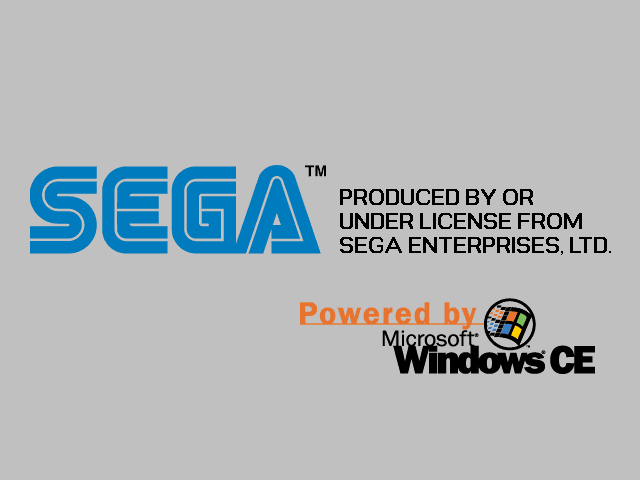
In conclusion, ‘Windows CE for Dreamcast’ was merely a secondary SDK of choice for developers. Nonetheless, a considerable number of Dreamcast games ended up making use of it.
If you’re curious about the fate of Windows CE and Windows Mobile, things didn’t go particularly well for Microsoft in the handheld market. Windows CE was abandoned in 2013. The year before, the CE-based core of Windows Mobile was replaced with Windows NT (aligning it with the desktop-based Windows 8). Nevertheless, Windows Mobile eventually lost ground to newer platforms (Android and iOS) and was discontinued in 2019.
I/O
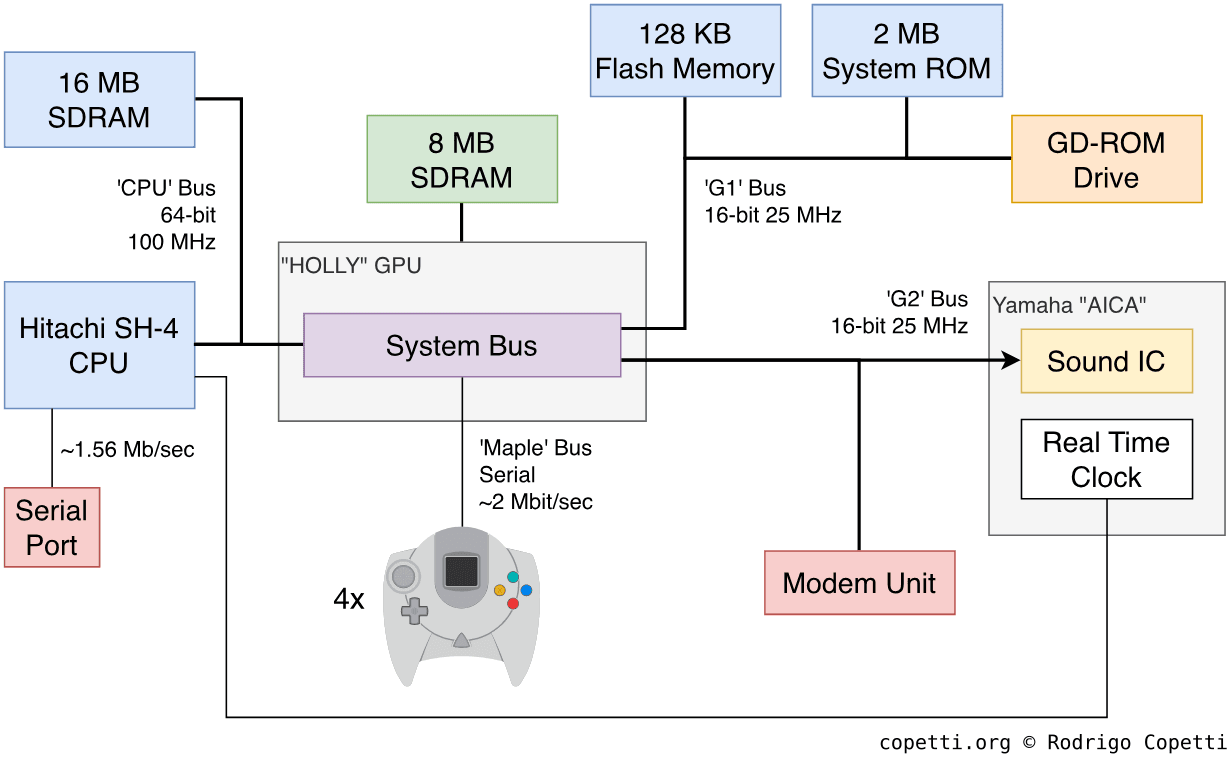
The GPU also includes another module for handling most of the I/O. It is called System Bus and provides the following interfaces:
- The G1 interface: Where the BIOS ROM, along with its saved configuration, and the GD-ROM content can be accessed.
- The G2 interface: Provides access to the modem and sound controller.
- The Maple interface: Transfers chunks of data between the controllers (along with any connected accessories) and the CPU. It’s a serial bus and provides a dedicated DMA.
- The SH-4 interface: Connects the main CPU for general-purpose communication.
- The DDT interface: Takes control of the CPU bus to access its main memory during DMA transfers.
- The PVR interface: Connects the CPU to the Tile Accelerator using a dedicated DMA channel.
External connections
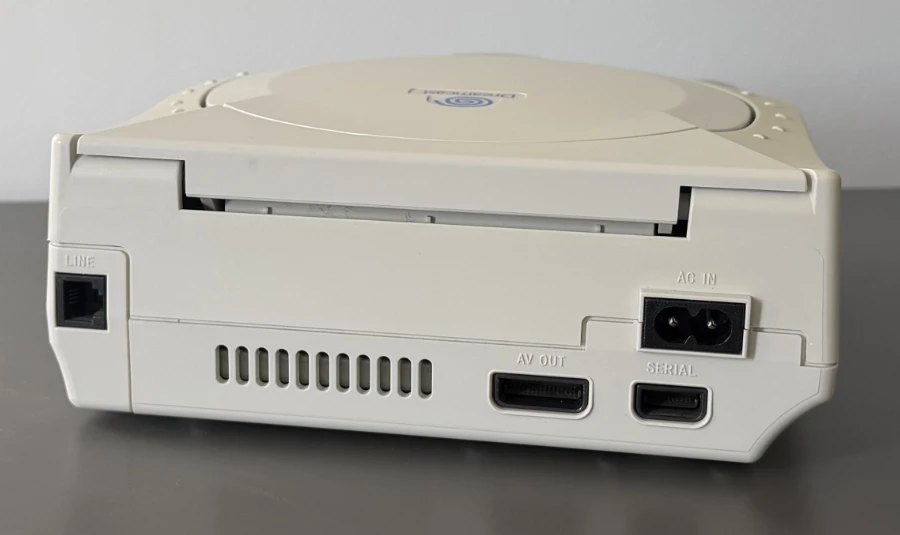
Behind the console, we find a modem and a Serial port. The modem is an interesting topic that will be further discussed in the ‘Games’ section. However, the serial port socket feels like a leftover from what Sega had envisioned before focusing on online services. It wasn’t widely adopted, aside from connecting a handful of accessories:
- Japan-only official products like the VS Cable, which linked two Dreamcasts for multiplayer gaming.
- Debugging hardware for development purposes.
- Third-party peripherals, mostly aftermarket.
Games
Development was mainly done in C or C++. At first, C was the recommended choice since the available C++ compilers were very limited in both functionality and quality.
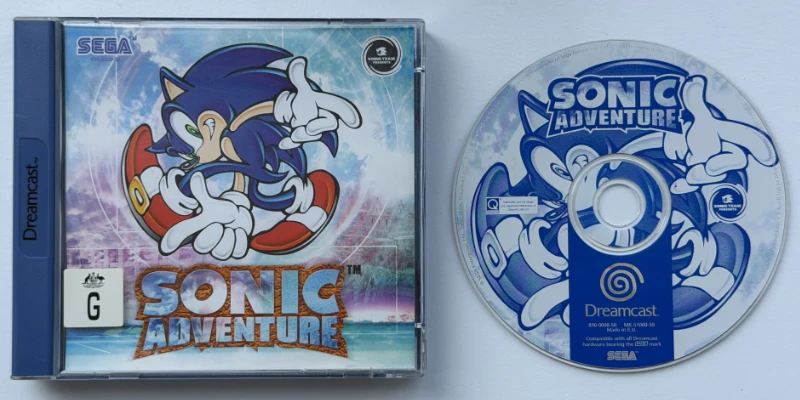
Sega also supplied development hardware in the form of a PC-like tower known as the Sega Katana Development Box. This housed Dreamcast hardware with enhanced I/O for debugging. It also shipped with a CD containing the official Katana SDK, intended for PCs running Windows 98.
As mentioned before, developers could also choose to adopt Microsoft’s Dragon SDK on top of Sega’s frameworks. In that case, DirectX 6.0 and Visual C++ 6.0 were also available for development.
A familiar, but denser, medium
It seems the popular 650 MB CD-XA discs weren’t enough for this generation anymore, prompting Yamaha and Sega to develop a proprietary variant called ‘GD-ROM’ that could now store around 1 GB of data.
Unlike ascending standards like the DVD, GD-ROM was a cheaper option by retaining the same laser used to read CDs, but improving the surrounding electronics to be able to extract more data from the same space.
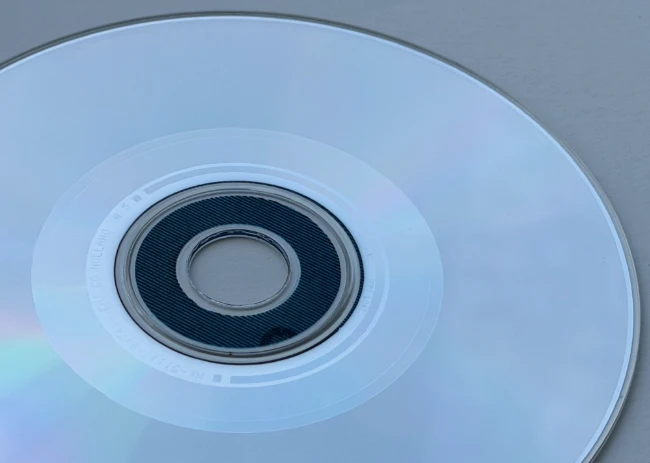
Not a lot is known about the GD-ROM as Sega kept the protocol for themselves. What is known, however, is that GD-ROMs are divided into three zones [32]:
- Inner Zone (35 MB): It contains metadata about the disc (allowing the Dreamcast to recognise the GD-ROM) followed by an audio track warning users if they inserted the disc into non-Dreamcast equipment. This zone intentionally follows the CD-ROM standard, making it backwards compatible with existing CD players.
- Outer Zone (984 MB): This is where the game data is stored. The larger capacity came from narrowing the distance between pits and lands.
- Security Ring: Sitting between the inner and outer zone, its engraving is meant to prove the disc is genuine. There’s not enough documentation publicly available to explain how it works, but what’s known is that the drive always verifies this area before reading the outer zone.
The speed of the reader is 12x, which is not too shabby compared to Saturn’s 2x CD reader. Nevertheless, it’s worth mentioning that the new reader operates at Constant-Angular-Velocity (CAV), as opposed to Constant Linear Velocity (CLV). This means that, with little effort, data access gets faster on the outer edge, which is coincidentally where the game data resides.
The bonus format
The Dreamcast also debuted another disc format: the Music Interactive Live-CD (MIL-CD); this was another creation of Sega that merely extended the standard Audio CD with interactive programs [33].
Whereas conventional CD players would only find audio tracks on a MIL-CD, the Dreamcast was able to ‘enhance’ the experience by displaying video, lyrics, and interactive menus. I’m guessing karaoke was its primary application.
In any case, the format didn’t attract enough attention. That is, until piracy groups found another use for it… The story continues in the ‘Anti-Piracy & Homebrew’ section.
The ambitious online platform
Sega had been a trailblazer in dial-up services since the Mega Drive/Genesis era, initially through separate modem accessories and games that could take advantage of online content; but as the hardware improved, new types of services could now be offered on the net. It’s worth noting that the late 90s coincided with the end of the walled-garden era, as the once-isolated servers connected over the telephone line gradually opened up to an emerging web of interconnected networks known as the ‘Internet’.
For the Dreamcast launch, Sega pre-equipped the console with a 33.6 kbit/s modem module (or a 56 kbit/s variant in America!), paving the way for users to subscribe to an Internet Service Provider (ISP) for enhanced gaming. In there, the Dreamcast could find:
- Web browsing, chat rooms, and email.
- Online multiplayer (dependent on dedicated servers maintained by game studios).
- Downloadable content (stored on the VMU, the console’s ‘memory card’).
However, the implementation and deployment of this functionality were highly decentralised and chaotic: Sega relied on local ISPs to supply the infrastructure and services, resulting in turbulent changes throughout the console’s lifespan. To give you an idea of the panorama:
- In North America, users could choose their ISP. Later, SegaNet appeared as a Sega-branded ISP, offering a single subscription package (with bonus content) for a monthly fee [34].
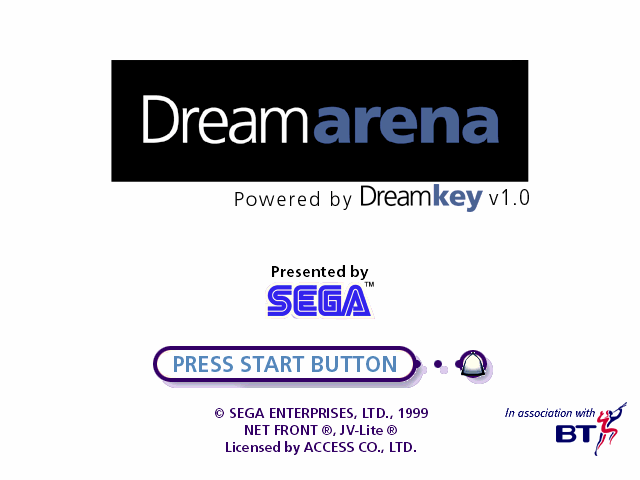
- In Europe, the console was hardcoded to a regional ISP, but enjoyed a common service called Dreamarena [35]. This was rolled out in phases with significant delays. Users in the UK paid only the cost of the call, whereas the price varied across the continent.
- Japan, like North America, allowed users to input a custom ISP, which would then connect to Dricas for services [36].
Players signed up to their local service using regional registration discs, such as DreamKey (for Europe) or Dream Passport (for Japan). These were often bundled with games and provided a tailored web browser (e.g. NetFront for Europe/Japan, PlanetWeb for the US) designed to register an account and browse the web. Later revisions of DreamKey finally allowed users to customise the ISP settings.
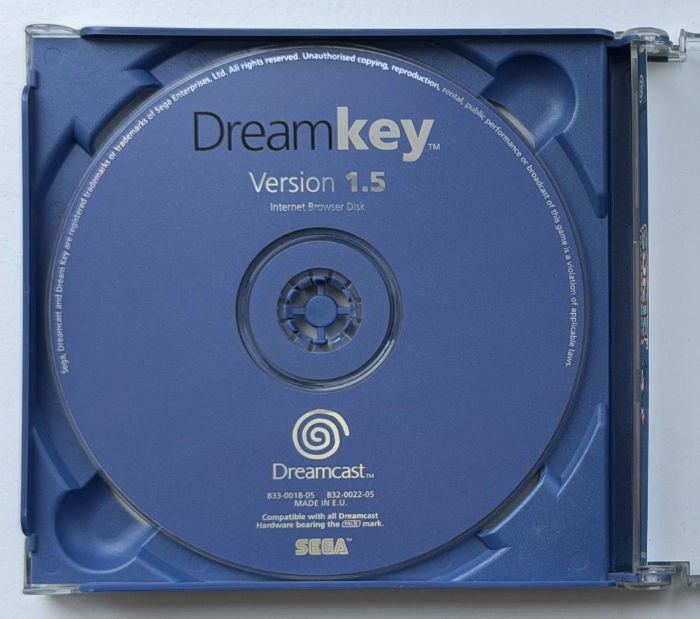
Over time, however, players around the world found out that the advertised functionality (like online gaming) was not yet available or unreliable, prompting an unfortunate mention on the BBC program Watchdog [37]. In extreme cases, like Australia and New Zealand, the delay in the ISPs’ implementation impacted the release date of the console.
To improve customer satisfaction, Sega later shipped a Dreamcast-branded keyboard and mouse [38], in case users fancied surfing the net PC-style.
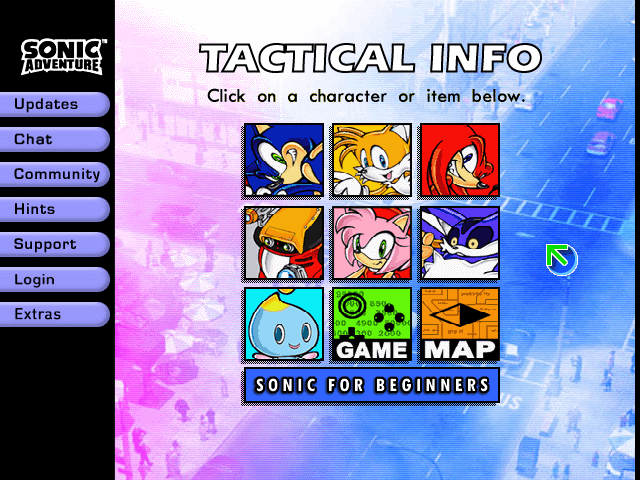

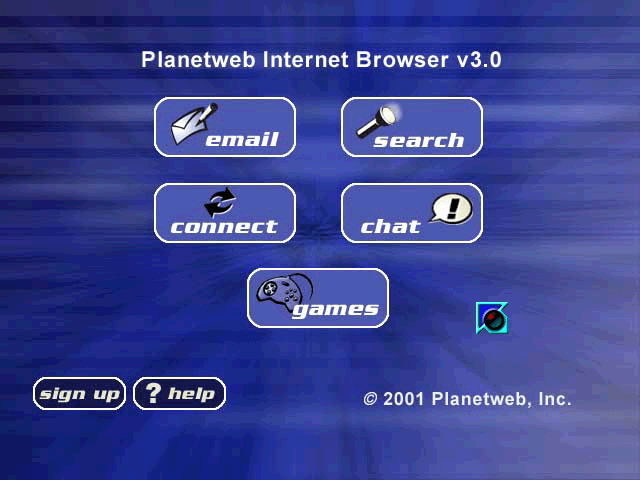
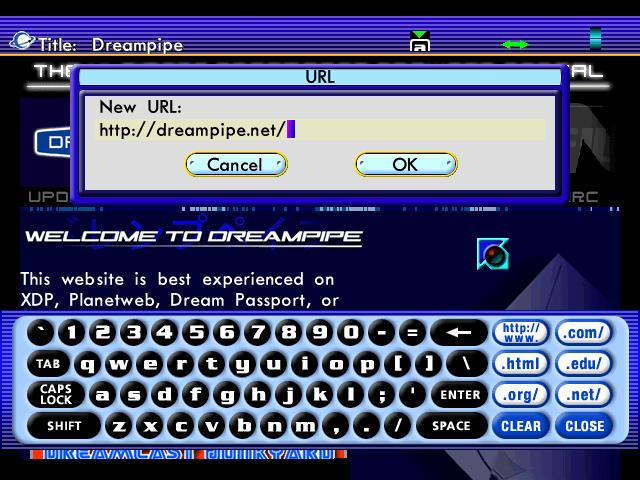
Whilst ambitious, the service reflected Sega’s hopes of leading the fast-growing online gaming market. Ultimately, however, these offerings once again failed to convince enough users, and SegaNet and Dreamarena were discontinued two years after launch. The dedicated multiplayer servers slowly faded over the coming years, and with them, all online functionality bundled in games ceased to work.
A thriving restoration community
You may be interested to know that the present day paints a different attitude towards Sega’s original venture. In recent years, an enthusiastic group has taken it upon itself to re-implement the defunct services, culminating in the following projects that have managed to restore most - if not all - of the original online experience:
- DreamPi, by Luke Benstead (a.k.a. Kazade), is a Raspberry Pi SD-card image housing software that recreates the physical layer of the Dreamcast-to-ISP connection [39]. The console connects to the Raspberry Pi, which then acts as a bridge to the modern internet. This setup requires a USB modem adaptor with extra circuitry to replicate the Plain Old Telephone Service (POTS) protocol - that is, to simulate the behaviour of the analogue voice telephone line.
- This suite also includes Dreamcast Now, allowing players to advertise their online presence on a website of the same name.
- Dreampipe by Dan and Jial, hosts the original web portals used by games, including their downloadable content.
- DCNet, by flyinghead, provides a centralised set of community servers that restores online multiplayer functions [40].
- Communities such as SEGA Online, Dreamcast-Talk, and The Dreamcast Junkyard host guides and forums, while Dreamcast Live also publishes leaderboards, curated list of community servers, and patched games that can access said servers.
The interactive Memory Card
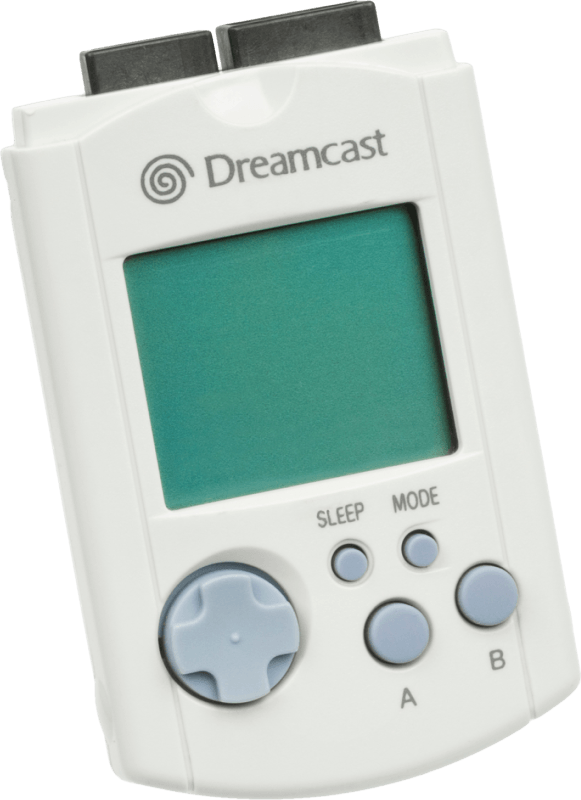
Another innovative feature of the Dreamcast is the Visual Memory Unit (VMU), a small gadget that attaches to the controller and, aside from serving as a memory card, is a fully fledged system that houses [42]:
- A Sanyo LC86K87: An 8-bit low-power CPU.
- A 48 x 32 monochrome LCD with four additional icons: Commanded using 196 B of eXternal RAM (XRAM) as a frame-buffer.
- Two serial connectors: One for each direction (input and output).
- Six physical buttons: Used to interact with the VMU when it’s detached from the controller.
- A 16 KB Mask-ROM: Stores a dedicated BIOS-IPL.
- 64 KB of Flash: Split between 32 KB for storing a single program (uploaded from the console) and 32 KB for keeping save data (acting as a memory card).
- 512 B of RAM: 256 B is reserved for the system, leaving the remaining 256 B to the program.
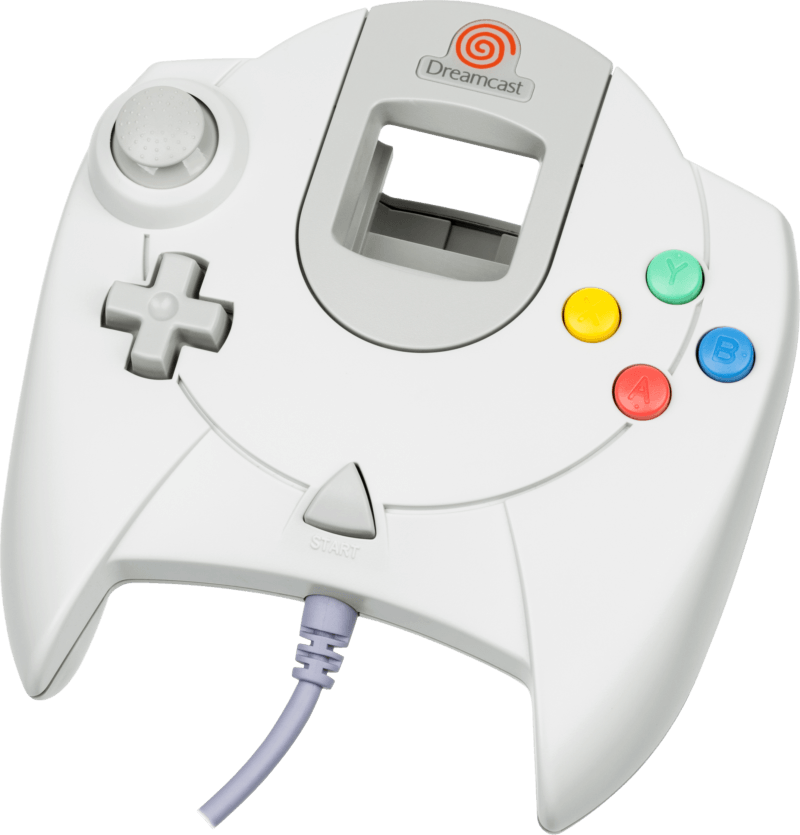
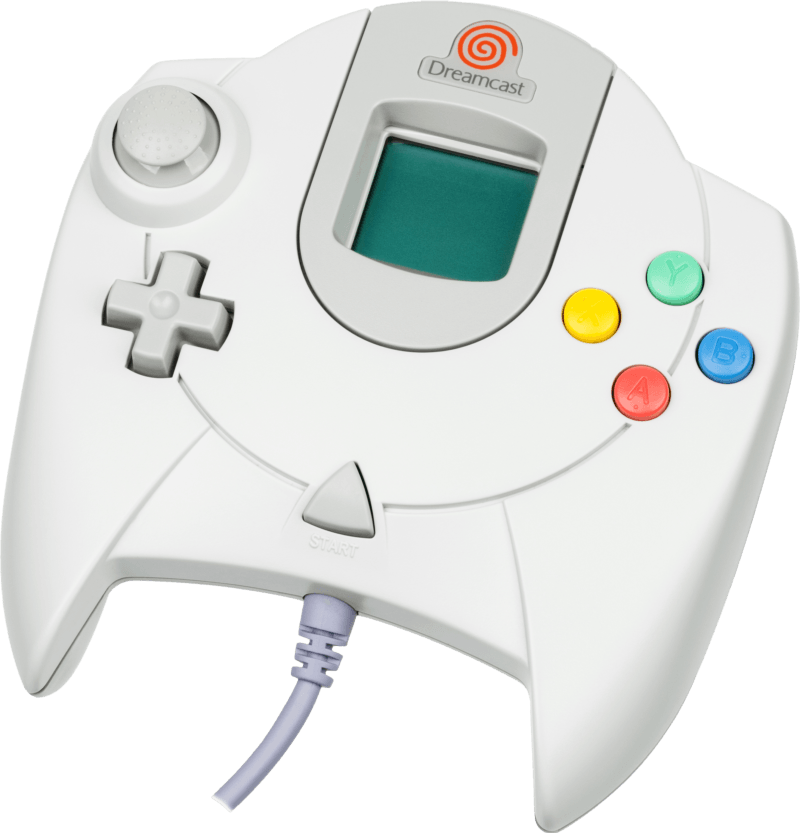
The VMU has two modes of operation:
- Attached to the controller: The official controller has two slots for connecting VMUs and other accessories of the same form factor. If the VMU is inserted on the first slot (visible from the front of the controller), it can display drawings during gameplay. Moreover, the Dreamcast can store saves and upload a program on the VMU.
- Detached from the controller: The gadget becomes a Tamagotchi-like handheld with a clock and save manager, and can also run whatever program the Dreamcast previously transferred. If that wasn’t enough, two VMUs can be connected to share content as well.
Anti-Piracy & Homebrew
At first glance, the adoption of the proprietary GD-ROM format was a strong deterrent to the production of unauthorised copies and their use on non-Dreamcast hardware. Games are also region-locked, meaning that the console refuses to run a game intended for a different geographical region.
Thus, attention turns towards MIL-CDs: as they rely on the standard CD medium, they become a potential (and affordable) attack vector for executing third-party code on the console. To mitigate this, Sega included another layer of protection: it required MIL-CD executables (1ST_READ.BIN) to be obfuscated using a simple block permutation algorithm [45]. The BIOS then applies the inverse algorithm to reconstruct the executable in memory. Overall, this system didn’t make use of a secret key, and only Sega knew the implementation of this algorithm, meaning its defence relied entirely on obscurity.
Additionally, after the BIOS descrambles the executable in memory, it locks the disc drive, requiring the MIL-CD application to manually reinitialise the drive [46]. This is an extra layer meant to prevent a somehow-pirated GD-ROM game from executing immediately afterwards.
The painful defeat
As you may already know, security is only as strong as the weakest link. GD-ROMs were very secure by design, but MIL-CDs were not (hence Sega adding layers on top). Unfortunately for the company, relying on the secrecy of the MIL-CD algorithm proved to be a fatal flaw that compromised the entire security model.
At the start of 2000, independent distributors such as Datel and Bleem! released unauthorised Dreamcast software that booted as MIL-CDs [47]. While they didn’t reveal how this was achieved, the same year saw major breakthroughs:
- Homebrew developer Marcus Comstedt reverse-engineered and documented the algorithm that scrambled MIL-CD executables [48].
- Undocumented methods were employed to extract the contents of GD-ROMs, presumably using development hardware and/or modified readers.
- The hacking group Utopia replicated the logic behind Datel’s Action Replay to construct a CD bootstrapper that unlocked the drive before executing a MIL-CD program [49].
The combination of these discoveries soon led to an influx of unauthorised software (e.g. independent games, cheat loaders, movie players, emulators, etc.) disguised as MIL-CDs to bypass Sega’s protection. Alongside this, a surge in third-party development tools (e.g. libronin and libdream/KallistiOS) allowed homebrew development to thrive.
On the other side of the coin, piracy groups were now able to extract the contents of GD-ROMs and repackage them as bootable MIL-CDs. These also took advantage of IP.BIN‘s space for initialisation code to embed a 1ST_READ.BIN unscrabler routine and a disc reader unlocker [50], allowing games to boot without modifying their executables. Overall, this caused an unstoppable wave of ’game rips’ to be released on the net.
Game piracy was not without further challenges, nonetheless. Although GD-ROMs can store around a gigabyte of data, CD-ROMs can fit only around 700 MB. So, how could ‘rippers’ shrink larger games to fit on a CD? Well, by recompressing music and graphics assets until they fit. Some games were even split across multiple discs. After all, game data is no longer stored as a single blob (unlike on an old cartridge), but is instead organised hierarchically into files and directories.
Two years after the Dreamcast’s release, Sega began shipping consoles with a revised BIOS that patched the previous tricks by removing support for MIL-CD altogether [51]. However, the change came too late to undo the damage.
A lesson for the future
I find it educational to point out that the Dreamcast’s security missteps had already been predicted by 19th-century cryptographers such as Auguste Kerckhoffs, who stipulated that, for a cryptographic system to survive, one cannot rely on keeping the algorithm secret. Instead, an additional factor (i.e. a secret key) must be added. This explains why later competitors adopted key-based cryptographic systems instead.
That’s all folks
I hope you enjoyed reading the article. I finished writing it at the start of my final year at uni.
I’ll probably be very busy from now on, but I do enjoy writing these articles so hopefully you’ll get the next one in a few weeks!
Until next time!
Rodrigo


