Supporting imagery
Model
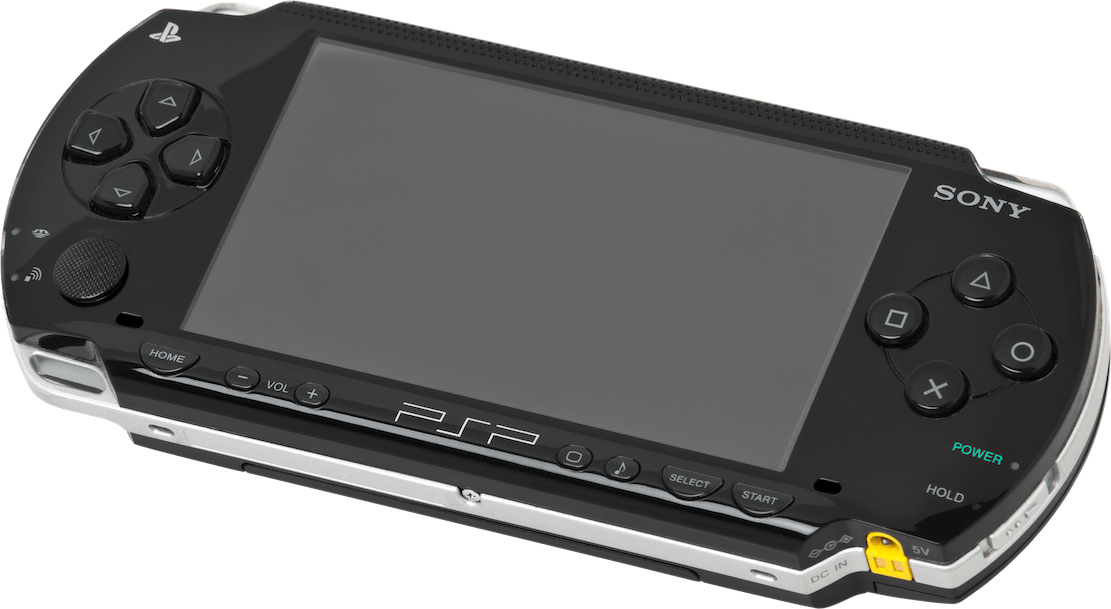
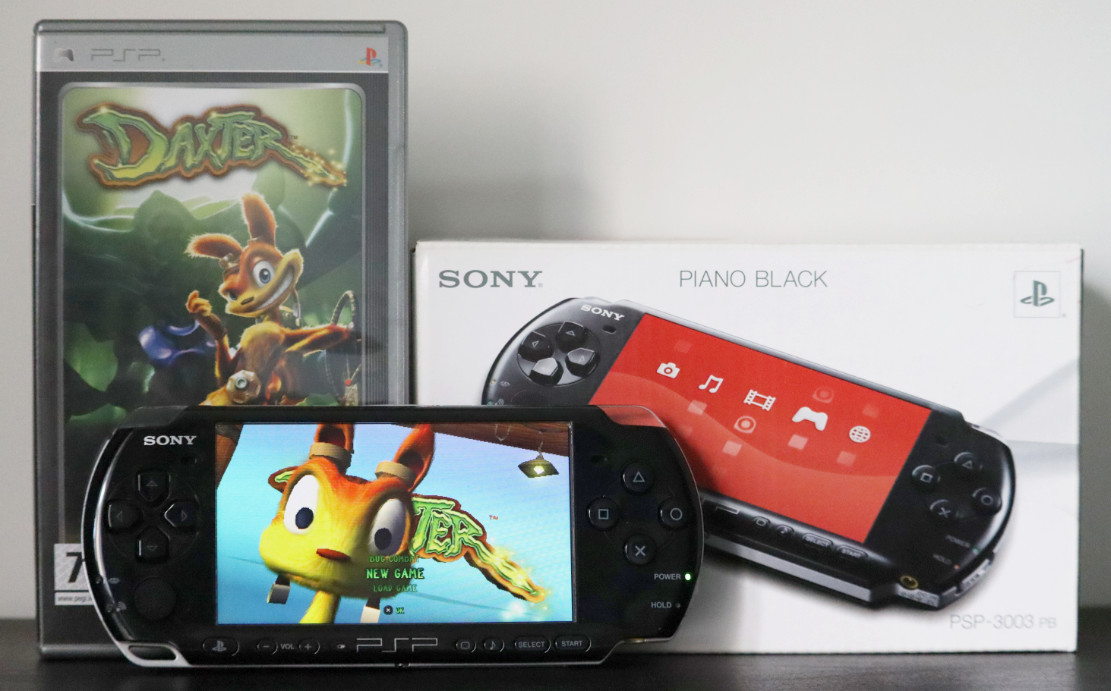
Released on 12/12/2004 in Japan, 24/03/2005 in America and 01/09/2005 in Europe
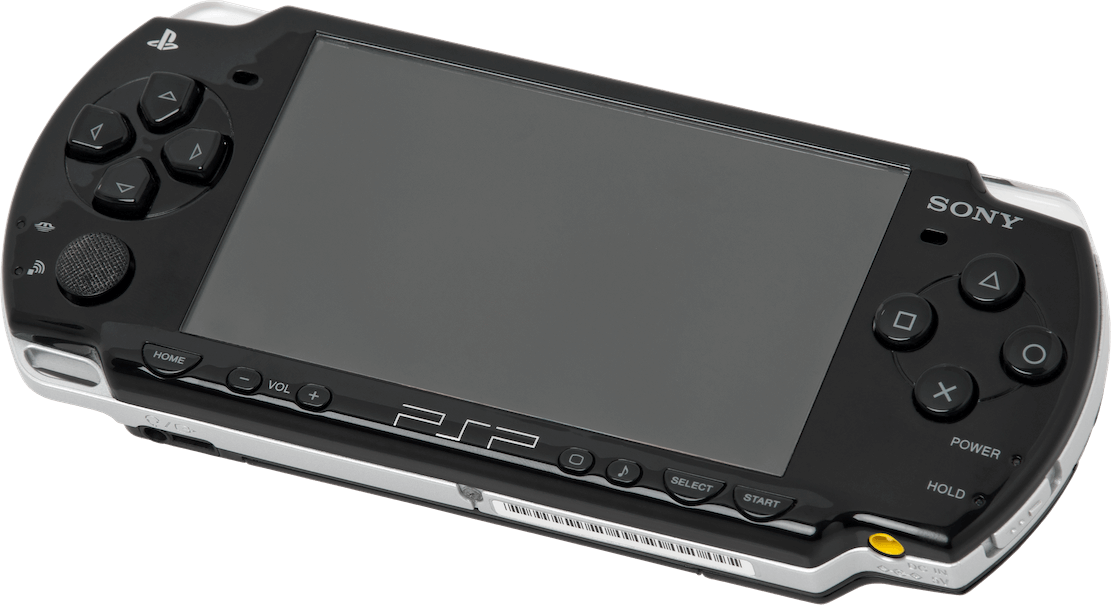
Released on 05/09/2007 in Europe, 06/09/2007 in America and 20/09/2007 in Japan
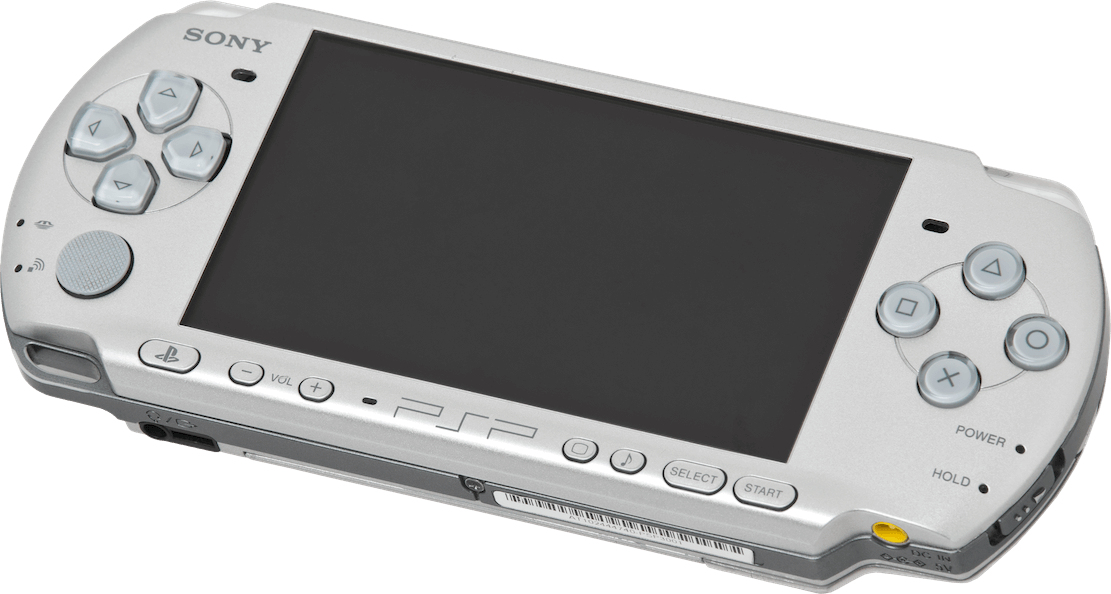
Released on 14/10/2008 in America, 16/10/2008 in Japan and 17/10/2008 in Europe

Released on 01/10/2009 in America and Europe, and on 01/11/2009 in Japan
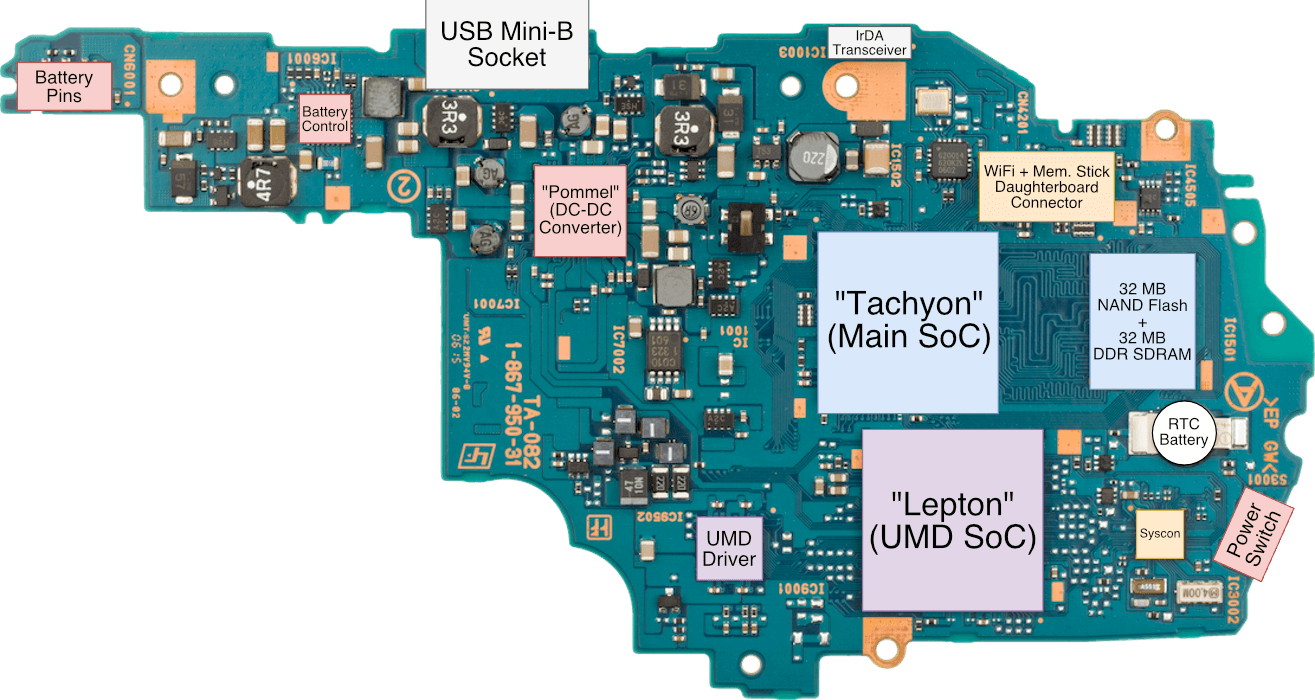
Motherboard
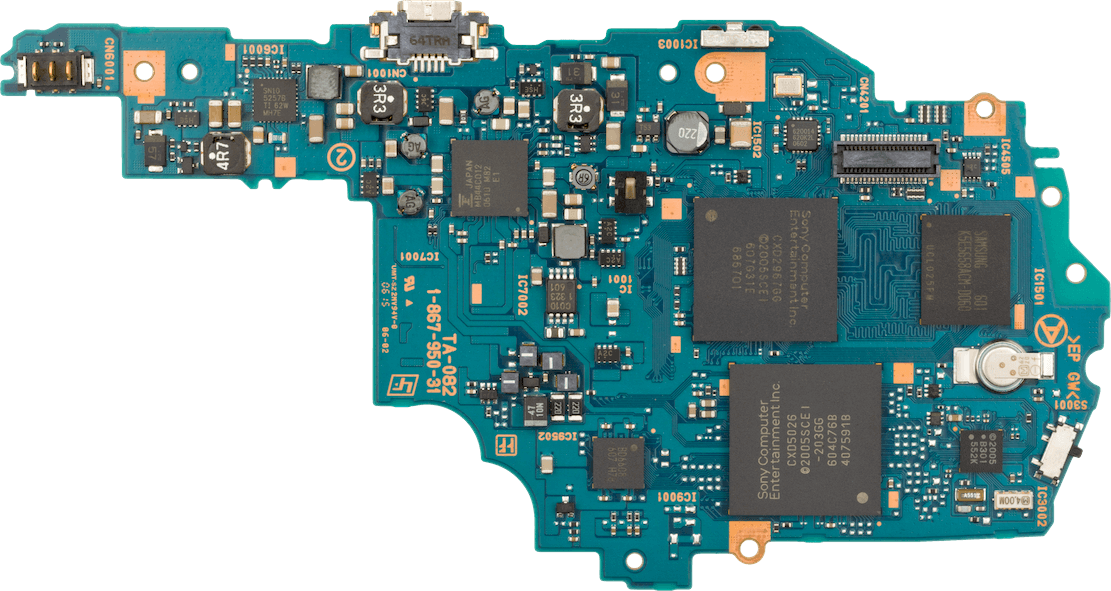
Such a tiny board... but you can do so much with it.
Those zigzags you see between the CPU and memory attempt to correct the length of each bus so all of the signals arrive at the same time. This tells you how fast technology has become!
After the 'Slim' model, Tachyon and 'NAND + SDRAM' became one.
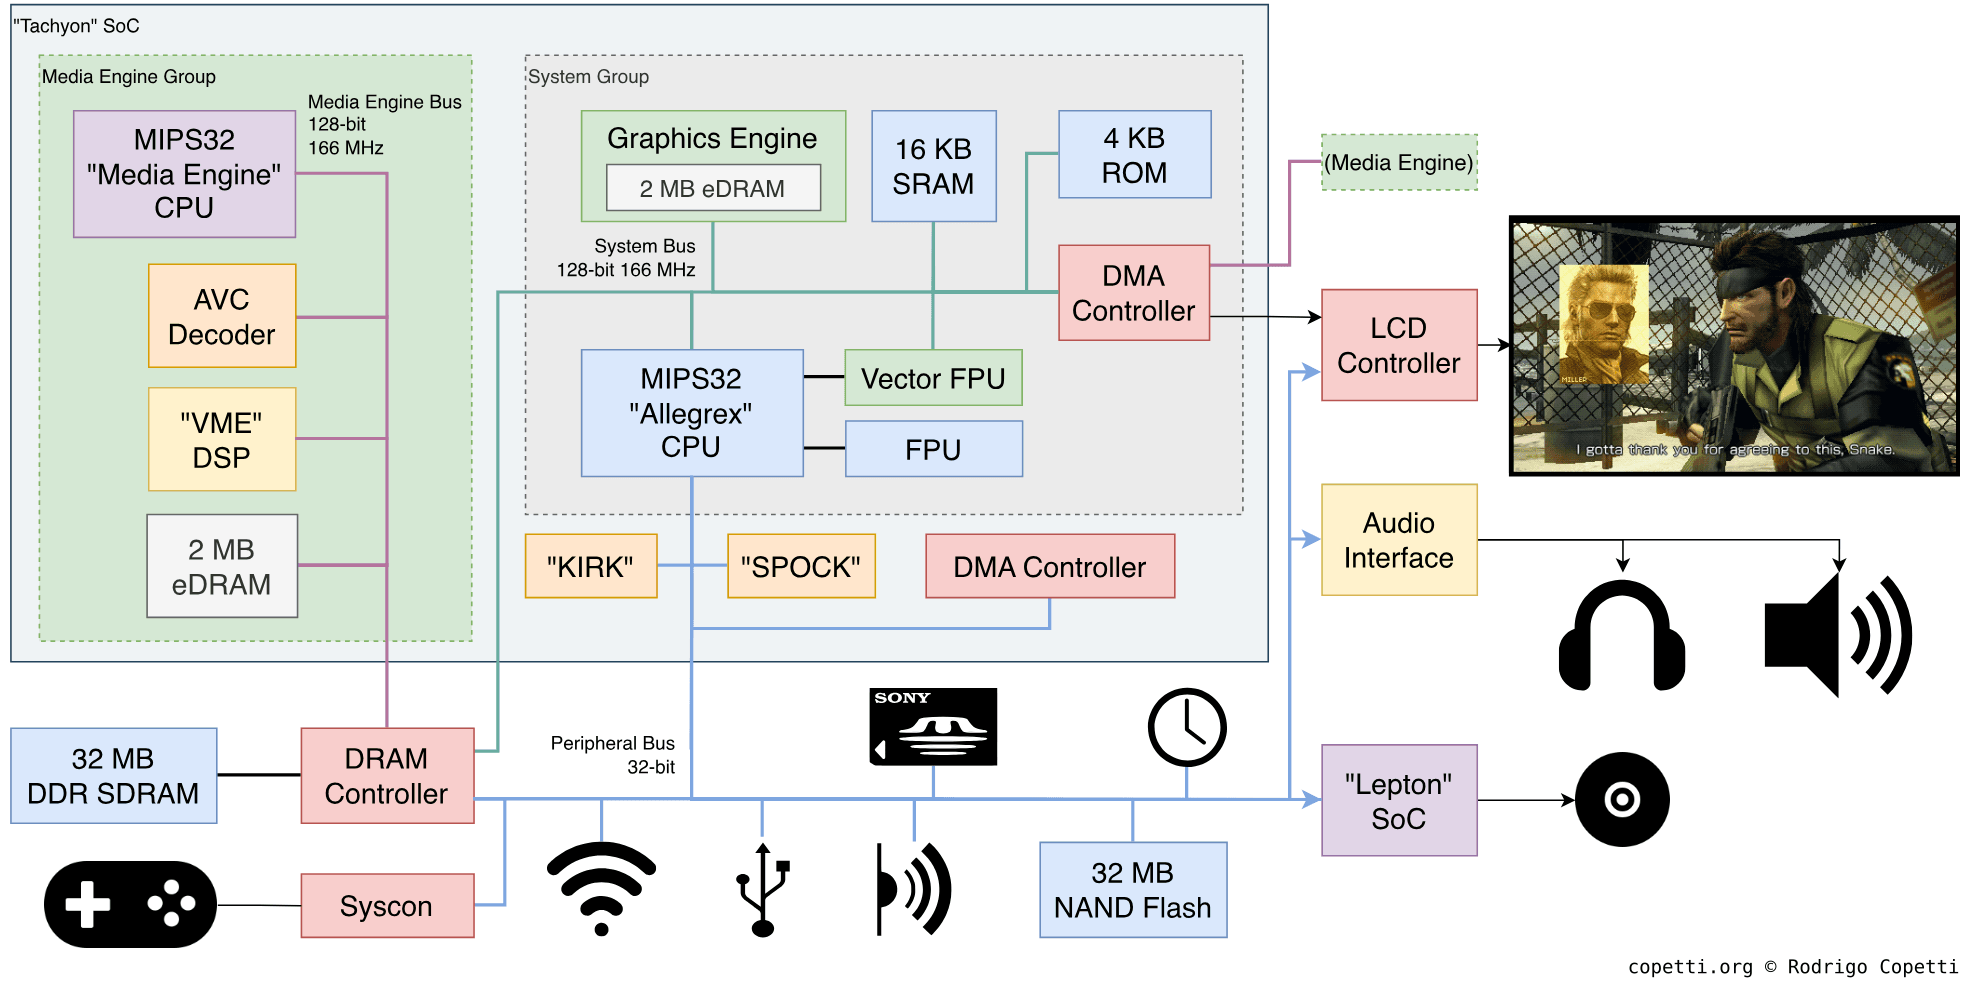
Diagram
After the 'Slim' model, NAND and SDRAM size were doubled (to 64 MB each)
A quick introduction
Released just one month after the Nintendo DS, Sony’s handheld debut proved that ‘horizontal innovation’ is not the only way to succeed in the portable console market.
This article is dedicated to anyone who wants to understand, straight to the point, how the PSP operates. It’s not a short write-up, but I hope that by the end of the article, you will be able to grasp the building blocks of this console: its design rationale, choice of CPUs, GPU pipeline, security system, and so forth.
Main CPU
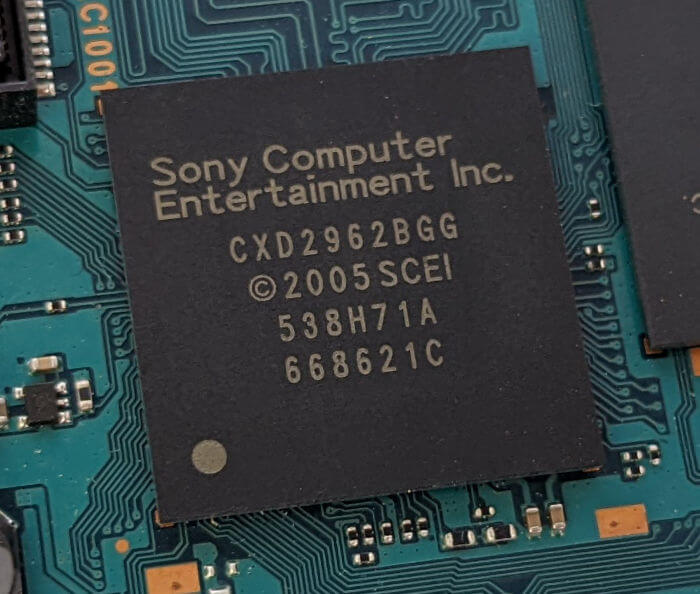
Similarly to Nintendo, Sony built an extremely packed System on a Chip (SoC) that houses most of the components we are going to discuss throughout this article. This includes the main CPU in charge of executing games and other programs (unlike the other CPUs, which we’ll talk about in due time). The SoC is called Tachyon, a name chosen by Sony themselves.
The main CPU is an in-house design that keeps up with the tradition of using MIPS technology. Be as it may, it’s been four years since the release of the PlayStation 2, I wonder what’s the state of MIPS since then?
MIPS after the turn of the century
I’m afraid the golden years of MIPS were left in the 90s, and there aren’t any indicators that these will repeat anytime soon. Its parent company, SGI, lost dominance against affordable x86 workstations and was running out of cash. So, in 1999, it sold its majority stake in MIPS [1]. With this, MIPS became an independent company once again; however, the competition was fiercer than in the early days.
The company’s first decision was to acknowledge that MIPS CPUs couldn’t compute in the high-performance arena anymore. So, they shifted their focus to low-power computing, running head-to-head against ARM and its unprecedented popularity.
Consequently, MIPS revisited its fragmented CPU line and consolidated it with three instruction sets [2]:
- MIPS32: An update of MIPS II (the last 32-bit-only ISA) bringing functionality gathered from later architectures while keeping the 32-bit boundary.
- MIPS64: The continuation of MIPS V, a 64-bit ISA and the last one before the revamp. The MIPS V has been a superset of all previous ISAs, just like its predecessors.
- microMIPS: Available as ‘microMIPS32’ and ‘microMIPS64’, these are supersets of the MIPS32 and MIPS64, respectively, with an additional group of 16-bit instructions (à la Thumb). microMIPS is not binary compatible with the other ISAs, however, so it required re-compilation of legacy codebases to run on microMIPS.
The big difference was that these would now be developed in conjunction, as opposed to MIPS dropping the previous architecture as soon as the next one arrived. New revisions would be denoted with the ‘Release x’ suffix, such as ‘MIPS32 Release 6’ or ‘MIPS32R6’, which is the last revision to date.
Along with the ISAs, MIPS also started selling a new line of IP cores. For instance, the MIPS32 4k design implemented the MIPS32 R2 ISA, it came in different variants and offered plenty of customisations.
Back on topic, Sony presumably acquired a license of the MIPS32 4k and customised it by extending the ISA and bundling particular co-processors [3]. The result is called Allegrex and runs at a variable speed, from 33 MHz to 333 MHz.
The new portable CPU
Allegrex is a complete 32-bit core offering [4] [5]:
- A custom MIPS ISA: mixes MIPS32R2 instructions with exclusive ones for arithmetic operations (multiplication, subtraction, min/max, bit-shifts) and interrupt control. These are called ‘Allegrex Extended Instructions’.
- A 32-bit address bus: this means that up to 4 GB of memory can be seen by this CPU.
- 32 general-purpose registers: all of them store 32-bit values; and two (the zero register and link register) are reserved for special uses. By now, this should come as no surprise.
- A 7-stage pipeline: one more stage than its home sibling.
- 32 KB of L1 Cache: of which 16 KB is for instructions and 16 KB for data.
- A cache write-back buffer: the CPU can write over the cache and assume RAM has been updated as well. Meanwhile, the cache takes care of updating memory as soon as its internal buffer is full.
- This design speeds up memory stores, but doesn’t work right away with multi-processor systems like this console [6]. So, developers had to manually evict the buffer when other components depended on the new values in memory.
Overall, this looks more competitive than the ARM9-based competition, but it’s not over yet, as we still need to check the co-processors cooperating next to the core.
Coprocessors
As with any MIPS CPU, Allegrex has three coprocessor slots. Sony added three [7]:
- The System Control Coprocessor as ‘CP0’: a necessary building block of any MIPS CPU. This particular component is what enables memory protection, cache coherency and interrupt control in the core itself [8].
- A Floating Point Unit (FPU) as ‘CP1’: accelerates arithmetic operations with 32-bit decimal numbers (following the IEEE 754 standard). It has thirty-two 32-bit registers and an independent 8-stage pipeline, thereby adding more parallelism to the main CPU.
- A Vector Floating Point Unit (VFPU) as ‘CP2’: a coprocessor designed for vector operations, similar to a traditional SIMD processor. Compared to the FPU, it instead provides 128 32-bit registers, relies on a proprietary instruction set, and implements a variable-length pipeline. The VFPU operates up to 32-bit floating-point values, which can be grouped into a 4-component vector or even a 4x4 matrix. This is useful for computing different kinds of geometric operations without requiring to rearrange the data.
- Its efficiency comes from its 128-bit data bus connected to the rest of the system, offloading the main CPU’s transit.
- Unlike the FPU, some behaviour of the VFPU deviates from the IEEE-754 standard.
In conclusion, Allegrex is incredibly fast. However, we still don’t know what you can do with it. After all, you can imagine this CPU as the conductor of an orchestra, and we haven’t checked out the performers yet.
A focused memory management
Let me talk for a moment about the memory system implemented in this system. Among other things, the System Control Coprocessor provides the functionality of a Memory Protection Unit or ‘MPU’ (not to be confused with an ‘MMU’), which maps the physical hardware onto the CPU’s memory space with some special quirks in between. Even though its modus operandi can be seen as a bit primitive at first, we’ll see why it’s optimal for the needs of this console.
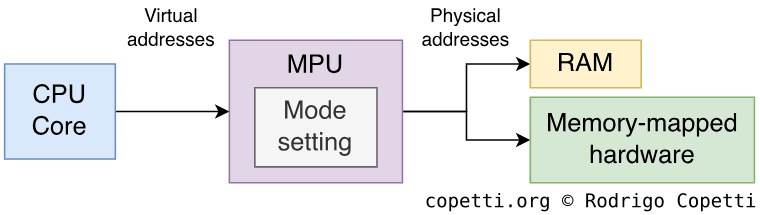
A traditional Memory Management Unit or ‘MMU’ takes care of the CPU’s access to the components surrounding it. This implies that all the address lines of the CPU will be connected to the MMU; only the latter is connected to the rest of the system.
This is particularly advantageous for features like ‘virtual memory’ and ‘memory protection’. Well, to achieve virtual memory, an MMU must bundle a component called ‘Translation Lookaside Buffer’ (TLB) to prevent performance degradation. Now, Allegrex’s MMU lacks a TLB [9], so it focuses on memory protection. This is why Allegrex’s MMU is instead called an MPU (Memory Protection Unit). An MPU is a cut-down version of an MMU without virtual memory. In any case, memory protection gives the system the power to decide which memory locations a program can access.
Thanks to this, Allegrex won’t have to deal with userland programs (e.g. games) accessing restricted locations (e.g. encryption keys). To enforce this restriction, memory addresses are grouped into five segments with different privilege levels. Furthermore, Allegrex’s MPU contains three modes of operation: User mode, Supervisor mode and Kernel mode.
If a casual process (operating in user mode) wants to access a memory address found in a privileged location, the MPU will ask the operating system (through the use of ‘exceptions’) whether to grant permission to this process.
All in all, this allows Sony, the developer of the operating system, to implement a security system enforced by hardware.
Memory available
So far, we’ve analysed the PSP’s main CPU and its accelerators. Now let’s see the physical memory available in this system.
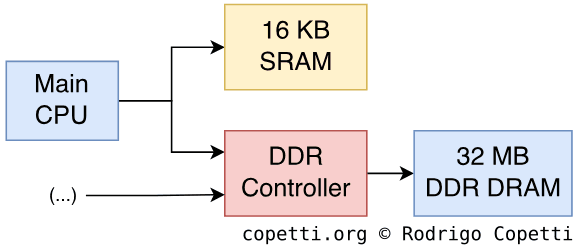
The PSP comes with two memory blocks accessible from the CPU [10]:
- 16 KB of SRAM: this is what we called Scratchpad in previous articles. It’s small but very fast RAM, so it’s up to developers to make proper use of it, although unofficial documents have called it ‘useless’ [11].
- 32 MB of DDR SDRAM: a significant larger amount at a lower access rate. We’ll refer to it as ‘main memory’ across the article.
- The ‘DDR’ initials mean ‘Double Data Rate’, which denotes an evolution from the traditional ‘SDRAM’, now featuring a faster transfer protocol. The original Xbox used the same type.
Bus design
You’ll soon find that the PSP accommodates lots of components with unique functionality. So, to organise them without repeating previous mistakes, Sony’s engineers interconnected them using dedicated buses. Thus, only small groups of components, with similar applications, share the same bus. Those buses talk to each other using dedicated arbiters (in the form of ‘memory controllers’ or Direct Memory Access (DMA)).
All of the buses found in Tachyon implement a well-known design called Advanced High-performance Bus (AHB), a solution built by ARM to tackle congestion on their chips and SoCs. If you are curious, AHB was also adopted on the Wii.
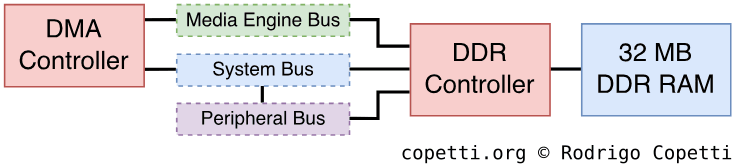
Using the principles above, the following buses were constructed for the PSP [12]:
- The System Bus: connects the CPU, scratchpad and GPU. It’s 128 bits wide.
- The Media Engine bus: connects another group of components (explained in the next section). It has the same properties as the System Bus.
- The Peripheral Bus: connects I/O and storage-related components. It’s 32 bits wide.
All three buses connect to the DDR controller, which is where the main RAM is found.
Tackling traffic congestion
Inside each bus, there will be multiple components working independently. They will store processed data in a shared space (such as the main RAM). Now, we don’t want the CPU to intervene whenever a module needs to read or write from memory. Traditionally, a DMA unit was placed on the bus to provide this facility, but a single DMA can only do so much. The PSP contains a significant number of components, and this will eventually lead to bottlenecks.
The solution is very simple: bus mastering. In a nutshell, each component will get its own DMA controller. This gives them the ability to become the ‘bus master’ and take control of the bus to access whatever location they want. To avoid contention (multiple ‘bus masters’ at the same time), the neighbouring components will acknowledge this event and wait until the operation completes.
The end of the line
The RISC revolution produced countless CPU designs throughout the 80s and 90s, but only a handful endured beyond the turn of the century. Just like I concluded my analysis of the SuperH in the Dreamcast article, the PlayStation Portable will be my last article of this series to feature a MIPS CPU.
After many turnarounds, what’s left of MIPS is now a company designing RISC-V CPUs. In all fairness, this is an interesting strategy that provides the company with greater leverage to compete against ARM.
Looking back at my analyses, however, it’s hard to comprehend how such a talented company could have lost its market share. Admittedly, in the workstation market, it became clear that Intel’s x86, no matter the amount of criticism, won by making equipment affordable (thanks to its Pentium line, along with the ‘clones’) and attractive due to its (Windows-only) compatible software. Finally, the P6 architecture provided Intel with the scalability initially only enjoyed by RISC designs.

In the case of low-power computing, it was harder for me to understand the retreat, as MIPS and ARM shared similar business models based on IP licensing. Luckily, a previous interview conducted by the Computer History Museum in 2011 raised the same question, resulting in this answer:
We made a mistake, we didn’t realise how important the cellphone market was. Early there was no money to be made (…) but ARM got it by investing in it. It was a very smart move and it turned out to be an incredible leverage point. We just looked at the gross margin and said “that’s not a great return! we’d be better off putting our attention elsewhere” but of course, it turned out cell phones became smartphones [and then] became a gigantic. [14]
– John Hennessy, co-founder of MIPS Computer Systems
Nevertheless, when it comes to this topic, I believe that, while we are unlikely to see a new MIPS CPU, we will see its former engineers carry MIPS’ distinctive technologies into new projects.
That being said, let’s continue with the PSP analysis.
Multimedia CPU
Up to this point, we’ve discussed the main CPU and the buses inside Tachyon, but there are still many features to be found in the SoC. In particular, there’s another block of modules designed for a specific application: multimedia. This group specialises in audio and image processing, including the combination of both (video processing), and it operates without consuming bandwidth from the main CPU bus (the ‘system group’).

This new block is called Media Engine group and it’s composed of the following components:
- A second Allegrex CPU serving as the ‘controller’ of the Media Engine group. This is the same CPU found in the system group, but without the vector coprocessor [15]. The controller is responsible for receiving orders from the main CPU and managing the rest of the multimedia hardware that will work concurrently.
- 2 MB of embedded DRAM (eDRAM): multimedia encoding and/or decoding consumes a considerable amount of bandwidth, so to avoid stalling the other components, the Media Engine contains dedicated memory to process the data ‘in-house’ and publish the results when necessary.
- ‘eDRAM’ is the same as DRAM but manufactured inside another chip.
- An MPEG-AVC decoder: a hardware decoder that does only one thing, and fast. That is, swallow an H.264 video stream [16] and spit out data that the audio and graphics endpoint understand.
- A Virtual Mobile Engine or ‘VME’: this is some sort of programmable Digital Signal Processor (DSP). The controller programs it and then begins feeding in the data. Afterwards, like the AVC, the VME stores the processed chunk in local memory.
- This is a very obscure component; only Sony seems to know the ins and outs of it (including how to program it). To this day, it’s still a mystery.
- Based on unofficial reports, the VME seems to have local memory and a DMA controller. It’s also known as the ‘Dynamic Reconfigurable Engine’ [17].
Needless to say, the Media Engine is not directly operable from the developer’s side (Sony hides all of it through a thick API). The operating system provides frameworks like ‘libmpeg’ or ‘libmp3’ that already implement complete applications optimised for this engine [18].
Graphics
To begin with, let’s go over the physical screen of this console, which is where the user can appreciate everything that will be discussed in this section.
Display
The PSP carries a 4.3” TFT LCD screen. It has a resolution of 480x272 pixels (for reference, that’s ~2.6 times the pixels of one screen of the Nintendo DS) and can display up to 16,777,216 colours. Thus, it’s got a 24-bit colour depth (the so-called ‘true color’ scale).

The aspect ratio is almost 16:9, a format that was increasingly becoming standard on home televisions at the time. Notice that a wider range of view is also an opportunity for game designers to enhance the experience (especially in the first-person shooter genre).
Introducing the Graphics Engine
Now it’s time to talk about the component in charge of producing pixels, the Graphics Engine (GE). The engine sits within the ‘system group’, making it effectively a ‘group within a group’.

The GE draws 3D graphics (polygons) with many features applied (e.g. texture mapping, lighting, and so much more), which you’ll see in a bit.
Architecture of the Graphics Engine
The GE subsystem has lots of interesting quirks to mention, so this will be a very complex section. But fear not! I’ll try to go step-by-step to avoid any confusion.
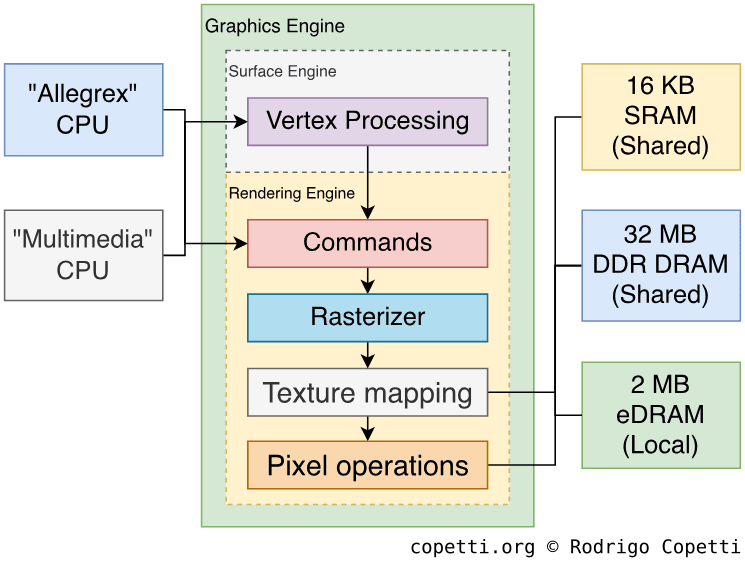
First things first, the GE is made of three components [19]:
- The graphics core: where the actual graphics functionality happens.
- The eDRAM controller: mediates access between eDRAM memory and the core.
- The bus matrix: works as a ‘bus arbiter’ between the System Bus and the internals of the GE (remember the GE is found within the system group).
- In reality, this component is a mesh of wires with some logic, but for the sake of explaining, it’s simpler to mask with a black box.
The reason for this design is that both main CPU and the graphics core can access those 2 MB of eDRAM. So, to prevent congestion, the traffic inside the GE goes through another Advanced High-performance Bus called local bus (‘local’ from the perspective of the GE). This allows the graphics core to perform its functions without depending on the System Bus to move data around (and consequently stalling the rest of the system).
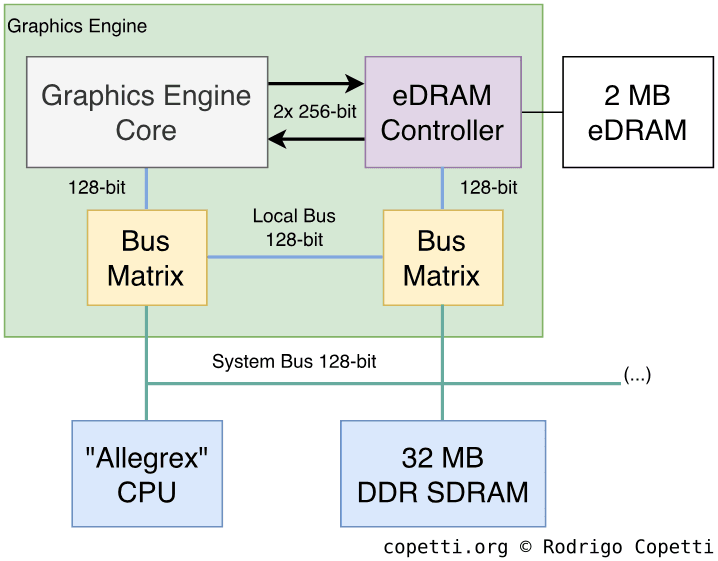
The local bus is as wide as the System Bus (128 bits), but if that wasn’t enough, the graphics core has a direct line to eDRAM using a 512-bit bus (made of two unidirectional 256-bit buses). You’ll see why it’s needed in the following section.
What about how the CPU and GE communicate with each other? As I said before, both CPU and graphics core can read from eDRAM. Additionally, the graphics core can access the System Bus to fetch data from any other component (including the main RAM). So, all of that just doesn’t happen magically.
In a nutshell, two bus matrix blocks rewire the connection between the local bus and the System Bus. Whenever there’s a component that wants to access an ‘alien’ bus, the bus matrices configure the communication so that one unit becomes master of the two buses and no other overlaps; this persists until the designated unit finishes transferring memory.
This behaviour reminds me of the commonly known technique called bus mastering, where the leading component is the ‘bus master’ and has complete control of the bus, and the rest are ‘slaves’ waiting for commands. However, I’m not sure which protocol or standard Sony’s engineers were trying to replicate. Based on my understanding, I think it may be somewhat similar to I²C, a protocol used for serial communications (particularly useful with embedded systems) that also performs bus mastering.
Organising the content
Now that we’ve seen what components we’ve got and how they interact with each other, let’s find out what information related to graphics we can place in memory.
There are three memory locations from which the GE will end up pulling or filling:
- 2 MB eDRAM: the aforementioned eDRAM. It’s used to store the frame-buffer, z-buffer and texture buffer. Its contents are directly written by the GE. This memory space is also called ‘local memory’.
- The CPU can access this memory if needed, although its speed is not ideal.
- 32 MB DDR SDRAM: this is the working area of the CPU for building display lists, vertex data, texture data and CLUTs (Colour lookup tables). In the context of graphics, this block is called ‘host memory’.
- 16 KB SRAM: the scratchpad memory is also accessible by both CPU and GE.
Functionality
Like its home sibling, the PSP’s graphics system focuses on rasterisation. However, the PSP’s VRAM is half the size of the PS2’s, and its bus is not as fast. To compensate, the PSP’s Graphics Engine features a vector processor!
I’ve skipped the interfaces since it’s becoming too convoluted.
The graphics pipeline is very similar to that of the PS2, with the addition of the vector processing stage. The graphics core is divided into two areas: the surface engine, which deals with vector processing, and the rendering engine which, as its name indicates, performs rasterisation and effects [20].
Although its features have been explained in the past [21], the details of the graphics pipeline itself have not. The truth is, programmers don’t depend on that information to build their games. However, for the sake of this analysis, I’ve deduced a model myself.
On another note, I’ve decided to make it a bit more technical than previous articles. I thought this would be a good opportunity to learn new concepts and have a wider vision of computing graphics. Having said that, I strongly recommend reading about the PS1 and PS2 graphics systems before continuing.
Commands
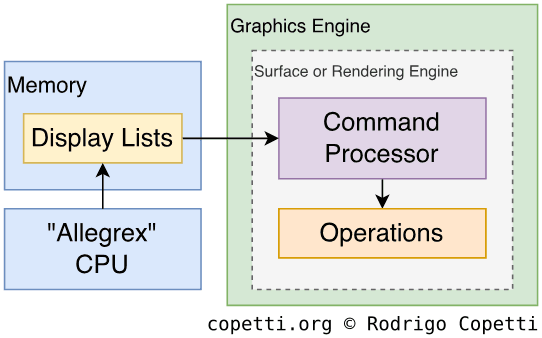
The Graphics Engine is controlled using traditional ‘display lists’ stored in main memory. The CPU builds them and the GPU reads them (using Direct Memory Access). Display lists basically tell the GPU what, how and where to draw. In the case of the PSP, display lists are not limited to rendering tasks – they can also include vector transformations.
The strategy implemented to process lists is critical to ensure that the CPU and GPU work concurrently and don’t stall each other. Remember, we want the GPU to accelerate operations, not to be a burden. Hence, the CPU and GPU support deferred rendering [22], a technique that allows the CPU to build the next set of display lists while the GPU is processing a previous one. The GE is configured by specifying where in memory the display list starts (base address) and where it stops (stall address). As a result, there are two ways of allocating a list:
- Double buffered: there are two separate display lists areas. One is being transferred to the GPU, the other is being filled by the CPU. When both processors finish, they swap places.
- Store controlled: the CPU fills the same list the DMA unit is transferring to the CPU, but the CPU is some entries ahead to avoid overlapping. This uses less memory but it’s susceptible to stalls if the GPU catches up.
Furthermore, the GPU’s DMA unit is not just a ‘dumb memory copier’ – it can also understand the data transferred [23]. Thus, display lists can include commands such as jump and return to tell the DMA to branch out and get data from somewhere else. This saves the CPU from embedding large resources (models, textures, etc.) in the display lists (which would effectively duplicate data in memory) and reduces bandwidth consumption. This system was inherited from the PS2.
Finally, the DMA can also interpret bounding box data: combined with information stored in the GE, the DMA will skip drawing commands that aren’t within the display area. It’s also possible to declare bounding boxes inside other bounding boxes, but let’s leave that topic for another day!
Vector Processing
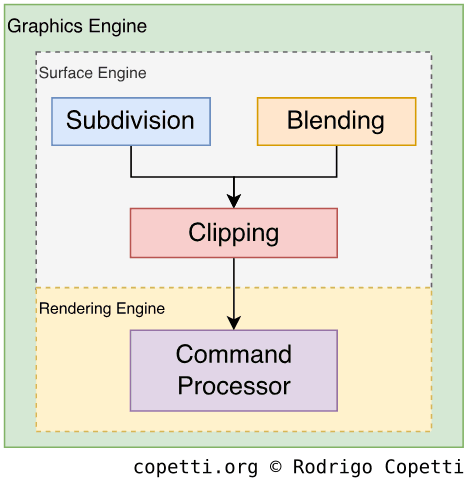
The Graphics Engine debuts the ability to perform operations over vectors, which helps to offload a lot of work from the CPU. Sony built this unit to accelerate common tasks previously carried out by the PS2’s VPUs using microcode [24]. While the GE is not as flexible as a VPU (the GE is a fixed-function unit), it does simplify a lot of coding (considering microcode had a considerable weight on the learning curve). The GE’s vector processor is called surface engine.
The surface engine undertakes three types of task. The first is the operation of parametric surfaces [25]. Remember the ‘Infinite Worlds’ section? Well, Sony explained that, while the PS2 was indeed capable of this, in the end just a few games bothered. It’s possible that polygon performance, along with difficulty in design and implementation, were the main factors.
To tackle this, the surface engine implements two parametric curves:
- Bézier: a relatively fast function but its parameters change the global shape. Additionally, it suffers from ‘continuity issues’ which manifest as cracks on surfaces (discouraging its use with animations). It’s often used for landscape generation.
- B-spline: requires more computations but fixes continuity issues and provides localised control. Character modelling and animation are potential candidates.
Both support levels of detail, which means that developers can set an arbitrary value to alter the level of subdivision (impacting the quality of the resulting model).
The second task is called vertex blending, a technique used for animations. The surface engine provides two types:
- Skinning (a.k.a. skeleton animation): movement relies on a structure of ‘joints’ attached to the character model. It’s often applied for normal animation (walking, jumping, etc.).
- Morphing: uses multiple instances of a model and averages them to get a ‘transition effect’ (using linear interpolation). It’s normally used for artificial animation (i.e. facial movement) and special effects. It comes with larger memory consumption and a steeper learning curve.
It’s important to denote that the CPU may still need to compute animations to process game logic (e.g. collision detection), so the CPU can’t offload all the work.
Finally, the surface engine provides scissoring (discarding vertices outside the viewport/rectangular area) as well.
Rasterisation
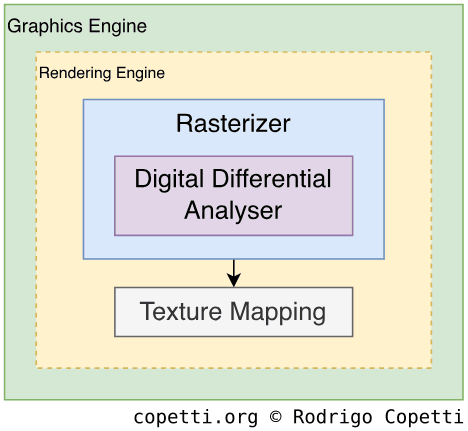
The next stage of graphics generation takes place in the rendering engine (skipping the command processor). In here, vector data is transformed into pixels, which is pretty much in pace with any other GPU in the market.
The engine draws many types of primitives, including points, lines, line strips, triangles, triangle strips, triangle fans and, finally, sprites (made of 2D rectangles). It also contains a unit called ‘digital differential analyser’ that will be used for interpolating values during rasterisation and texture mapping.
Developers can supply a projection matrix to apply perspective transformation. This sends their 3D world to a 2D space (so you can see it on the screen), using the virtual camera as a model. Modern features, like sub-pixel precision, are assumed to be implemented (otherwise, users would’ve been able to spot its absence right away).
Textures
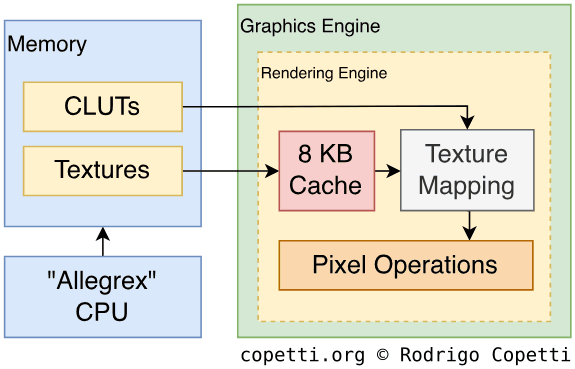
This may be the topic of most interest for some. Polygons (now mere pixels) can be painted with textures. At this stage, texture maps are fetched from memory and processed with many functions. This process is called texture mapping.
The rendering engine has three mapping modes or, in other words, three ways of processing texture maps:
- UV mapping: every coordinate of the model is mapped to a coordinate of the texture.
- Projective mapping: in a nutshell, it simulates a physical projector beaming a texture map onto a surface.
- Shade mapping: casts up to four lights (ambient, directional, point or spot) onto the model. This is useful when blending the result with another map (you’ll see more in the next section).
- If programmers supply a texture map instead of a solid colour, the result is a ‘fish eye’ effect (useful for reflections, a.k.a. environmental mapping).
- This mode also permits toon shading.
Textures may use Colour Lookup Tables or ‘CLUTs’ to reduce their size. Furthermore, this engine applies perspective correction and bilinear or trilinear filtering for interpolation.
On another topic, there are 8 KB of texture cache found in the GE to save bandwidth. The cache employs the ‘Least Recently Used’ algorithm for space management.
Finally, while this pipeline is not programmable, developers can send extra colours to be blended with textures. There’s also colour doubling (which doubles the RGB value of colours), colour addition (combines a primary colour with a secondary colour), and fogging (hazes distant polygons).
Pixel Operations
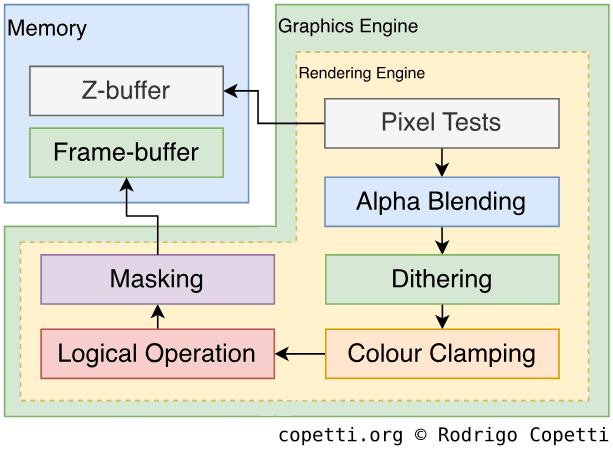
We’re reaching the end of the pipeline. The initial geometry has been transformed into pixels, and these are now richly coloured, so it’s time to decide what to do with them.
Some pixels may correspond to geometry that is not required for the current frame (for example, it may be occluded or masked). To filter these out, the GE can perform the following tests:
- Scissoring: discards polygons away from an arbitrary area.
- Depth range: discards too distant or too near polygons (developers set the reference values).
- Colour: discards pixels equal or not equal to an RGB value.
- Alpha: compares the pixel’s alpha value to a reference value.
- Stencil: similar to alpha, but relies on the stencil value.
- Depth test: late Z-buffering.
Afterwards, pixels will also travel through these optional blocks for further effects:
- Alpha blending: combines non-opaque pixels with the ones in the frame-buffer using different arithmetic operators.
- Dithering: softens colour changes.
- Colour clamping: aligns RGB values to fit in the frame-buffer format.
- Logical operation: decides how to merge the new frame with the existing frame-buffer using logical operators (
AND,ORand many more). - Masking: as the name indicates, it masks the z-buffer or frame-buffer.
Complex functions like antialiasing are the result of a strategic combination of the above. Finally, the outputted pixel is written to the frame-buffer, which in turn is sent for display.
Observations
As evidenced, the PSP inherits various features from the PS2. The difference, however, is that much of this functionality is now hardwired into the silicon, as opposed to offering many general-purpose programmable units (which require manual setup). I presume this was done for two reasons: to use fewer transistors (so it fits in Tachyon and the board remains ‘portable’) and to facilitate the porting of PS2 codebases to the new console.
Model design
To show how this arrangement influenced model design, and to help compare it to the PS2 and Nintendo DS, here are two examples of models designed for the PSP.


 Interactive model available in the modern edition
1,383 triangles.


 Interactive model available in the modern edition
1,374 triangles.
Video out
The first model of this console (model ‘1000’) has a proprietary video port called remote port at the bottom-left corner (next to the audio jack).
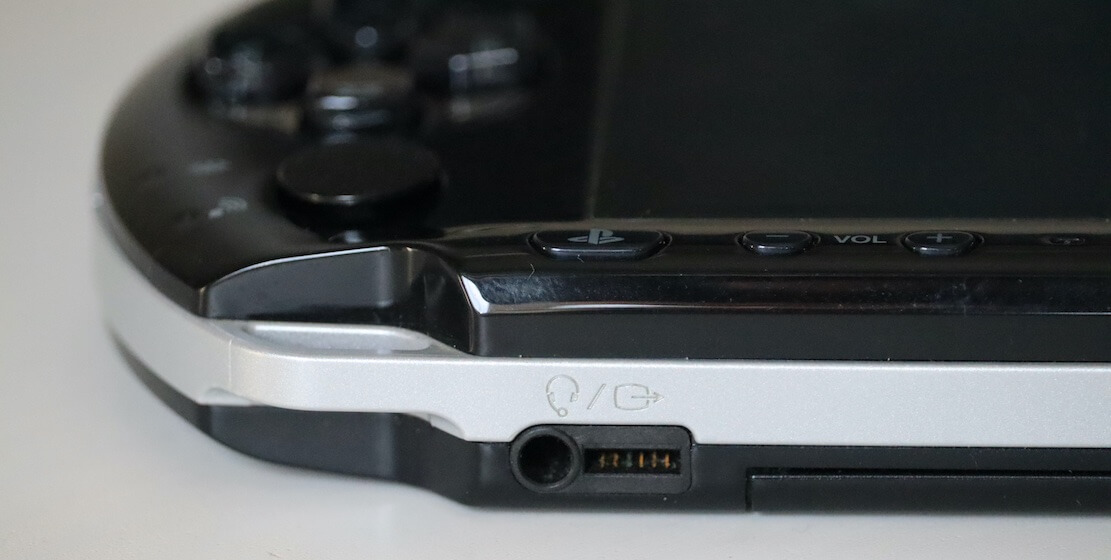
The remote port uses the RS-232 protocol [26], an old standard for transferring data in serial. Though the specification wasn’t publicly available to developers (let alone documented), a couple of audio headsets with control buttons appeared on the market. They apparently use the serial port to send commands (play, pause, etc.) to the console.
In later models (‘2000’ and ‘3000’), the remote port was expanded with an extra YCbCr pinout. Sony shipped three video cables (component, S-Video and composite) that rely on this interface to broadcast the PSP’s screen to the TV.
The video cable sends a frame with a resolution of 720x480 pixels (in NTSC) or 720x576 pixels (in PAL), in either progressive or interlaced mode (the latter option is available only on the 3000 model). As the PSP’s native resolution is 480x272 pixels, games show black bars to preserve their aspect ratio. However, these bars don’t show when the console is running the ‘XMB’ visual shell, which natively supports adjusting its resolution according to the video cable.
Audio
In this section, we tend to encounter a Programmable Sound Generator (PSG), a sequencer or a large mixer. This is because, at the end of the day, dedicated audio hardware is meant to offload audio operations from the CPU. Although if this hardware turns out to be ‘weak’, it degrades the sound capabilities of the console.
Now, what we consider ‘sound hardware’ in the PSP is very bare-bones: only two PCM channels and a stereo mixer. The maximum sampling rate and resolution are 48 kHz and 16-bit, respectively.
I don’t see any of the accelerators I mentioned in the first paragraph. So, does this imply that the sound will be as limited as other cases showed? No! Because the PSP relies on software to compensate for this.
You see, while there isn’t a large amount of sound-related circuitry, Sony supplied a lot of general-purpose components. These can help with audio decoding, streaming and mixing. I’m talking about the Media Engine.
That block is very good at signal processing, but it needs to be programmed. So, Sony wrote the following software for the Media Engine to complement the two PCM channels (we’ll call these the ‘endpoint’) [27] [28]:
- Sound driver: talks to the endpoint and performs memory transfers using DMA.
- Software audio synthesizer: as the name indicates, it generates the signals to be sent to the endpoint.
- This synthesizer supports 32 channels, using the PCM, ADPCM or ATRAC3 formats [29].
- Provides digital reverb, pitch control and ADSR envelope.
Games don’t have access to these modules directly. Instead, they call many libraries included in the official SDK. Some libraries are designed to operate raw signals while others are optimised for particular applications. Examples include:
- MP3 and AAC decoding.
- MIDI sequencing.
- VoIP audio decoding (G729 and u-law).
- The operating system of the PSP bundled a variant of the ‘Skype’ app, if you wonder what uses VoIP could have here.
Audio comparison
Let’s put all this into practice by taking a look at how games reproduced their sound. I wrote this special player that allows you to swap between consoles (to enable side-by-side comparisons):
Nintendo DS: Final Fantasy IV (2007).
PSP: Final Fantasy IV - The Complete Collection (2011).
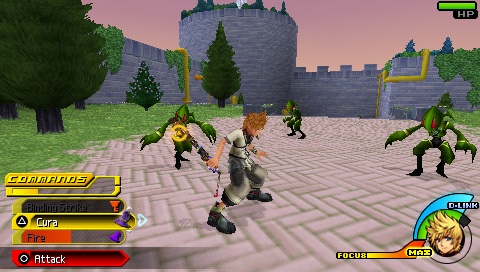
PlayStation 2: Kingdom Hearts 2 (2005).
PSP: Kingdom Hearts Birth by Sleep (2010).
In the first example, the Nintendo DS game sequences its music on the fly, while the PSP one decodes ATRAC3. As you can hear, having no dedicated sound hardware per se doesn’t imply poor sound quality. In fact, one could argue the opposite, as the Media Engine provided more features than the sound chips of most previous portable consoles ever did.
The second example is much trickier to quantify. I placed a PS2 tune for comparison, but I had to boost the PS2 one a bit (I presume PSP soundtracks are louder to compensate for the smaller speaker and the proximity to the user). Also, bear in mind that the arrangements are slightly different between platforms. It’s possibly just a creative change since the PSP game was released five years after the PS2 one. Overall, the PSP doesn’t show deterioration (considering that the PS2’s SPU2 is very powerful and flexible).
I/O
The PSP has plenty of connections and sensors to discuss. However, I’m taking this opportunity to also introduce some chipsets that haven’t been mentioned yet. These play a big part in managing the circuitry that detects the player’s input.
Internal interfaces
Most of the available I/O is linked through the Peripheral Bus. It’s only 32 bits wide, which is enough to transfer simple information at a normal pace. This bus has access to the main RAM as well.
The D-pad, joystick, and buttons are handled by a unique chip referred to as System Control or ‘SysCon’. This is a common codename across Sony hardware, and it deals with interfacing many internal components - although in the PSP’s case, SysCon only handles the physical buttons.
External interfaces
The console features a good amount of connections [30]:
- 802.11b Wi-Fi: either connects to a hub or operates in ‘ad hoc’ mode to talk to nearby PSPs. This is similar to what the Nintendo DS offered.
- USB 2.0: for accessories or to plug the console into a computer. In the case of the latter, the PSP is recognised as a mass storage device, providing access to the memory stick.
- IrDA: stands for ‘Infrared Data Association’, similar to what a TV remote uses to change the channel. Before the release of the PSP, the infrared protocol was popular for transferring multimedia between a camera/phone and the computer. As for the PSP, however, the IrDA port went bluntly ignored.
- As tends to happen, Sony removed it with the second revision of the PSP (model ‘2000’).
Commercial accessories
The use of a standard port, the USB, incentivised third-parties to design accessories for this console.
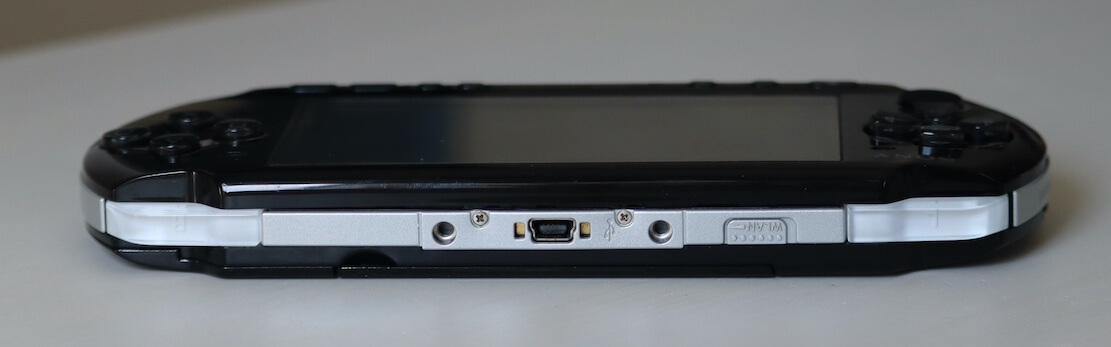
Notice the two holes surrounding the mini USB port to hold an accessory.
Examples of commercialised accessories included:
- A microphone for audio chatting.
- A GPS receiver, to use with the Go! Explore GPS disc, for satellite navigation.
- A camera for videoconferencing. This makes sense as Skype came included with the system.
The interesting part is that these type of peripherals were already available in the Pocket PCs and PDAs market as well. This makes you wonder if Sony envisioned the PSP as a Pocket PC for youngsters.
Home console connectivity
After the release of the PlayStation 3, a new feature appeared on the PSP: Remote Play. Using a Wi-Fi connection, the PS3 could be remotely controlled from the PSP.
The idea actually predated the launch of the Wii U. Unfortunately, only a handful of PS3 games supported Remote Play, meaning users could only navigate through the menus, do some multimedia, and play PlayStation 1 games.
Operating System
Over the years, the program in charge of controlling a given console before a game starts has become more and more convoluted – mainly due to the increasing need for security and services (updatable APIs, online multiplayer, multimedia, etc.). The PSP tries to accommodate all of this within very constrained hardware. Now, I don’t mean to say that the outcome is mediocre, but many decisions are the result of balancing costs, performance, and robustness.
Architecture and design
First and foremost, the PSP contains a hidden, undocumented 4 KB ROM inside Tachyon. This is where the bootloader resides [31]. In other words, upon powering on, the CPU will start by looking for instructions in there. That ROM has many names, including ‘Bootrom’, ‘Pre-IPL’ and ‘Lib-PSP iplloader’.
The rest of the system is installed on 32 MB of NAND Flash memory found in the motherboard. Here is where the majority of the PSP’s Operating System (OS) resides.
The OS is composed of the following components:
Modules
A module is what we would call a ‘program’ or ‘driver’ in the PC/Windows world. Once loaded, modules may reside in memory and perform the following tasks [32]:
- Expose functions to simplify access to certain hardware.
- Run as a foreground program (e.g. games).
A module binary may be encrypted or decrypted. It also embeds metadata to define whether it’s a ‘user module’ or ‘kernel module’; the latter allows the new module to control privileged areas in memory (where the kernel resides).
Modules are summoned by the ‘kernel’ or ‘Visual Shell’ (VSH). User modules can execute other modules at the discretion of the kernel. This enforces security – the kernel will never load kernel modules from Universal Media Disks (UMDs), for instance.
Kernel/IPL
While this OS doesn’t contain a kernel per se, it has multiple components that fill in the duties of a traditional kernel.
The first component is the IPL, which is loaded by Pre-IPL and takes care of initialising the hardware. Part of the IPL, called IDStorage, also stores unique information about the console (such as its MAC address, serial number, and UMD authentication keys) [33]. Overwriting this last area causes catastrophic results! So the UMD keys are duplicated a couple of times to survive corruption.
The IPL then loads a set of kernel modules which handle low-level operations (memory management, multi-threading, and file system). They also implement memory access exceptions triggered by the MPU (remember the segmentation paragraph?). For the sake of simplicity, whenever I use the word ‘kernel’ in this article, I will be referring to these kernel modules.
Having said that, the kernel doesn’t do multitasking, but it does implement cooperative multi-threading for single processes.
The kernel persists in memory as long as the console has power. For that reason, programs (user modules) aren’t written for bare-metal. Instead, user modules rely on functions exposed by kernel modules. Consequently, the kernel reserves 4 MB of main RAM and another 4 MB for ‘volatile memory’ (temporary buffer for many operations, with access granted at request). That only leaves 24 MB of main RAM (out of 32 MB) for user programs.
Other Parts
NAND also houses other sections of the firmware.
Firstly, there’s the Visual Shell or ‘VSH’, which is the first thing the user notices after powering on the PSP. The VSH is a graphical user interface that allows the user to run games and other modules (only user-type ones). It is composed of multiple modules, some of which are only loaded upon request.
As a curious fact, the system call used to launch retail games works by first rebooting the console, and then loading the executable. This approach was possibly done to unload the VSH and free up resources for the game.
Secondly, there is a second partition in NAND that stores user-related data, such as network settings. This partition is called ‘flash1’ (as opposed to ‘flash0’) and its contents are called system settings.
Boot process
Now that we have identified the main parts, let’s examine how they work together to bring the console into a ‘working state’ (once it is switch on). Security is discussed only briefly here; the later ‘Anti-Piracy and Homebrew’ section explores it in more depth.
The complex boot process works as follows [34] [35]:
- The main CPU’s reset vector is at
0x1FC00000, which points to the Pre-IPL ROM inside Tachyon.- The first half of Pre-IPL tells the CPU to copy its second half to scratchpad memory and continue execution from there.
- Pre-IPL looks for the next stage from either NAND or an external memory stick. When the latter is selected (never under normal use), the PSP enters a mode called factory service mode. For simplicity, we’ll focus on the normal mode (selecting NAND).
- Pre-IPL initialises the NAND controller and continues execution from NAND. The second part of Pre-IPL runs the IPL, which is encrypted, so it is decrypted (using ‘KIRK’, more details later) and copied to eDRAM (within the Graphics Engine) as a working area.
- Once finished decrypting, it continues execution at eDRAM, where the decrypted IPL resides.
- The first half of Pre-IPL tells the CPU to copy its second half to scratchpad memory and continue execution from there.
- The IPL’s execution process is divided into three stages.
- The first stage, called the loader, resets the main CPU and hides the Pre-IPL ROM from the memory map. The loader also initialises minimal hardware and decompresses ‘Main.bin’, the next stage, on eDRAM.
- Main.bin focuses on initialising the rest of the hardware, including main memory. Once it finishes, it decrypts the third stage onto main memory and continues execution from there.
- The final stage, referred to as payload, loads the kernel. The kernel is stored in the form of multiple binaries, modules and metadata that, once loaded into main RAM, gives life to the system. Afterwards, the interactive shell is shown.
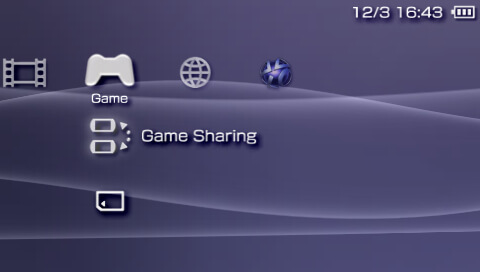
Visual Shell
Internationally speaking, this console debuts the famous XrossMediaBar or ‘XMB’ interface. This is the feature-rich Graphical User Interface (GUI) that shipped with the PSP.
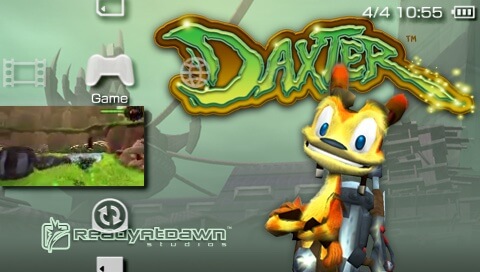
When the user steps on the actual game item, the XMB styles itself with assets provided by the game, until the user selects another element from the category.
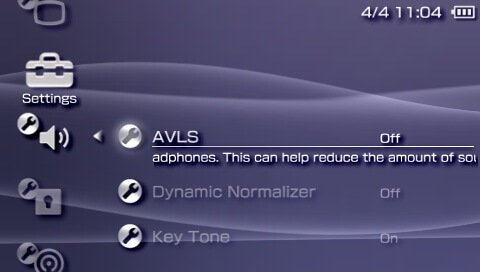
Some entries group multiple configuration controls.
From a human-computer interaction standpoint, the XMB’s design reveals very interesting solutions to interaction challenges (such as navigating around many depths of information, avoiding flooding the user with options, and fitting all these entries in a 4.3” screen). In essence, information is organised into ‘categories’ and ‘elements’, and the D-pad is used to navigate between them. The left and right arrows switch between categories, while the up and down arrows select an element within the current category. It’s worth pointing out that all categories are found at the same hierarchy level. So, no entry is shown superimposed over the rest. This impedes the insertion of attention-stealing advertisement and whatnot.
On another topic, the XMB provides customisation options, such as changing the background colour and re-arranging items. Moreover, it provides access to multimedia services and, of course, allows the user to load up the game (whether from a UMD or memory stick).
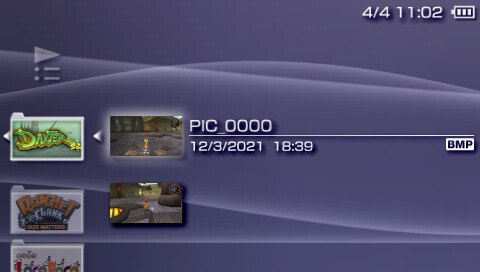
There’s also an embedded file viewer, which is used for both multimedia and save management.
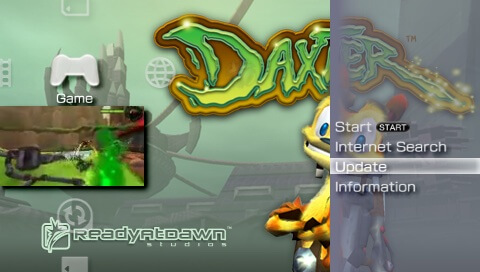
Updatability
As we’ve seen before, everything except Pre-IPL is stored in writable storage, and is therefore ‘updatable’. Sony distributed firmware updates in the form of downloadable files, which users could either download manually or via the ‘System Update’ assistant. The latter also installed those packages.

Some updates strengthened the PSP’s security system by adding layers of encryption to the boot process and integrity checks for kernel modules.
From the developer’s standpoint, some updates enhanced the APIs by adding more functions and correcting existing ones. Consequently, games were tied to the system version they were developed for, and users were required to update the firmware to play newer games. However, new updates were always backwards compatible, so older games should never break on an updated system (at least, in theory).
From the user’s perspective, some updates introduced new services, like a web browser, an RSS reader, and so forth. After the release of the PlayStation 3, many online applications were ported to the PSP, including the ‘PlayStation Store’ and ‘Remote Play’.
Games
For the first time in this series, games developed for this console are not written for bare-metal. Instead of relying on memory addresses and ports, they must call modules to perform operations on the hardware. In fact, the APIs found in the official SDK are designed around this model.
Development ecosystem
The development toolkit provided by Sony to game studios was produced by SN Systems (the same author of the PS1 and PS2 kits). The software kit required a workstation running either Windows XP and Cygwin; or CentOS Linux.
With this kit, developers had access to [36]:
- An SDK, containing C++ libraries linked to a particular firmware version (as they depend on the modules installed).
- A choice of two compilers: a variant of the GCC compiler called psp-gcc, or an alternative by SN Systems called SVCPSP.
- The GDB debugger.
- SN Systems’ assembler, linker, and archiver. The latter generates PSP executables.
- A plugin for Visual Studio 2005 and 2008, enabling developers to use Microsoft’s IDE for PSP development.
Initially, Sony provided only an emulator for testing PSP software [37]. This was later replaced with the PSP Hardware Tool: a PC-like tower connected to a dummy PSP shell (similar to the Nintendo DS kit). The devkit interfaced with the workstation using a piece of software called ProDG (only available on Windows).
Storage medium
The PS1 and PS2 featured two types of storage: a read-only disc for loading games, and a re-writable ‘Memory Card’ for storing saves and executables. The PSP continued this tradition, albeit with different casings.
Given that this was Sony’s first mainstream portable console, how did they manage to find the right medium for each job? Well, taking into account they were also the creators of the BetaMax, MiniDisc and so forth, you can guess what they did this time… introduce even more formats.
UMD Discs
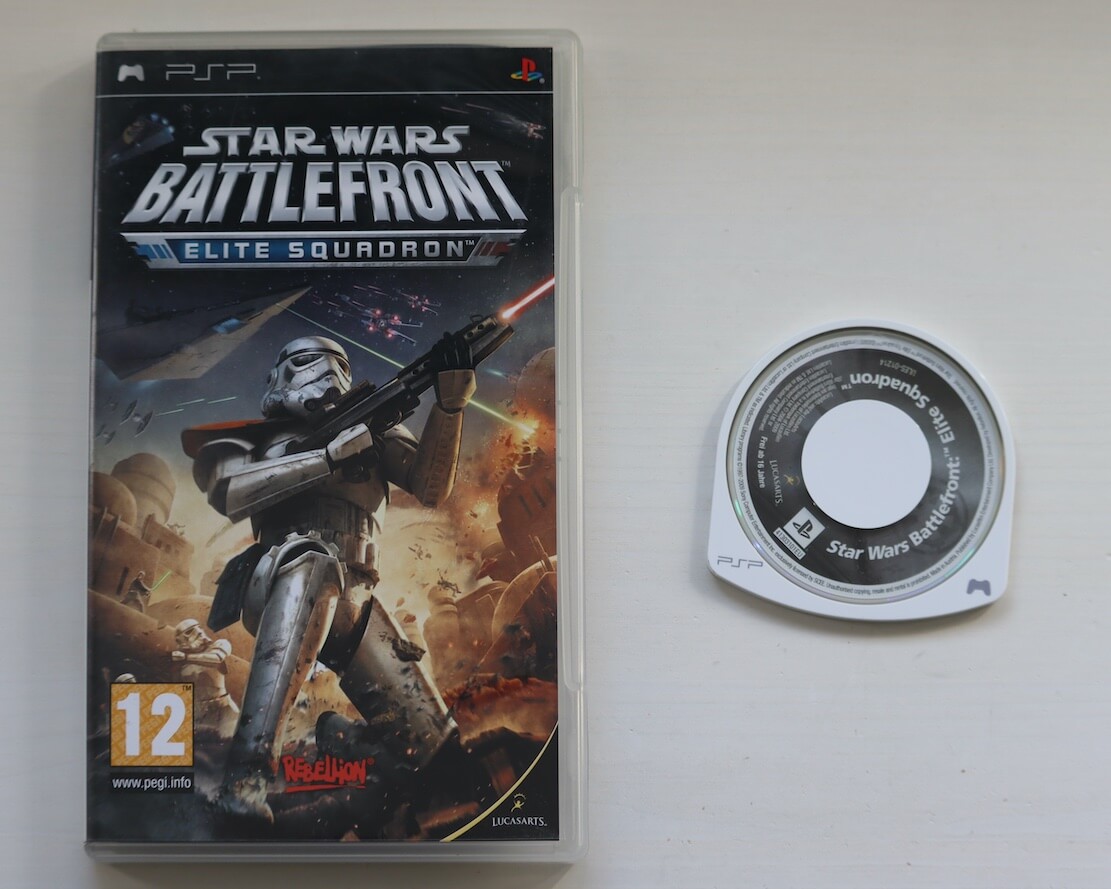
CDs and DVDs are too large and easily copyable. Furthermore, conventional readers won’t work in a shaky environment (anyone who has tried listening to an audio CD on a Walkman while walking know what I’m talking about). So, Sony’s solution was a new invention from the ground up: the Universal Media Disc (UMD), a proprietary medium.
UMDs hold either 900 MB or 1.8 GB, depending on whether they are single-layer or dual-layer, respectively. They differ from DVDs and MiniDVDs not only in physical design but also in their internal data structure.
Apart from games, Sony published the ‘UMD video’ and ‘UMD audio’ specifications, allowing third-party distributors to ship their content to PSP users - remember, this was 2004, when the iPod Photo had a 2” display.
These discs are enclosed in a non-removable caddy; the centre is magnetic, so it attaches itself to the reader’s motor once the disc is inserted.
Memory Stick Duo
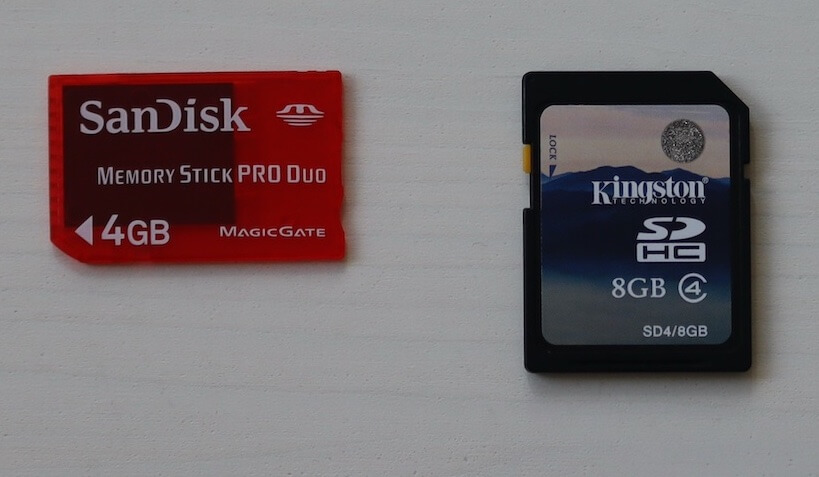
The ‘portable’ equivalent of the Memory Card is the Memory Stick Pro Duo, yet another example of Sony’s insistence to bring another medium to a flooded market (remember the massive number of options back then? Even flashcarts had to accommodate many variants). This arrived during the boom in digital photography and cellphones, when people wanted lots of storage for a cheap price; and just before the SD card took over.
The Memory Stick, like the rest, is a protocol that interfaces internal memory (like Flash) with external peripherals in a way that’s convenient. So, you may swap cards between the computer and the camera without having to dismantle anything. The ‘Pro Duo’ variant (used by the PSP) has a capacity of up to 32 GB, with speeds of 1.23 MB/s for reading and 0.54 MB/s for writing.
The PSP relies on the Memory Stick to store user-related content, such as saves, media, and games. It’s formatted with the FAT32 file system, and the controller embedded within the Memory Stick may support MagicGate’s digital rights management.
Unlike the PSP’s internal RAM, the contents of the Memory Stick are not memory‑mapped; the file system is accessed through system calls provided by kernel modules.
Network services
Eventually, Sony caught up with the competition and improved its online infrastructure. They even offered services not yet provided by Microsoft or Nintendo.
PlayStation Network
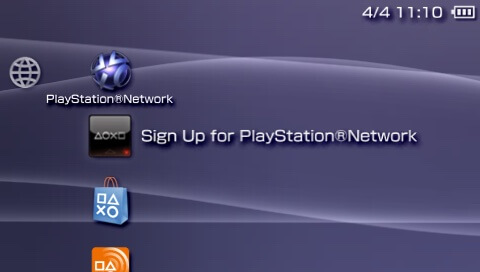
In response to Microsoft’s Xbox Live and Nintendo’s Nintendo Wi-Fi Connection, Sony had its own online infrastructure… PlayStation Network or ‘PSN’.
This service superseded the primitive DNAS, previously deployed for the PlayStation 2. One of the additions was the use of a centralised authentication system.
Users could now register a free PSN account, enabling multiplayer gaming with other people around the globe via Wi-Fi connection.
It’s worth mentioning that at first, the PSP didn’t include many online services. This changed drastically with the release of the PlayStation 3, but I guess that is a story for a later article…
PlayStation Store
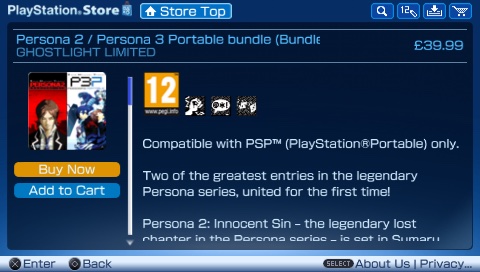
Another development that followed the debut PlayStation Network was the PlayStation Store. As the name indicates, it’s an online marketplace that allows users to purchase games digitally and download them directly to their Memory Stick.
I suppose this was a welcome addition for small game studios, as physical distribution carried significant costs, which would eventually impact the price of the game. Strangely enough, a later model of the PSP called ‘PSP Go’ enforced this shift even further. By removing the UMD reader, it could only play titles acquired from the PlayStation Store.
Later on, the game catalogue drastically expanded with the arrival of PS1 games. These were downloaded to the Memory Stick and played like any other digital game. PS1 binaries on the PSP worked with the use of software emulation; Sony embedded an in-house emulator into the system to make all this work seamlessly.
Updatable content
Last but not least, online services provided the opportunity to download game patches (in the form of ‘updates’) directly to the console.
Not many games made use of this feature, however. This is hard to imagine today, when large updates (the so-called day one updates) are often pushed before the game even reaches the store shelves…
Anti-Piracy and Homebrew
Just because this is a portable console doesn’t mean it should have weaker security than the PS2. It’s quite the opposite in all senses - the security system implemented on the PSP is very diverse, with some parts still remaining a mystery to this day.
Of course, we all know by now that its implementation contained pitfalls that eventually opened the door to Homebrew and piracy. Yet, considering that this was a console from 2004, certain design decisions can be considered ahead of time, especially when you compare them with the competition.
Physical security
I’m going to describe the three main chips responsible for security-related operations. The algorithms involved can be pretty complicated for first-timers, but I will try to provide a quick overview. Don’t forget to consult the bibliography if you find the topic interesting, as this writing is primarily focused on the PSP itself.
KIRK
To start with, we’ve got KIRK, another component residing inside Tachyon. KIRK is the hardware implementation of the following cryptographic algorithms (think of it as an accelerator) [38] [39]:
- Advanced Encryption Standard (AES) encryption and decryption: a symmetric encryption system that operates with a given key. KIRK also provides a key vault of 128 keys and a master key, both 128 bits long, to encrypt and decrypt data.
- ECDSA: another asymmetric encryption system. It includes two functions:
- Public-private key generation: used for encrypting and decrypting user data, such as save files.
- Signature verification: validates and decrypts data encrypted by Sony. KIRK also stores Sony’s public key for this purpose.
- SHA-1: generates a hash value from data. ECDSA depends on SHA during signature verification to ensure that the original data hasn’t been tampered with.
- Cipher-based Message Authentication Code (CMAC): another algorithm used to decrypt and verify the integrity of the encrypted data (whether it comes from Sony or not) using a shared key. It relies on AES for decryption.
- Pseudo-random number generation: as the name indicates, it attempts to generate an unpredictable number for cryptographic use.
In short, the CPU issues commands to KIRK (for instance, “encrypt this string with algorithm x and key y”). KIRK can behave like a bus master as well, writing the results directly into main RAM.
Lepton
As you know, UMD discs are not easily duplicated, but their contents are also stored in encrypted form. Users never notice this, however, since the decryption process is handled by hardware too.
Alongside Tachyon sits another System-on-Chip known as Lepton, which controls the UMD drive and acts as a middleman between the main CPU and disc’s contents.
Lepton contains an enormous amount of circuitry - you may even consider it another computer living inside the PSP. This component includes its own CPU, a DSP for decoding, 480 KB of memory (as buffer), and 384 KB of ROM for storing its firmware.
The main CPU communicates to Lepton using the ATAPI protocol, an interface traditionally used for plugging conventional CD/DVD drives into PCs. The critical difference, however, is that Lepton only decrypts data from a UMD if the disc is identified as authentic.
SPOCK
In addition to the encryption handled by Lepton, the sectors of an UMD are encrypted using AES. SPOCK is another block located next to KIRK that focuses on decrypting each sector of the UMD disc.
Inside the NAND Flash, IDStorage contains an encrypted key known as the ‘master key’. SPOCK includes a hardwired key used to decrypt it. The decrypted master key is then used by SPOCK to decrypt another key found on the UMD, and that second key is finally used to read each sector. Easy-peasy!
By the way, even though SPOCK resides within Tachyon, it is operated by Lepton.
To sum up, having these routines in hardware allows the system to execute games without consuming general-purpose resources on encryption and decryption tasks.
Software security
The operating system uses the provided hardware to compose a security architecture. Overall, the software is protected using the following principles:
- Chain of trust: Pre-IPL, the first stage of the boot process, is a read-only piece of code written by Sony and embedded during manufacturing. Anything that Pre-IPL approves is deemed trustworthy, and this trust extends to all subsequent stages it loads.
- Signed executables: executables are not only encrypted, but also signed with keys that only Sony knows, ensuring that tampered data cannot be re-signed.
- Obscure hardware: KIRK, SPOCK, and Lepton are undocumented, obfuscated blocks of silicon that don’t expose which algorithms are applied and how.
- Developer-proof security: the MMU’s privilege modes restrict access to sensitive memory locations, protecting against the presence of user-level exploits in retail games (which lead to arbitrary code execution).
Defeat
Despite all these protections, hackers never gave up on this console. Maybe because the amount of functionality made it very attractive for Homebrew development.
The amount of work uncovered in this area is outstanding, so I’ve had to draw a line somewhere. Thus, only major breakthroughs are covered here. But, for those interested in the full picture, playstationdev.wiki keeps a good archive of every single discovery.
Early blunders
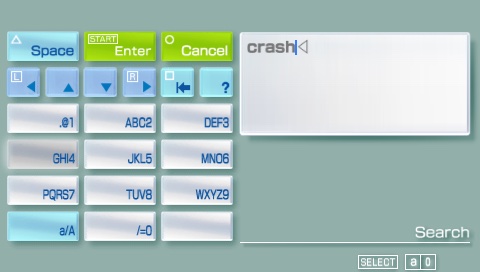
After the release of the PSP in Japan, it was only a matter of time before user-land exploits began to emerge. Some relied on multiple security flaws found in early versions of the firmware:
- The game ‘Wipeout’ embedded a web browser to access downloadable content. It wasn’t protected against DNS attacks (domain hijacking), allowing users to browse any URL on the wider internet.
- Later on, it was discovered that the browser’s URL field didn’t verify the input. So, entering
file:///disc0:/as URL would list the contents of the UMD, already in decrypted form. This gave hackers an opportunity to inspect PSP executables and reverse-engineer them.
- Later on, it was discovered that the browser’s URL field didn’t verify the input. So, entering
- The first revision of the system didn’t check for signatures on executables stored in the Memory Stick, allowing to run custom user modules (but not kernel ones).
- This was probably accidental, as it’s common practice for development units to skip signature checks. It seems Sony may have rushed the retail firmware and forgotten to re-enable the checks, like Microsoft.
- After this was patched, hackers discovered a flaw in the file system implementation that enabled to run unsigned code. In a nutshell, the user had to duplicate the folder containing the executable, append
%to the name of the second folder, and strategically reorganise the contents of both folders.
These early blunders helped to build a knowledge base of the inner workings of the PSP, which led to more attack vectors and custom software that interacted with the hardware directly (remember, only game studios had access to the official SDKs and documentation).
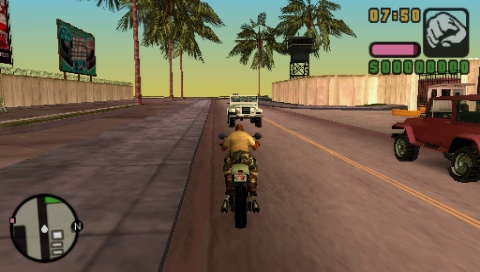
As in any cat-and-mouse game, Sony responded with more system updates (which were required by new games). Meanwhile, newer discoveries, such as the so-called ‘TIFF’ and ‘GTA’ exploit continued to appear [40]. It’s worth mentioning that these early developments were only considered ‘Homebrew launchers’, as full kernel access had not yet been achieved.
Downgrading
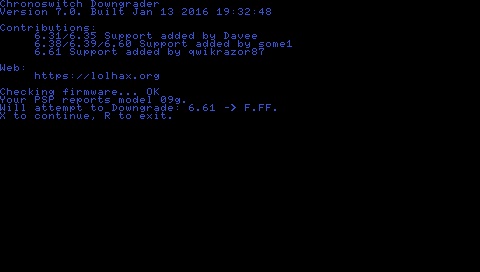
As Sony gained momentum with stronger firmware updates (incorporating security patches next to attractive features, such as a web browser), old versions became some sort of promised land, where advanced users enjoyed the ability to run their Homebrew. However, finding a PSP with an exploitable system version became increasingly challenging. As a result, downgrading quickly grew in popularity. Downgrading is the opposite of upgrading: it involves replacing the firmware installed with an earlier (and better exploited) version.
A common approach for downgrading relied on executing an exploit that tricked the system into installing an older update file. This wasn’t easy, as it depended on an ever-shrinking pool of exploits in the latest firmware releases.
Eventually, two ‘modchips’ reached the market: ‘Undiluted Platinum’ and ‘PSP-Devolution’. Both shipped with a separate NAND chip used as secondary NAND storage, enabling the user to boot a secondary (and exploitable) firmware, or replace the primary one. This technique only supported the PSP model ‘1000’, as later ones integrated Tachyon with NAND and DDR SDRAM into a single package.
Pandora
The cat-and-mouse game was the order of the day, until August 2007, with the arrival of Pandora [41].
The ‘Pandora battery method’ is a popular (and respected) collection of achievements. It managed to bypass most of the security layers, and focused on the only area Sony could not react quickly: Pre-IPL. This is what Pandora succeeded in [42]:
- Find a way of entering ‘Service Mode’: by tampering with the PSP’s removable battery, which had some circuitry attached for identification purposes, hackers discovered that overriding its serial number value to
0xFFFFFFFFtriggered Service Mode at boot time. In this state, Pre-IPL would look for a secondary system in the Memory Stick. The modified battery became known as JigKick or ‘Pandora’ Battery.- Users could craft a Jigkick battery using a hacked PSP, or by desoldering the ground pin of the battery’s EEPROM. The latter was far riskier, considering casual users were disassembling a Lithium battery! Unsurprisingly, some third-parties began selling ‘Pandora battery’ makers.
- Functionally speaking, a Jigkick battery behaves like any normal battery. However, when inserted, the PSP will always boot from the Memory Stick.
- Trick ‘Service mode’ into loading a fake/unsigned firmware: the next step required to find a way to load a fake IPL in Service Mode. The main challenge was that the executable still had to be encrypted and signed to work. Well, hackers found a way to bypass this. Essentially, the process worked as follows:
- Even though IPL is encrypted in batches of 1 KB of code, hackers found out that KIRK could be instructed to decrypt smaller sizes, leaving the rest of the code untouched.
- With the use of brute force, a special binary could be crafted so, when KIRK decrypts it, it only contained an instruction similar to ‘jump 100 bytes down’.
- Combining the two above, hackers crafted a binary that contained the encrypted jump instruction along with unencrypted code. All in all, this enabled arbitrary code execution with maximum privileges in Service Mode.
- The custom IPL code in the Memory Stick could only reside at specific sectors. Consequently, special programs were developed to assist with this. A Memory Stick with a custom IPL installed to this location is called Magic Memory Stick.
After this, all that remained was to embed a useful payload. Popular options included:
- A de-bricker, which reinstalled a clean official firmware, repairing consoles with corrupted NANDs.
- A downgrader, now enjoying greater permissions.
- A custom firmware installer, which I explain more in a bit.
It’s important to mention this was a tremendous discovery, especially considering that KIRK had not yet been fully reverse-engineered, and the encrypted block that made Pre-IPL ‘jump’ had to be brute-forced.
CFW and beyond
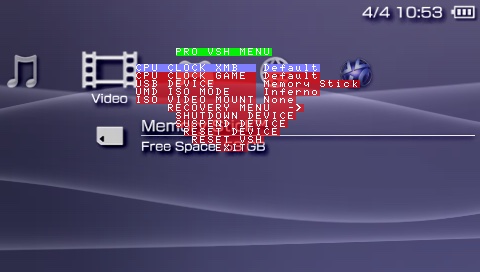
The Pandora method dealt a big blow to Sony – it was an effective bootrom exploit, and much like the case of the Nintendo DS, fixes could only ship in the form of new hardware revisions.
One of the main applications of Pandora were Custom Firmwares (CFW). A CFW is an official firmware modified to include additional functionality, such as homebrew modules. These customisations enjoyed kernel privileges and had complete control of the console. Examples of new modules included ISO loaders, signature disablers, low-level CPU management, a ‘plugin’ loader (allowing further customisations without reinstalling the firmware), and many, many more. Various groups packaged their own variants, such as M33, PRO, and ME.
A CFW needs to be installed first, and the installer depends on a kernel-level exploit. Well, thanks to Pandora, this was no longer a challenge. However, Sony eventually fixed the vulnerabilities leading to Pandora, meaning later PSP shipments were limited to the traditional software-based exploit methods.
Ultimately, the last straw came when the security system of the PlayStation 3 was compromised. The PS3 stored the private keys used to decrypt PSP executables (as its operating system includes a PSP emulator). Once they were extracted, it allowed anyone to sign user-land software and embed a kernel exploit, for instance, to bootstrap a CFW installer or a CFW loader.
As of 2021, it was recently discovered that the latest firmware contains a kernel-level vulnerability during the boot process, which can then be used to kickstart a CFW of choice. This was packaged in a solution called Infinity 2 [43].
Homebrew encouragement
Breaking security was not the only goal from the Homebrew community; there were also groups committed to providing necessary tools to build software without legal repercussions. For instance, the pspdev group published an open-source SDK called PSPSDK that replicated many of the official interfaces, while removing restrictions previously imposed by Sony.
PSPSDK also includes a toolkit to handle the compilation and packaging process, just like the official SDK, but designed for PSPs running a CFW instead.
That’s all folks
This is what grown-ups used to buy if they wanted to look cool (I had a DS).
There you go, you’ve just finished reading about the last portable console before smartphones and tablets took over! I think this gives us an idea of what services/features users were expecting from portable handhelds in the early noughties - and how this evolved during the next decade.
Nevertheless, I want to thank the PSP Homebrew Community discord for not only taking the time to proofread this endless article, but also to enlighten me with even more information. Various members of that group have dedicated great effort to develop free tools and Homebrew applications to expand the capabilities of this console. My acknowledgement is also directed to all the authors who produced the documents listed in the sources. It took me ~3 months to write this article, but it was possible thanks to the combined years of work that other people dedicated to reverse-engineer this console.
As for the next article, I’ll need to first take one month or two to focus on all the issues and requests submitted on the GitHub repo and do some maintenance work on the site, but rest assured I’m striving to make the next writing as complete as this one!
Until next time!
Rodrigo


