Supporting imagery
Models
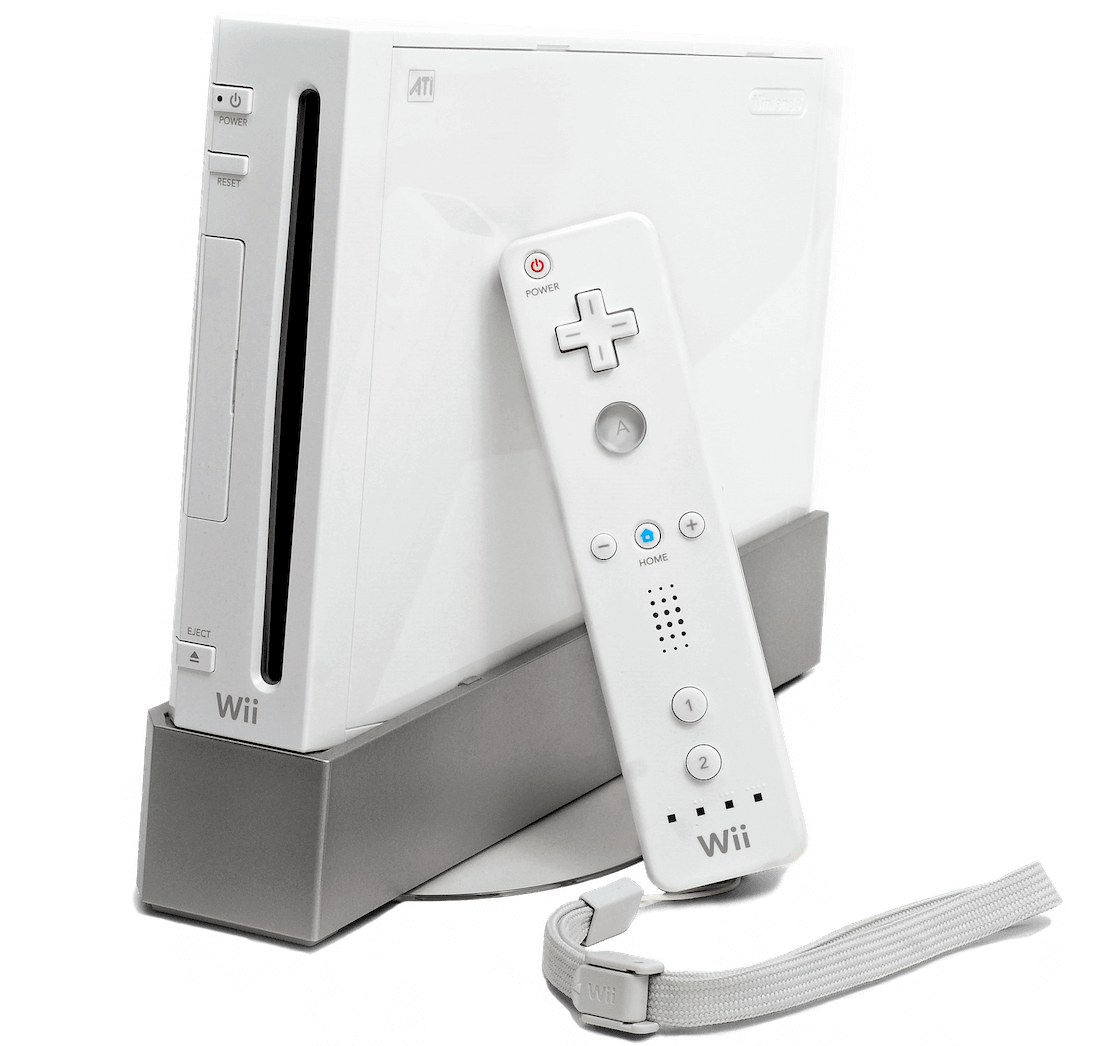
Released on 19/11/2006 in America, 02/12/2006 in Japan and 08/12/2006 in Europe.
Motherboard
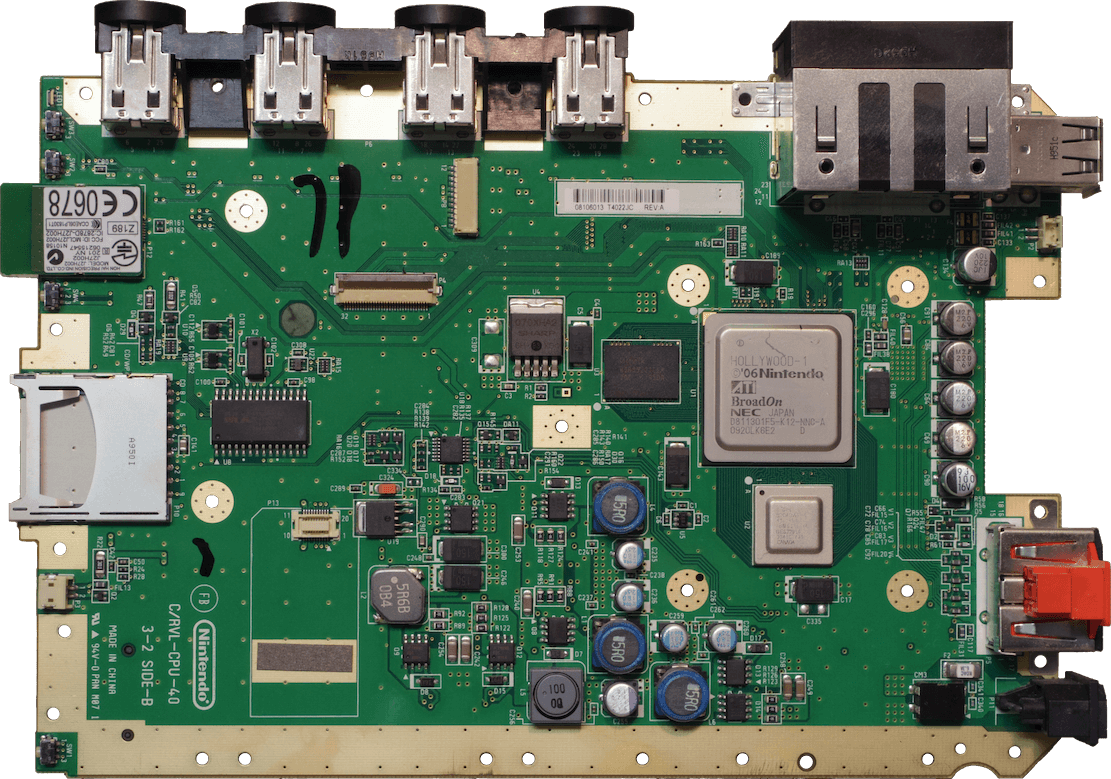
Showing revision 'RVL-CPU-40', earlier revisions had a significantly larger fabrication process and later ones removed most of the Gamecube's I/O.
NAND Flash is fitted on the back.
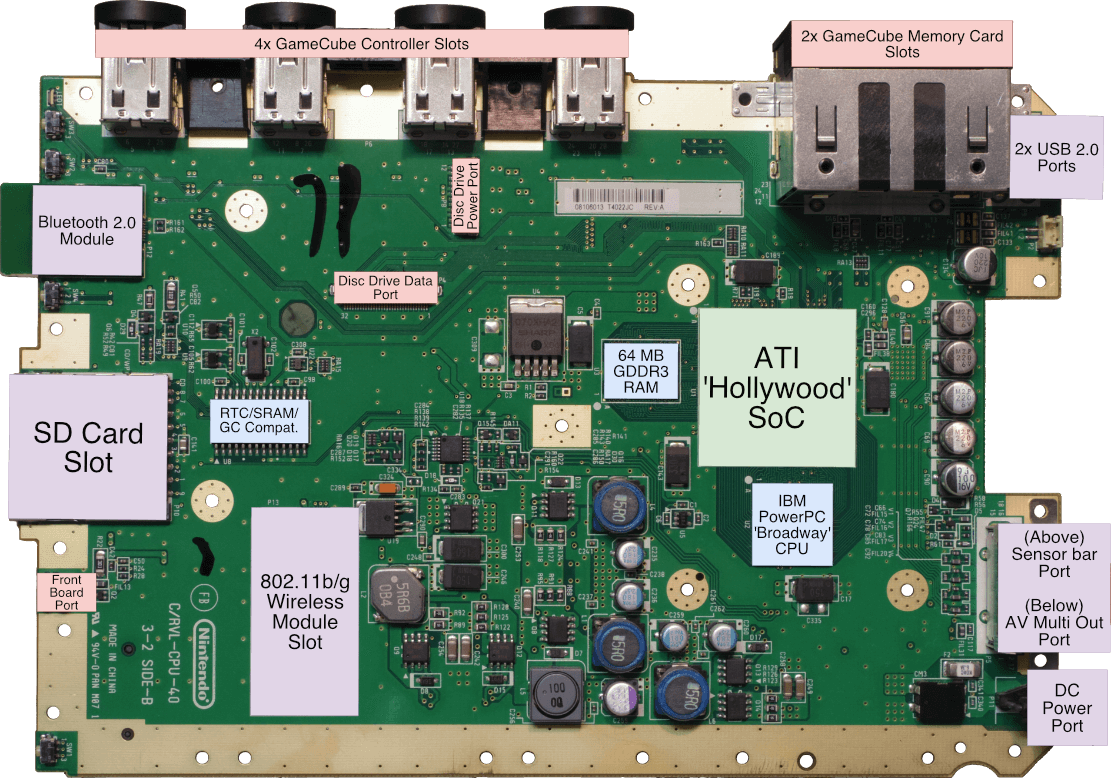
Diagram

Important data buses are labelled with their width and speed.
A quick introduction
Even though the Wii lacked the state of art graphics its competitors enjoyed, new types of control and innovative software gave this console new areas to brag about.
Here we will analyse every aspect of this console, from its already-familiar hardware to its overlooked security system, including its major flaws.
Quick Note: Some sections overlap part of the previous article about the GameCube, so instead of repeating the information I will just put a link to the respective part of the article.
Next-gen controllers
Let’s start by discussing one of the most iconic aspects of this console: The controllers.
The main device is no other than the Wii Remote (also called ‘Wiimote’), a gadget with a similar shape of a TV remote that contains many types of input controls:
- For starters, it has a set of physical buttons which are used like any conventional controller.
- It also contains an accelerometer to detect orientation changes, this is the main component used to achieve motion sensing.
- Finally, it includes an infrared camera that, combined with the accelerometer and some Wii processing, can be used to point at the screen.
- This sensor requires the Sensor Bar (included with the console). The bar contains two sets of infrared LEDs which the camera can sense, the Wii uses triangulation to calculate the position of the Wiimote from the TV.
The remote is powered by Broadcom’s BCM2042 [1], a chip that includes all the necessary circuitry to become an independent Bluetooth device (CPU, RAM, ROM and, of course, a Bluetooth module). While the Wiimote is programmed to follow the ‘Bluetooth HID’ protocol to be identified as an input device, it doesn’t comply with the standard method of exchanging data (possibly to disallow being used on non-Wii systems).
Lastly, the Wiimote also includes 16 KB of EEPROM to store user data and a small speaker limited to low-quality samples (3 kHz 4-bit ADPCM or 1.5 kHz 8-bit PCM).
Expansions
Nintendo shipped this system with another controller to be used on the opposite hand, the Nunchuk, this one comes with its own accelerometer, joystick and two buttons. It’s connected to a 6-pin proprietary port on the Wiimote.
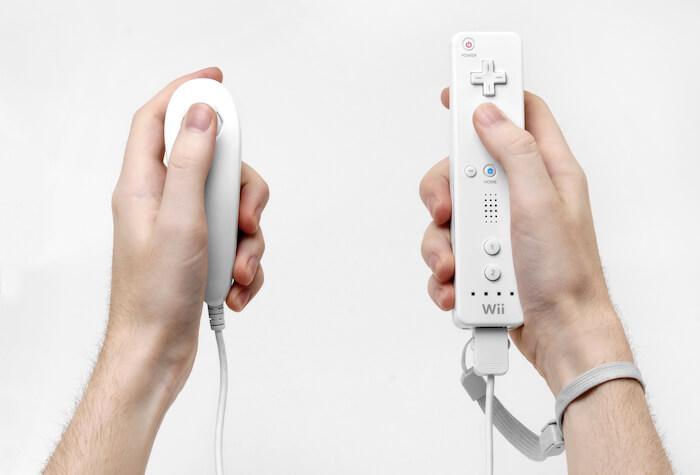
Other accessories were also built for this port, each one provided different types of input.
CPU
After the success of Gekko, IBM presumably grabbed this design and re-branded it as ‘750CL’ for other manufacturers to use [3]. Then, when Nintendo requested a new CPU to use with their new console, still known as ‘Revolution’ (hence the RVL prefix on their stock motherboards), IBM and Nintendo agreed to use a 750CL clocked 1.5 times the speed of Gekko. This CPU is known as Broadway [4] and runs at 729 MHz.
After having reviewed Gekko, I’m afraid there aren’t many changes found in the new CPU. However, this may be an advantage: GameCube developers were able to start developing their new Wii games right away thanks to all the experience they gained with Gekko. Moreover, the fact that Broadway runs 1.5x the original speed will allow them to push for more features and quality.
What about memory?
This one is an interesting bit, the old GameCube memory layout has been re-arranged and enhanced with the following changes:
- Splash (24 MB of 1T-SRAM) now resides inside the Hollywood SoC (explained later) and it is now called MEM1 [5].
- ARAM (16 MB of serial SDRAM) is long gone, however…
- There’s a new memory chip, MEM2, which includes 64 MB of GDDR3 SDRAM for general purpose.
- This type of memory is based on the traditional DDR2 system but revamped with higher bandwidths (~2 times the original transfer rates) and reduced power consumption, which is ideal for GPUs.
Backwards compatibility
For now, you can think of this console as a superset of the GameCube and as such, compatibility with the previous generation of games is naturally inherited. That being said, in order to make the Wii fully backwards compatible, the old set of external ports were brought to the Wii, these include the GameCube controller and memory card ports. However, there’s a new constraint: The new memory map is incompatible with the old one. Thus, a thin ‘emulation’ layer was implemented in software (more details in the ‘I/O’ and ‘Operating System’ section).
Regarding the GameCube accessories using the Serial/Hi-Speed socket, I’m afraid the Wii didn’t include these ports, so those accessories can’t be used here.
In later years, new revisions of the Wii saw these ports removed, unfortunately.
Graphics
Similarly to the GameCube (where the graphics component, I/O interfaces and audio capabilities were combined into a single package called ‘Flipper’), the Wii follows suit and houses a big chip next to Broadway called Hollywood. In here, we find the graphics subsystem which, to be fair, is identical to Flipper’s albeit with minimal corrections.
Thus, Hollywood’s GPU still performs the same tasks that Flipper’s counterpart did back in the day but now enjoys 1.5x the clock speed (243 MHz). This increase means that more geometry and effects can be processed during the same unit of time.
Functionality
As the 3D engine is still Flipper’s, instead of repeating the same pipeline overview, I will mention some interesting design changes that games had to undergo:
Standardised Widescreen
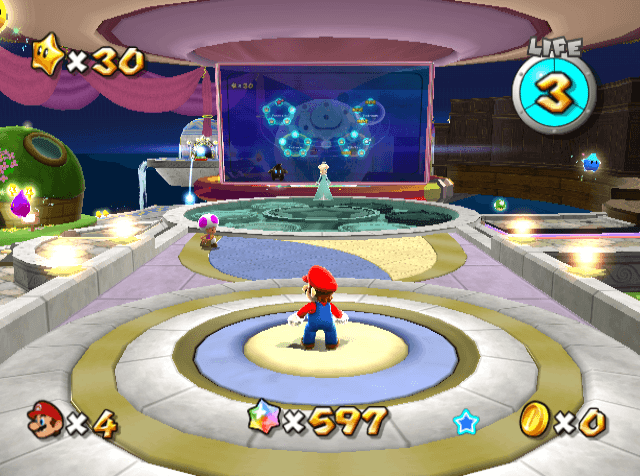
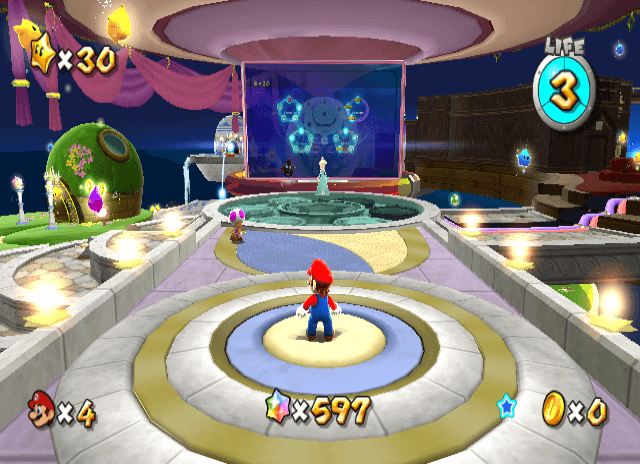
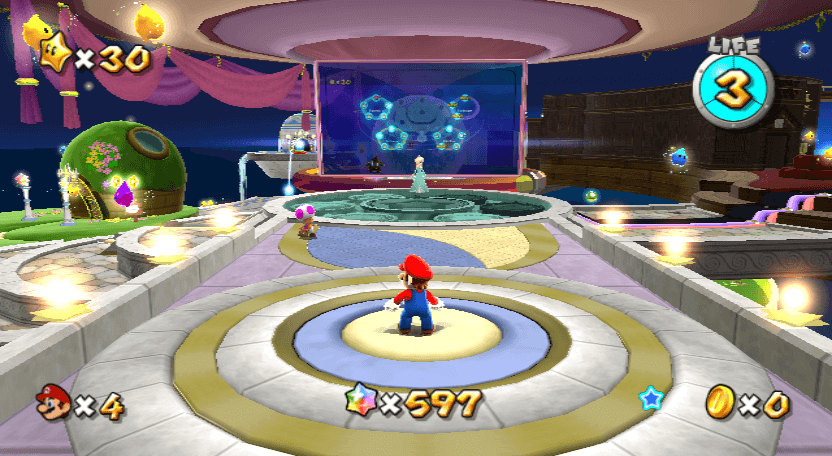
GameCube games lacked proper support for widescreen displays (that is, composing 16:9 frames, departing from the traditional 4:3). Nevertheless, Flipper’s GPU was already able to do so and a handful of games provided options to activate it, although this was still considered an exclusive feature.
Be as it may, the framebuffer remains identical and the video encoder still outputs a PAL or NTSC-compliant frame, so this ‘widescreen’ feature is instead accomplished by widening the field of view in the projection matrix. The result is a scene rendered with a larger view angle that now appears squashed horizontally. However, the widescreen TV also plays a part in this process, as it will subsequently stretch the 4:3 frame (coming from the console) and the displayed image will thus look more or less in the correct ratio. If you are curious, this technique is not new, it’s been used in film projection and it’s referred to as anamorphic widescreen. Also, it’s amusing how SNES developers had to deal with the opposite effect.
Back to the point, the Wii standardised this feature by allowing a ‘widescreen mode’ to be activated from its system settings, which in turn promoted its wide adoption (pun intended).
Screen Interaction
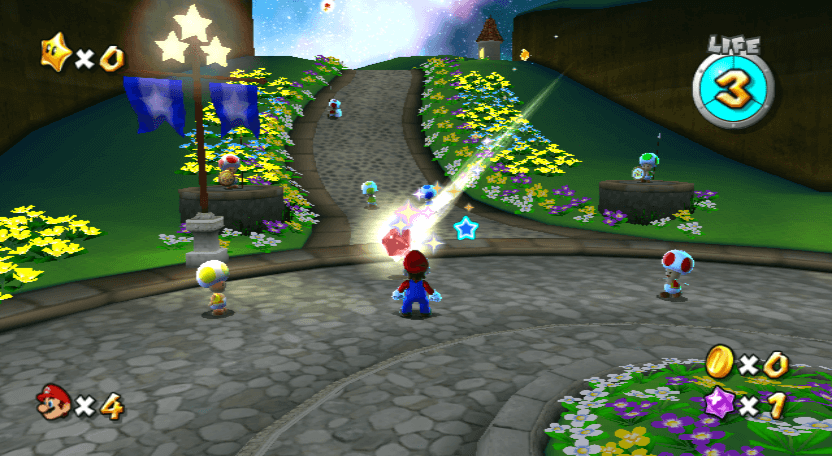
You can pick up the stars by pointing at them.
The new and disruptive controller design meant new types of interactions on Wii games. Since the Wiimote enabled users to point at the screen, some games like Super Mario Galaxy or The Legend of Zelda: Twilight Princess used this feature to allow the player to interact with the scenery.
In the report titled Myth Debugging: Is the Wii More Demanding to Emulate than the GameCube? [6], developers of the Dolphin emulator explain that games like Super Mario Galaxy and other first-person shooters rely on the embedded z-buffer to identify the object the Wiimote is pointing at and/or check how far the object is from the Wiimote cursor.
This is not a new feature per se, but a novel use of current capabilities. GameCube games didn’t depend on a multi-use controller with pointer functionality. Now, players can control the character and point at the screen at the same time.
Updated Designs
The extra megahertz of Broadway and Hollywood, combined with avant-garde designs, brought some improvements to character models. It may not be as significant as other generations, but it’s still noticeable and appreciated.

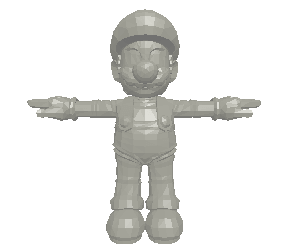
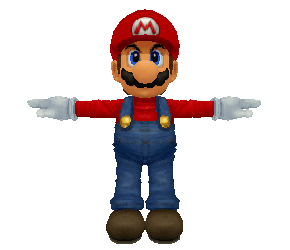 Interactive model available in the modern edition
4,718 triangles.

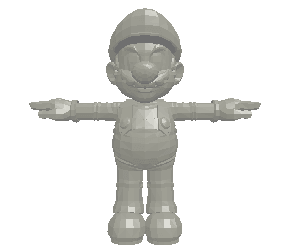
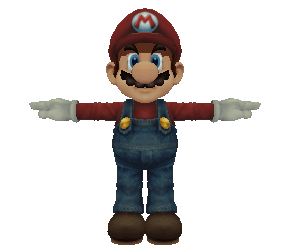 Interactive model available in the modern edition
5,455 triangles.

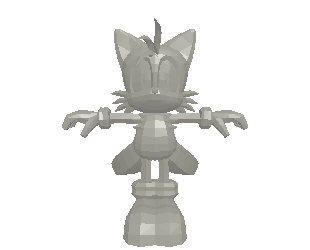
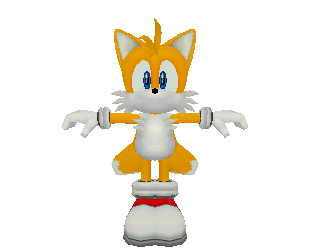 Interactive model available in the modern edition
1,985 triangles.

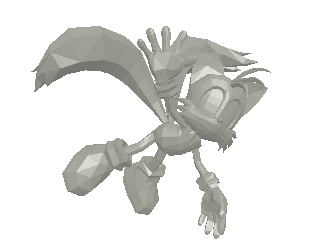
 Interactive model available in the modern edition
3,644 triangles.
Video Signal
Surprisingly enough, this console doesn’t use the old Multi Out port anymore, but a variation of it called AV Multi Out (so much for a name) with a slightly different shape. This one carries all of the previous signals plus YPbPr (known as ‘component’) [7]. It also includes some data lines that the system uses to identify the type of cable plugged in.
Unfortunately, this medium inherits the same limitations of the GameCube. That is, no S-Video on PAL systems and no RGB on NTSC ones. Also, RGB can only broadcast interlaced signals (no progressive).
Audio
The Wii includes the same Macronix DSP found in the GameCube, you can take a look at that article for the detailed analysis.
Compared to the GameCube, the only major change is that, since ARAM is gone, either MEM1 or MEM2 can be used as audio buffer.
I/O
The I/O subsystem of this console is truly a game changer (if you’ll pardon the pun). The interfaces are now controlled by a single module that will take care of security too. I’m talking about Starlet.
The hidden co-processor
Starlet is just an ARM926EJ-S CPU wired up to most of the internal components of this console. It resides inside Hollywood, runs at 243 MHz (same as Hollywood) and contains its own ROM and RAM too. Thus, you can consider Starlet an independent computer running alongside the main CPU.

The core is similar to the one used on the Nintendo DS, except for including two ‘special’ additions:
- A ‘J’ in its model name, which denotes the inclusion of Jazelle: A dedicated unit that executes 8-bit Java Bytecode. Java programs would still depend on the virtual machine (known as ‘JVM’), but some opcodes may get executed directly from the CPU. Overall, this could accelerate the execution of compiled Java code.
- A dedicated Memory management unit (MMU) to enable virtual memory. Useful for general-purpose operating systems.
These enhancements are a bit ‘weird’ since they are completely unused on the Wii. Nonetheless, Nintendo selected that core for Starlet. This reminds me of the first iPhone (2G), which also included an ARM CPU with Jazelle (wasted as well).
If you’re wondering, Jazelle never took off. After some iterations it was discovered that Java Bytecode just ran better on software. Later on, ARM succeeded Jazelle with ‘Thumb-2EE’ and, at the time of this writing (June 2021), both of these units have been phased out.


The dark & small front slot is an SD card reader.
Moving on, this ‘I/O CPU’ is tasked with arbitrating access between many I/O and Broadway, and in doing so it also takes care of security (which decides whether to allow access or not). This is especially crucial when it comes to granting access to NAND, for instance, which is where the main operating system and user data are stored.
The chip also inherits some technology from ARM, such as the Advanced Microcontroller Bus Architecture (AMBA), a protocol that facilitates the communication between devices using a set of specialised buses.
Having said that, Nintendo wired up the I/O in a way that makes use of two AMBA buses [8]:
- The AHB Bus (AMBA High-performance Bus): As the name indicates, it’s designed for high-speed communication. Here we find:
- The NAND Interface: Accesses 512 MB of NAND Flash that stores the operating system and user data.
- Two Secure Digital Input Output (SDIO) interfaces: SDIO is a protocol mainly designed for accessing an SD card, but in this case, a second one is used to control the Wi-Fi module (802.11 b/g) as well.
- A USB 2.0 Controller: Interfaces two external USB sockets and an internal Bluetooth 2.0 daughtercard.
- A SHA-1 and AES module: Reserved for security tasks (more details in the ‘Anti-Piracy’ section).
- The APB Bus (Advanced Peripheral Bus): This one is restricted to low-performance components, including:
- The Drive interface: Connects the disc reader.
- The Serial interface: Connects the GameCube controllers.
- The External Interface (EXI): We’ve seen this one before. It communicates with other GameCube hardware, used for backwards compatibility.
Maintaining compatibility
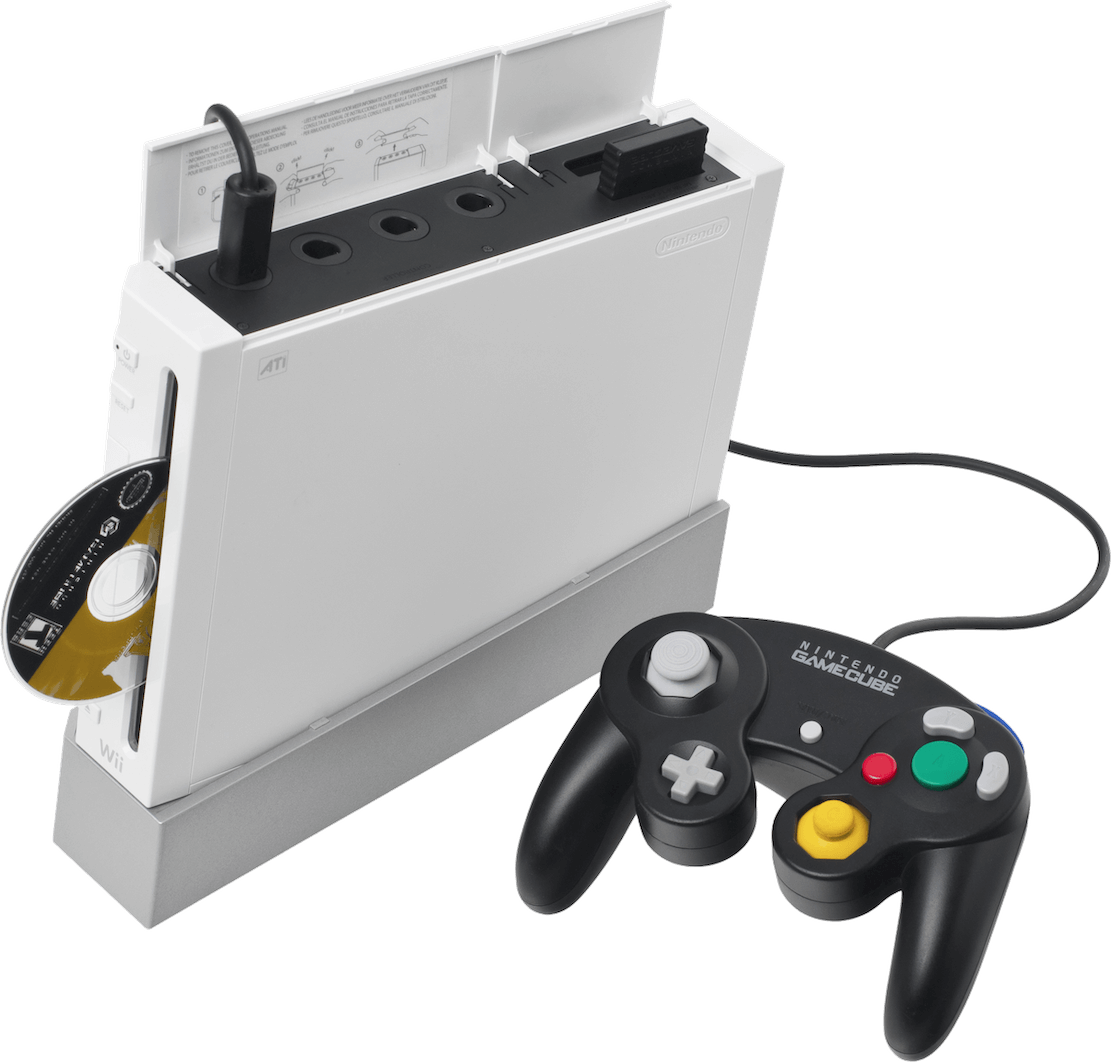
The Wii maintains full backwards compatibility with GameCube games even though the I/O system has changed drastically. This is because Starlet can be reprogrammed when a GameCube game is executed to virtually re-map the I/O, just like the original GameCube would expect to find.
Additionally, the Real-Time Clock chip includes some spare ROM that stores bitmap fonts (the Latin and Japanese set) used by GameCube games; and SRAM to save IPL-related settings.
Operating System
Generally speaking, there are two operating systems residing in the Wii. One is executed on Broadway (main CPU) and the other one on Starlet (I/O CPU). Both reside inside those 512 MB of NAND memory and can be updated.
Starlet’s OS
Starlet is already an interesting piece of hardware, but its software is even more intriguing. You see, not only does this OS have complete access to every single corner of the console, but it’s also the first thing that runs when the power button is pressed.
Starlet runs a system unofficially referred to as Input/Output Operating System or ‘IOS’ (please, do not confuse this with Apple’s iOS) [10]. IOS is a fully-featured operating system composed of:
- A Microkernel: Controls the ARM9 CPU, executes processes and talks with other hardware using drivers.
- Drivers: Enables the communication with hardware outside the CPU (I/O).
- Processes: Performs a task, such as network management or implementing a file system.
- Cryptographic core: Accelerates encryption-related operations (AES and SHA-1 only).
With this in mind, the main job of IOS is to offload the workload of the main CPU by abstracting I/O and security. For that reason, programmers don’t have to worry about those matters. In order to accomplish this, Starlet reserves between 12 and 16 MB of GDDR3 RAM for its tasks, the rest is used by Broadway and the GPU.
Broadway and Starlet communicate with each other using an Inter-Process Communication or ‘IPC’ protocol: In a nutshell, both CPUs share two registers each. One CPU can write on the other’s registers (the written data may represent a command or a value) and from there, the receiver CPU can perform a function in response.
The update system of IOS is a bit tricky: Updated IOS versions are not installed on top of old ones, but in another slot instead (the reserved area in NAND for IOS is divided into ‘slots’). This is purely for compatibility reasons, since it allows older Wii software to keep using the same IOS version it was developed for.
Nintendo often released IOS updates to improve hardware support (which was necessary when a new accessory was shipped). There’s only one exception when IOS updates actually replace older ones: When a specific version was discovered to have an exploitable vulnerability. This was only for security reasons.
When a GameCube game is inserted, a different thing happens: Starlet boots a MIOS instead. This IOS variant just orders Starlet to emulate the original IPL.
Broadway’s OS
This one is commonly known as the System Menu and effectively runs on the main PowerPC CPU (Broadway).
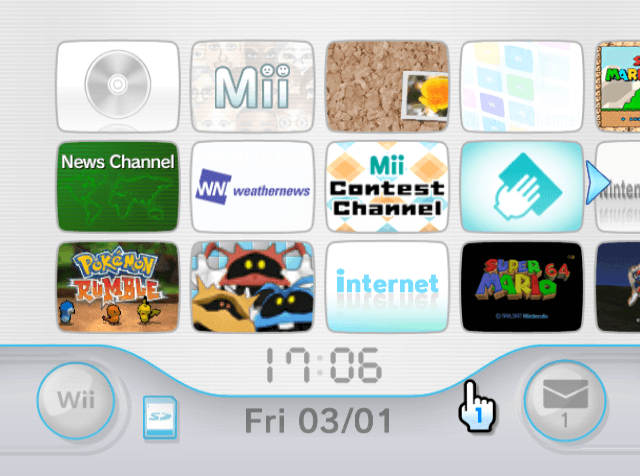
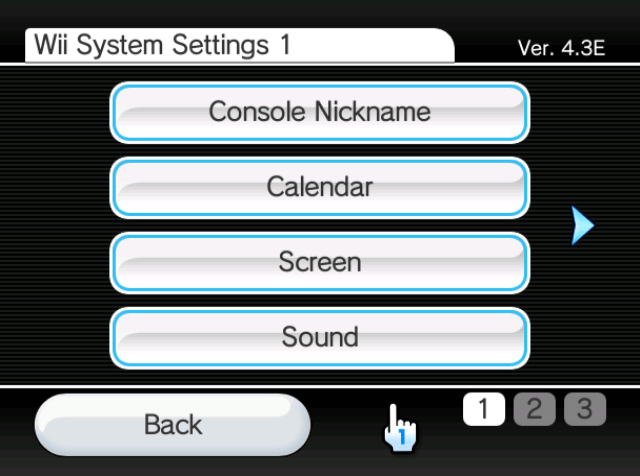
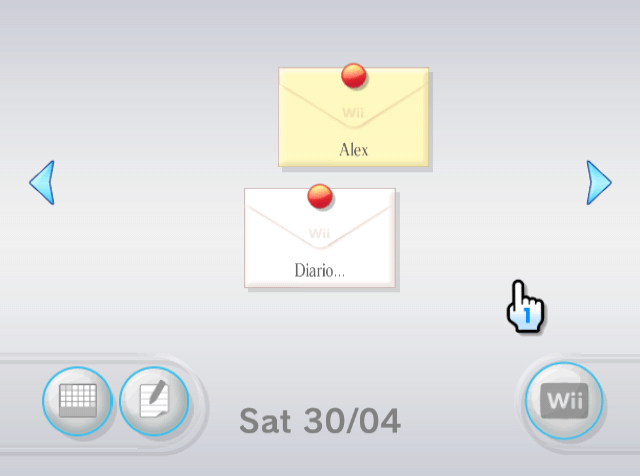
Compared to IOS, I wouldn’t consider this a ‘fully fledged’ OS, but more like a ‘program’ that allows the user to perform the following operations:
- Start the Wii/GameCube game: Only if there is a valid one inserted.
- Change console settings: Including time, date, video mode or sensor bar location, among others.
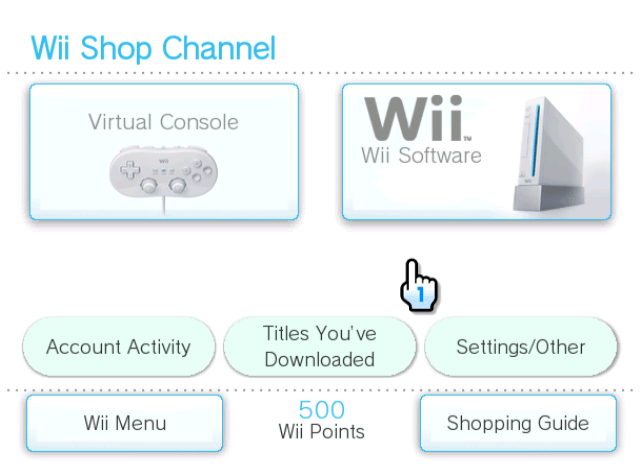
- Run apps: One of the novelties of this console is the ability to install small Wii games (called ‘WiiWare’), retro games (‘Virtual Console’ games) or just convenient applications (such as an internet browser). Nintendo called these channels, but they are also referred to as titles by the OS.
- Users can download/buy channels through a pre-installed channel called Wii Shop Channel.
- Virtual Console titles embed an emulator to run the game itself. Curiously enough, the emulator is not shared across the system or even between games of the same platform. This allows to optimise the emulator for specific games.
- Send/Receive messages: Wiis have a unique ID (burned in their SEEPROM chip) which can be shared to exchange messages between other Wiis. Messages can be seen on the Message Board.
- Nintendo and Wii games also used this medium to provide a newsletter as well.
Just like IOS, Nintendo released multiple updates to this system too. Some fixed security holes, others added more features. A notable new feature was the ability to store channels on the SD card.
Any program running on Broadway (including the System Menu) relies on a specific IOS version to work. When a game or a channel is booted, Starlet reboots itself using the declared version of IOS needed.
Update medium
Nintendo refers to them as System updates. They contain the two OSes in the same package and use ordinal numbers for versioning. The last version known is 4.3E, released in June 2010.
System update packages can be fetched from Nintendo’s Servers or game discs. Users can manually check for updates using the System Menu. Updates are forced if a game requires a specific version of IOS that is not installed (and the disc happens to contain the required packages).
Boot sequence
So far we have discussed two very different operating systems that reside in this console and run concurrently. This seems fairly simple, although both have to be carefully coordinated during the start of the console to work properly afterwards.
That being said, the boot process of this console is as follows [11]:
- User taps the ON button on the console.
- Boot0 stage: Starlet runs a hardwired program found in its embedded Mask ROM (1.5 KB).
- In a nutshell, Starlet decrypts and checks the integrity of the first 96 KB of NAND, Starlet then calculates its hash and compares it against a saved hash found on Starlet’s embedded OTP memory. If both hashes do not match, then the console is induced in an infinite loop.
- Boot1 stage: Starlet runs a small program found in that aforementioned 96 KB of NAND.
- This program will just instruct Starlet to initialise (clear) the 64 MB of GDDR3 RAM, then decrypt and verify the rest of NAND.
- Boot2 stage: Starlet loads the initial IOS (needed for the System Menu) and then kickstarts Broadway.
- Broadway starts the System Menu. The user is now in control.
Games
While new games did not always come with considerable graphical leaps, they did surprise users with the number of features they could now offer. This was thanks to the new services Nintendo shipped with the console’s launch, ranging from the new set of controls, to a standardised online infrastructure (WiiConnect24) which enabled free online gaming.
Medium
Wii games are distributed using a proprietary disc format called Wii Optical Disc (I know, the name can’t get more obvious). Anyhow, Matsushita/Panasonic designed this format based on the traditional DVD disc while adding non-standard features, like a burst cutting area on the inner section of the disc to prevent unauthorised reproductions.
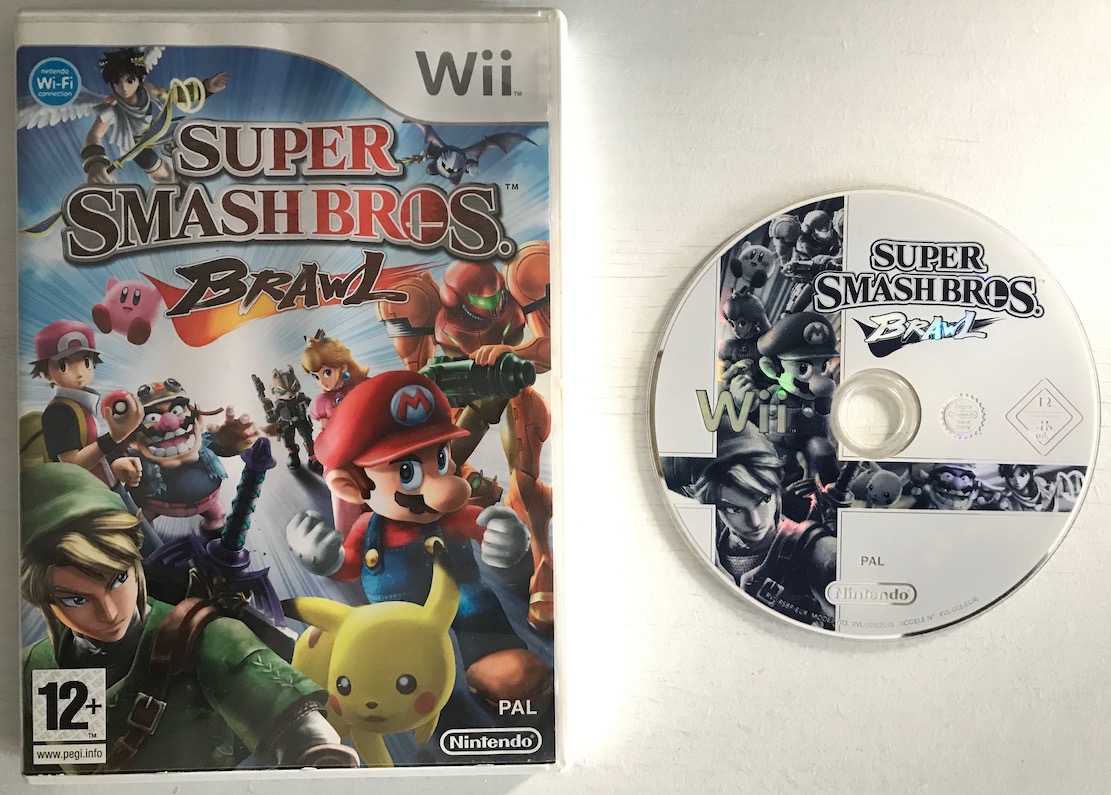
The Wii disc provides either 4.7 GB (if single-layer) or 8.54 GB (if double-layer) of space available. They often contain two partitions: The first one for system updates and the other one for the actual game.
Some games like Super Smash Bros. Brawl included more partitions to store multiple Virtual Console games, which were executed inside the main game.
Development
As part of the tradition, Nintendo supplied a development kit. This one was called NDEV [12] and shaped like an enlarged black brick. NDEV shipped with enhanced I/O and two times the amount of MEM2 (128 MB in total) for debugging purposes.
The official software suite was named Revolution SDK [13] and it included various tools, compilers, debuggers and frameworks to carry out development (mostly in C/C++). Nintendo distributed subsequent updates through a web portal called Warioworld.com (now offline/redirected) which only approved developers could access.
The official SDK relies on IOS calls to interact with the Wii hardware, this is why IOS updates are often correlated to SDK updates.
Return to Home
Considering all the software advancements of this console, it may surprise you that games still run on bare metal, which means that they have complete control of Broadway, but not of Starlet (hence, security mechanisms are implemented here). Needless to say, the game’s behaviour is still subject to Nintendo’s approval before getting distributed.
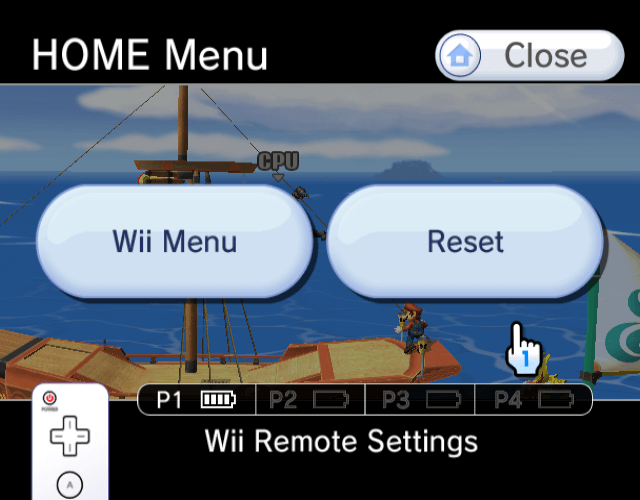
Having said that, there are certain features across different games that look awfully identical, somehow. For instance, do you remember the famous HOME Menu? Pressing the ‘HOME’ button on the Wiimote will trigger a screen popup in-game, enabling the user to return to the System menu without the need to reboot the console. Considering the OS does not provide this feature, how did every single game manage to come up with the same graphical interface?
The answer is simple, Nintendo included in their SDK some mandatory libraries that games have to embed. Lo and behold, one of them draws that screen. Furthermore, this is the reason you’ll find that only homebrew apps feature ‘original’ designs for the home menu.
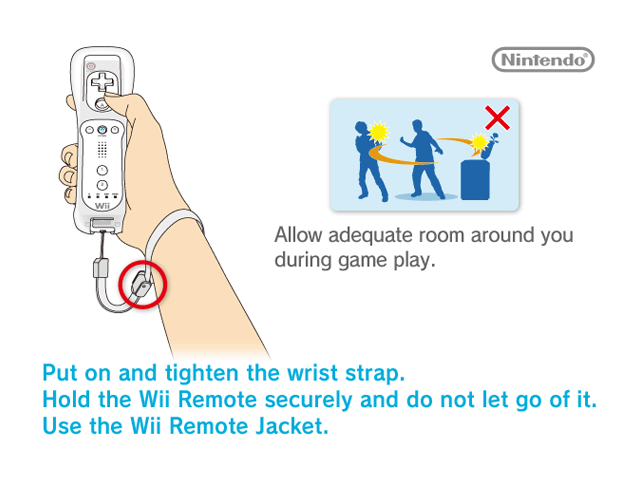
The official HOME Menu is one of the 200 or so requirements games had to include, as ruled by the Wii Programming Guidelines document (found on the official SDK). Other requirements consisted of displaying the ‘Wii Strap reminder’ screen (which is just a BMP image) at the start of the game, followed by another rule that dictated how to interact with it.
Personalised titles
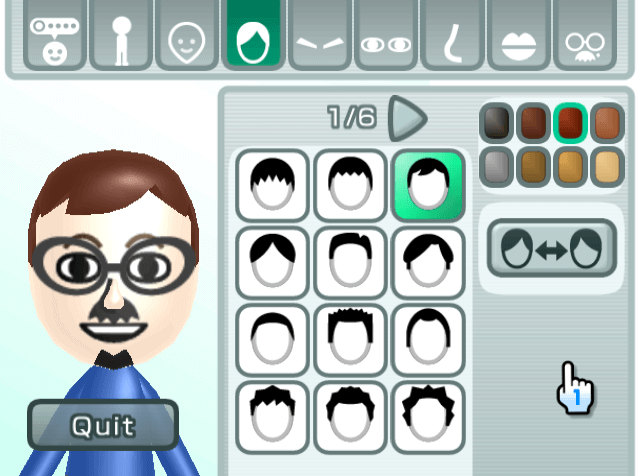
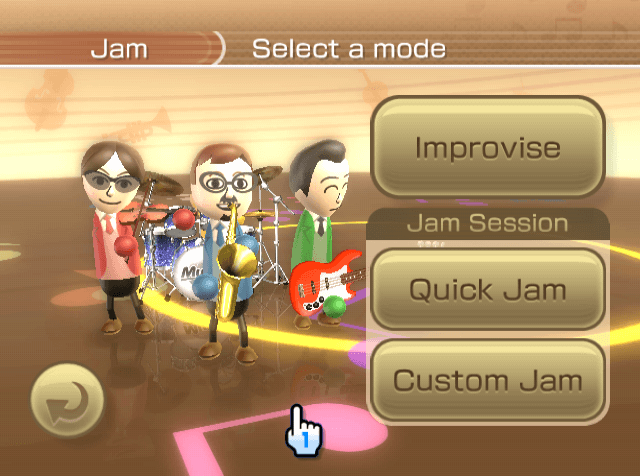
Wii Music (2008).
Another new feature I would like to emphasise is the introduction of Miis, some sort of avatars that users could create using a dedicated channel called Mii Channel.
But the fun didn’t stop there, since games could also fetch these new-created Miis to personalise gameplay.
Anti-Piracy & Homebrew
I think the number of features that this console offered made it very attractive for hacking, as cracking the security system would allow homebrew developers to get their hands on the console’s capabilities without having to go through Nintendo’s checks. Be as it may, the Wii ended up having a fantastic Homebrew library.
Copy protection
Let’s start with the common victim: The disc drive.
Wii discs include the aforementioned ‘burst cutting’ area which is inaccessible by conventional readers. So, in the absence of this, the driver will always refuse to read the content.
Modchip developers discovered that the drive contained a debug interface called ‘Serial Writer’ [14], though this port is locked until a secret key is entered. Still, it was a matter of time before the key was discovered. Once this happened, modders were able to disable the copy protection and subsequently developed a modchip that automatised this process.
Matsushita released further revisions of this drive obfuscating the debug interface, however, other flaws in the reader were discovered to re-enable it again.
It’s worth mentioning that the main benefit of modchips was plain piracy, as the disc content is still encrypted, so more research and tools were needed to run custom code.
GameCube homebrew, on the other hand, was already possible to execute by following previous exploits discovered on the predecessor.
System encryption
This is probably the most complex section of this console, yet its never-stopping research opened the door to lots of talented developers and amazing programs.
The Wii designed its internal security around a couple of cryptographic ciphers (AES, RSA, ECC, SHA-1 and HMAC). To keep explanations easy-to-follow, let’s take a look at each group separately:
Shared encryption
The communication between many components (NAND, game disc and SD card) is encrypted to avoid being tampered with. Nintendo chose a symmetric key system to protect it [15], meaning that the Wii uses the same key to encrypt and decrypt its data.
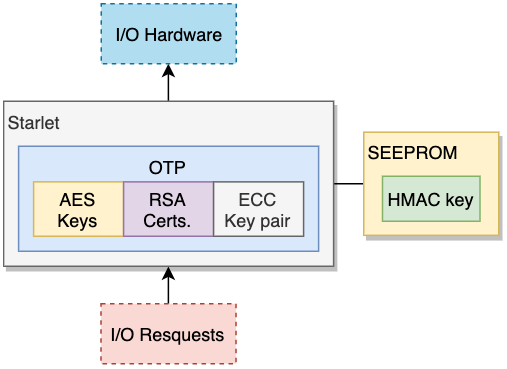
Starlet has three 128-bit AES keys stored in its OTP memory [16], these are written once during manufacturing:
- Common key: A global key generated by Nintendo that’s found on all Wiis, it is used to decrypt the first layer of encryption used on channels and disc-based games (we’ll refer to them as titles from now on).
- SD Key: This one is used to encrypt/decrypt data transferred to the SD card, and only the System Menu can perform these transfers.
- Nintendo stored a copy of this key inside IOS for no clear reason.
- NAND Key: This key is randomly generated during the manufacturing process (meaning that it’s unique for every Wii) and it’s used to protect the NAND chip.
With this, we can see that Starlet is in charge of the encryption/decryption of sensible content, this is why this CPU is the only one that has access to confidential data.
Chain of trust
Titles contain another layer of security, RSA-2048. This is an asymmetric cipher, meaning that we need one key to encrypt the content and another one to decrypt it. In a nutshell, this allows Nintendo to encrypt titles using an undisclosed key (called ‘private key’), while the Wii decrypts them using a ‘public key’, which is stored in the console. If hackers were to obtain the public key, it would not be enough to crack the security system, as data is still expected to be encrypted using the private key, which only Nintendo knows.
Furthermore, RSA is not only used for encrypting content, but also to check the integrity of said encryption. You see, Nintendo uses multiple keys that are used to sign (encrypt) already-encrypted data, forming a chain of encryption with the only purpose of making sure:
- Every single key used has been authorised by Nintendo.
- Data hasn’t been altered and re-encrypted without authorisation.
Let me give you an example of how this works:
- Nintendo creates a key named
x. - Nintendo programs Starlet to trust content only signed with key
x. - If Starlet finds itself having to decrypt a title with key
y, it will only proceed ifyhas been signed with keyx.
This is called a Chain of trust. Outside the Wii, this technique is commonly used to protect most of our communications across the globe (for instance, web browsers using HTTPS rely upon ‘root certificates’ to validate the authenticity of unknown certificates).
Starlet’s chain
Starlet’s OTP stores public keys (meaning that, for our purposes, it can only decrypt and verify the signature of content). Its chain of trust is made of the following keys [17]:
- Root Key: Signs the CA key.
- Starlet only needs to stores this (public) key, the rest can be decrypted (and subsequently trusted) if it’s been signed by this key.
- The Certification Authority Key (CA): Signs the XS and CP keys.
- The XS Key: This key signs ‘Tickets’, a type of data that contains a list of AES keys needed to decrypt titles (called ‘title keys’).
- The CP Key: Once the title is decrypted using the respective title key, the CP key is used to sign the metadata of a title (called ‘TMD’).
- While it doesn’t sign the content per se, the metadata includes an SHA-1 hash that Starlet uses to verify the integrity of that data.
As you can see, all of this enables Nintendo to be the sole distributor of content, which can be a good thing for game studios concerned about piracy.
More keys
This system also contains a pair of ECC private and public keys. Elliptic Curve Cryptography (ECC) is another algorithm similar to RSA. In this case, it’s only used to sign the content transferred through the SD card. This is what prevents content copied from one Wii to be used in another one.
The ECC key is signed by yet another RSA public key called MS, which will allow Starlet to trust the ECC key.
The last key used by this console is the HMAC key, which uses another algorithm that combines SHA-1 hashes and HMAC. During the boot process, Starlet checks that NAND hasn’t been altered by third-party hardware. To do that, it computes the SHA-1 hash of NAND and compares it against a hardwired hash to check if they match. In addition to that, the saved hash is signed using the HMAC key to make sure it’s authentic.
As a final note, the HMAC key is stored in SEEPROM (outside Starlet), not in OTP.
Observations
After all this, it’s worth mentioning that when the system runs GameCube games, none of the mentioned encryption methods are used. Instead, Starlet will only check that the game only accesses its designated memory locations. This is because 1/4 of GDDR3 RAM is allocated to simulate old ARAM.
The fall of encryption
Let’s start with AES keys, the algorithm may be hard to crack, but if the keys are extracted somehow (especially the common key), that layer of security would be instantly nullified. Thus, the main challenge is how to extract them.
Well, a group of hackers called Team Twiizers found out that the lack of signatures on GameCube mode may be a promising attack surface [18]. They not only discovered that 3/4 of that GDDR3 RAM were not cleared after running a GC program, but also that by bridging some address points on the motherboard (using a pair of tweezers, nonetheless) they could swap the selected banks of GDDR3 RAM, allowing access to restricted areas. Lo and behold, the AES keys were found residing in there.
Let’s not forget that this only allows to decrypt the ‘first layer’ of security, but in order to execute unsigned programs (Homebrew), RSA has to be cracked too. Unfortunately, this can be computationally impossible… Unless there are flaws in its implementation. Well, Team Twizzers didn’t stop there so they started reversing how IOS was coded, focusing on its signature verification functions.
RSA signature verification, without going into too much detail, works by comparing the hash of the computed RSA operation against the decrypted signature. After some fiddling, the group discovered something hilarious: Nintendo implemented this function using strncmp (C’s ‘string’ compare).
For people unfamiliar with C, strncmp is a routine used for checking if two strings are equal. This method receives three parameters: two strings and one integer, the latter states the number of characters to be compared. Afterwards, strncmp starts comparing each character until the end of any string (or the character counter) is reached. Strings in C are just a chain of characters terminated by a \0 character, this means that strncmp stops comparing once any string reaches \0. Hence, by composing a Wii title in a way that its hash contains \0 at the beginning, Starlet’s RSA computations will find themselves comparing very short hashes (or even empty ones) with substantial chances of collision (different data that produces the same hash value). Ultimately, using a feasible amount of brute-forcing, this enabled the comparison to return equal… Title is signed!
As if that wasn’t enough, this flaw was discovered on multiple IOS versions - and even in routines found on boot1 and boot2!
The dawn of Homebrew
After this, there was only one thing left: Make the exploit permanent and implement a ‘user-friendly’ tool, so it could run custom programs without hassle.
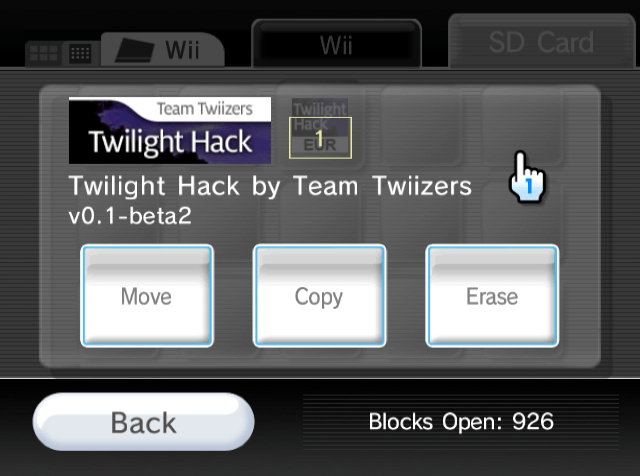
So far, these exploits required the use of extra hardware, so not every user could make use of it… Until Team Twizzers discovered yet another exploit: A game buffer overflow.
I’m referring to the famous The Legend of Zelda: Twilight Princess (a game by Nintendo, by the way). TT discovered that the game’s save file could be modified to overflow the number of characters used for naming the player’s horse. So, when the player attempts to read the overflowed name, it would trigger a chain reaction ending in arbitrary code execution. This could be used to run, let’s say, a program loader.
Since signatures could now be forged, this crafted save file was easily distributed on the net for other people to use. As a result, the homebrew community was now able to execute their custom software.
A permanent state
While further reversing IOS, it was discovered that signatures are only checked during the installation of titles, not during their execution.
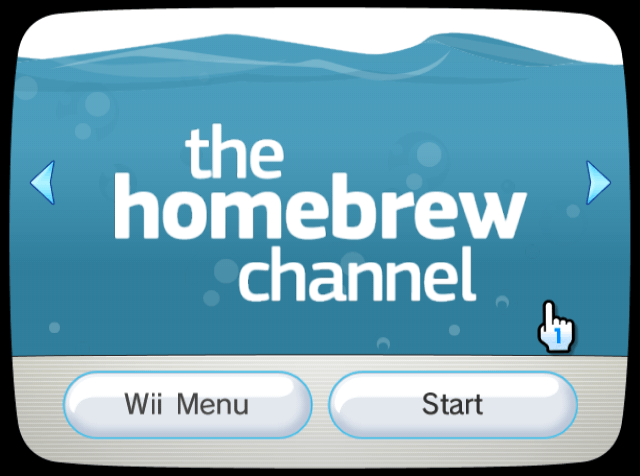
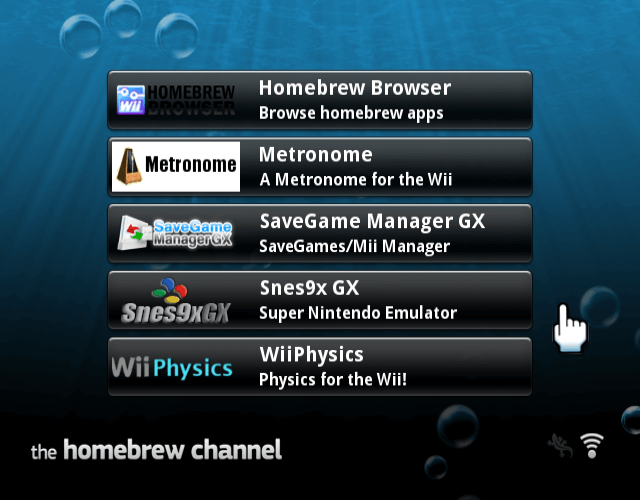
Probably the most user-friendly hack of all times.
Thus, TT did it again. They carefully forged an installable channel that could load arbitrary programs from the SD card. If this channel were to be installed before Nintendo had taken action to mitigate the security issues, then the Wii would enjoy homebrew permanently (independently of Nintendo patching their signature flaws in the future, which they did).
Homebrew Channel was the result of this, this title allowed any user to kickstart homebrew programs that benefited from full control of this system (with all the implications that this means).
Nintendo’s response
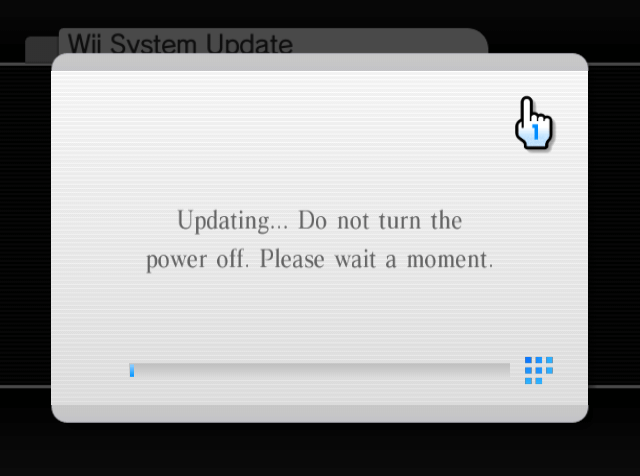
For obvious reasons, Nintendo issued several system updates that fixed the signature exploits on multiple versions of IOS, they also took care of their flawed boot stages by shipping new hardware revisions.
However, there were still fundamental flaws discovered in this system:
- Broadway can reboot Starlet to any IOS version without extra permissions, allowing to exploit non-patched versions.
- Hidden IOS APIs can still be used without special privileges, allowing even more unauthorised control of the hardware.
- The disc drive can receive commands to read conventional DVDs and some IOS contained hidden calls to send those commands. This was particularly worrying for piracy reasons.
So, to wrap this up, what was left after this was just a cat-and-mouse game. Over the next months, different exploits were discovered with Nintendo subsequently trying to patch one after another. This ‘game’ continued until the console reached its end-of-life and no more updates were issued. We can assume the mouse won this one.
At the time of writing, the exploits mentioned in this article have already been patched, but also replaced with currently working ones.
I guess there’s no arguing about the impact the hacking scene made on this system, and who can forget the enormous amount of homebrew that was made available (there was even a homebrew ‘store’, which was faster and freer than the official ‘Wii Shop Channel’).
That’s all folks
Happy new year 2020!
This one took me quite a while, I naively predicted that since most of the content was already done for the GameCube, I would just have to write short paragraphs and add links here and there…
I think it turned out more informational than I expected, so I hope you found it a nice read.
Until next time!
Rodrigo


