Supporting imagery
Model
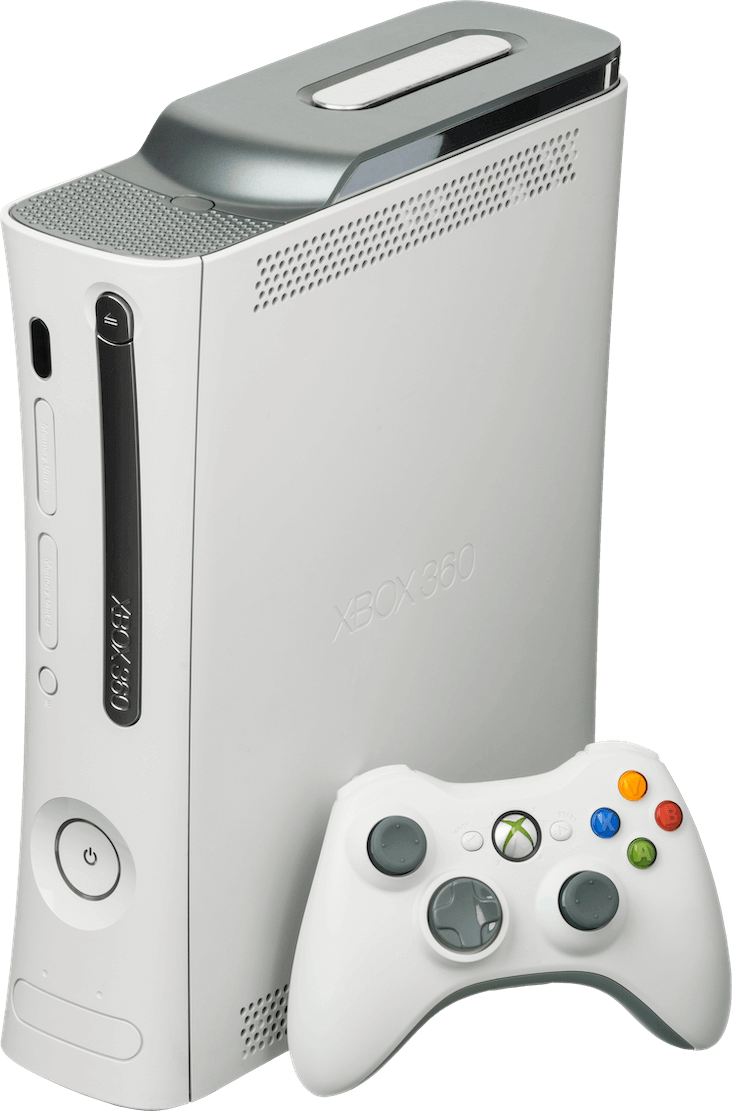
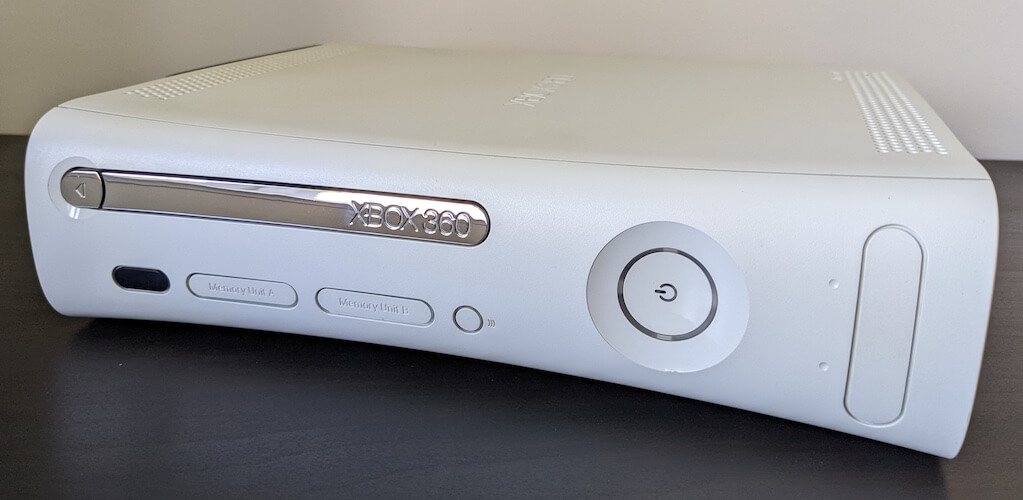
Released on 22/11/2005 in America, 02/12/2005 in Europe and 10/12/2005 in Japan
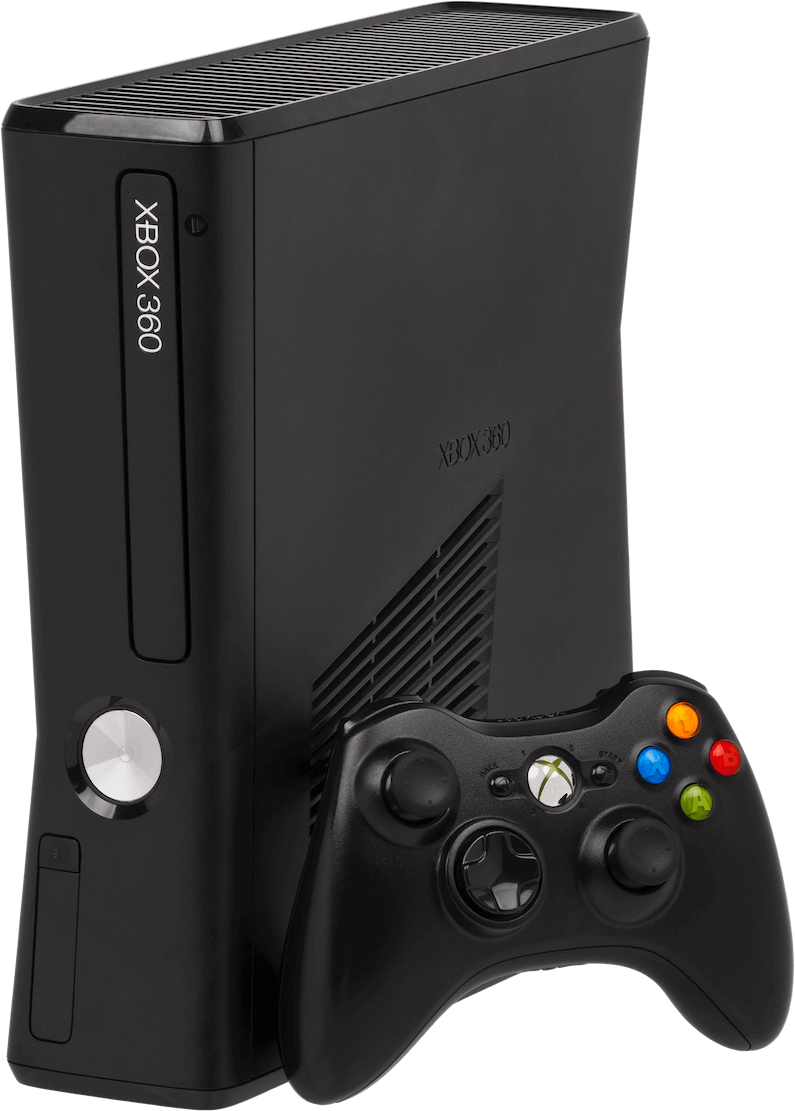
Released on 18/06/2010 in America, 24/06/2010 in Japan and 16/07/2010 in Europe
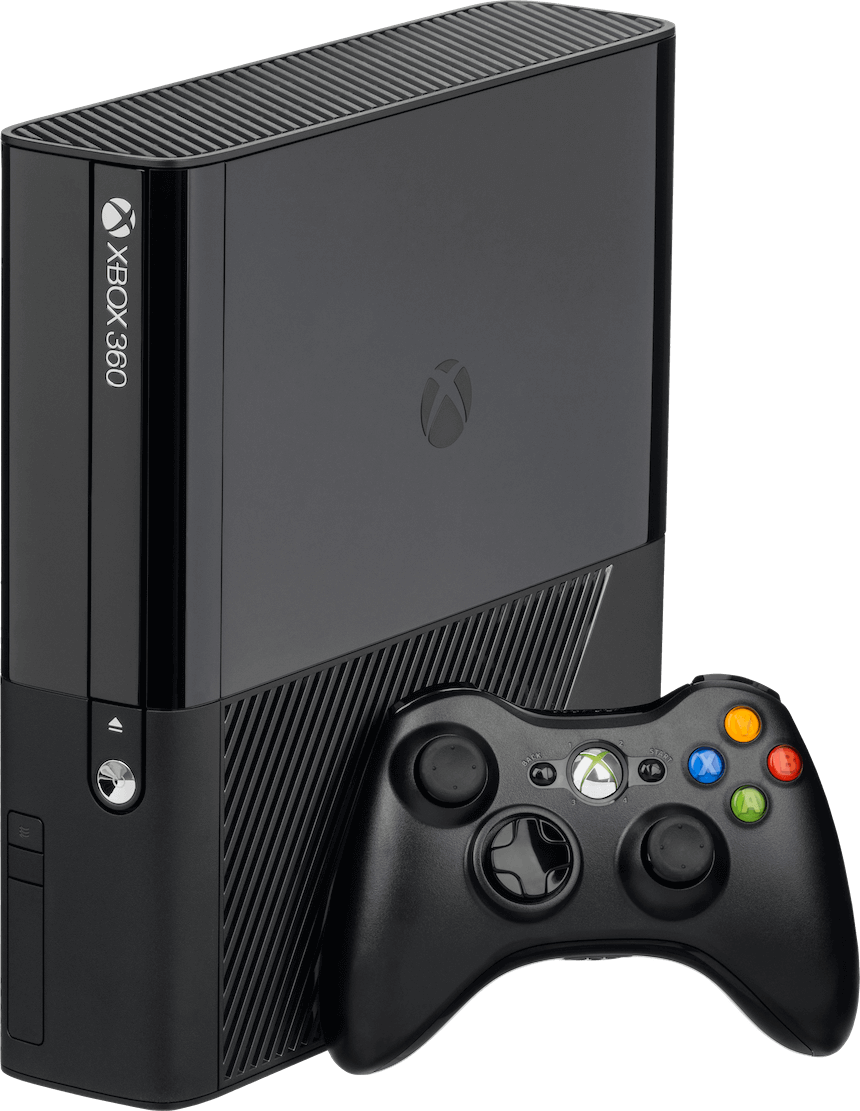
Released on 10/06/2013 in America, 20/06/2013 in Europe and similar in Japan
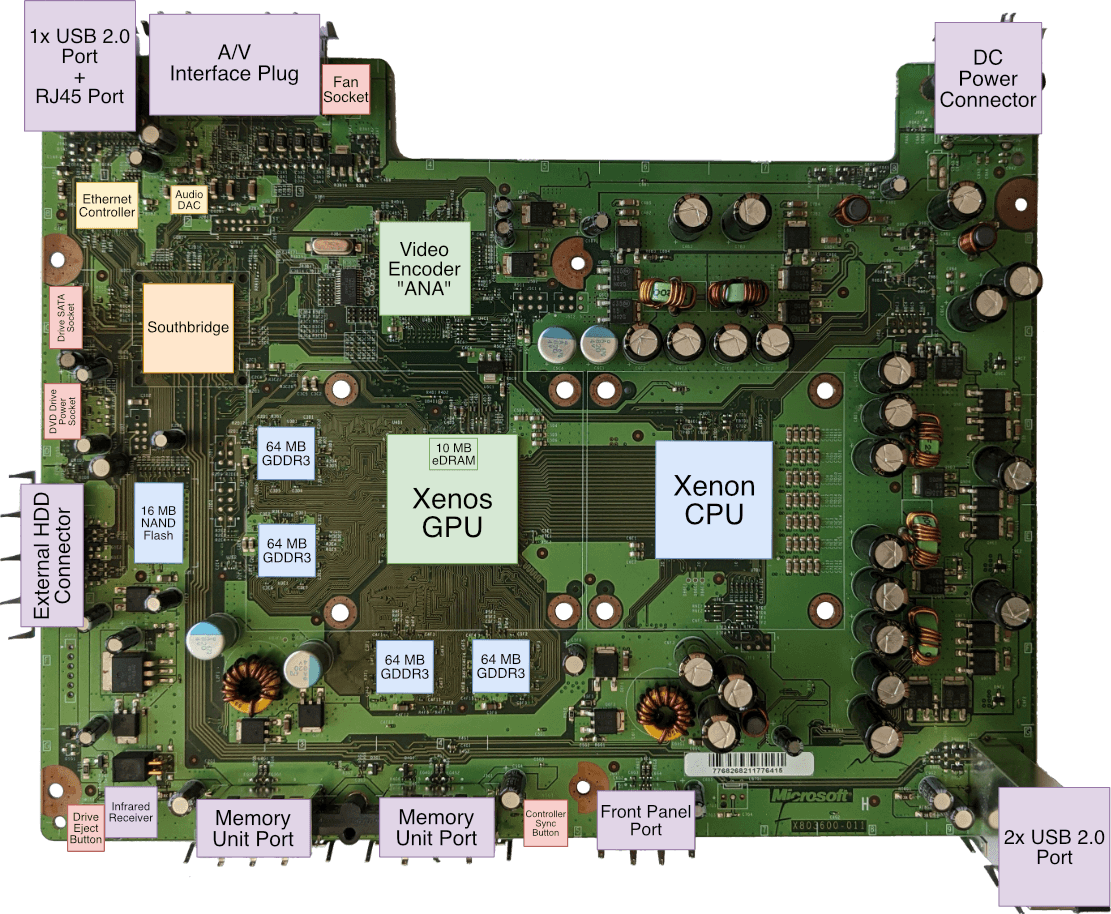
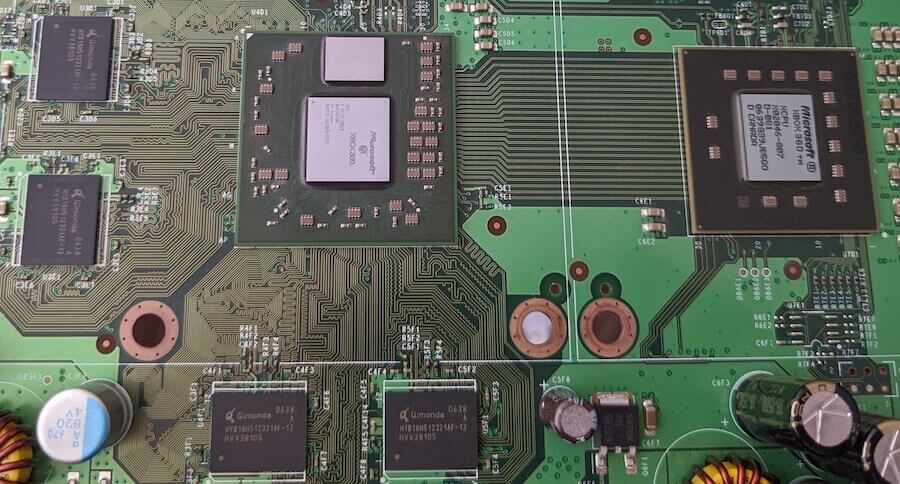
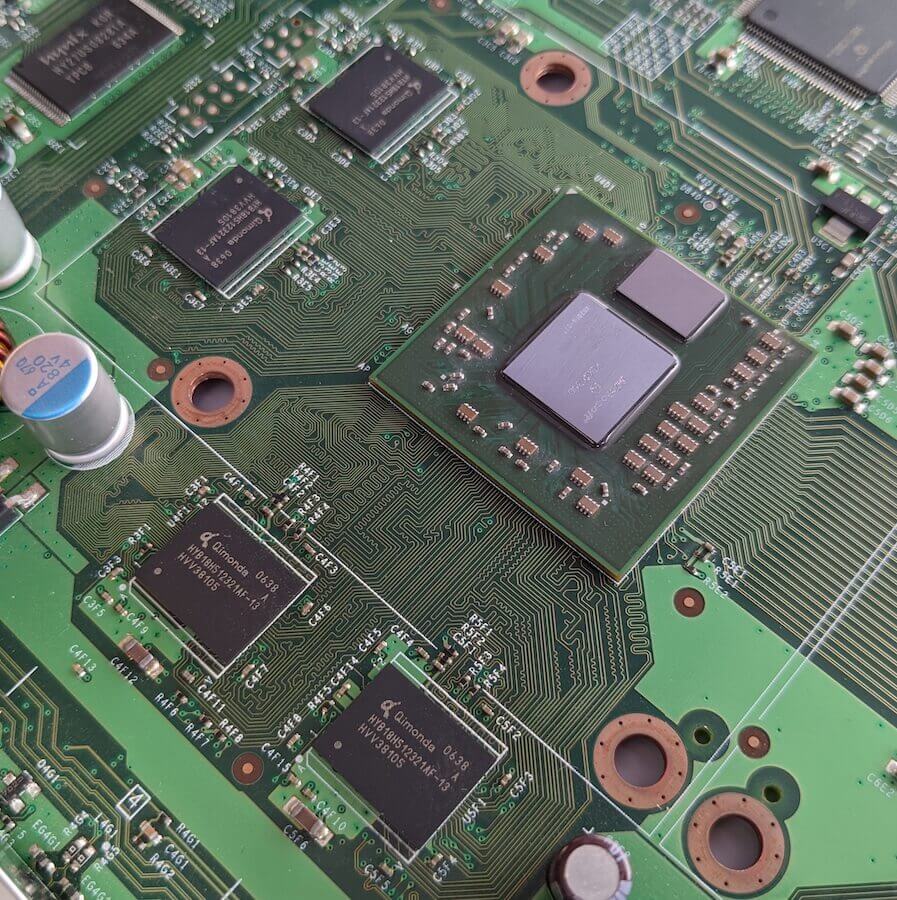
Motherboard

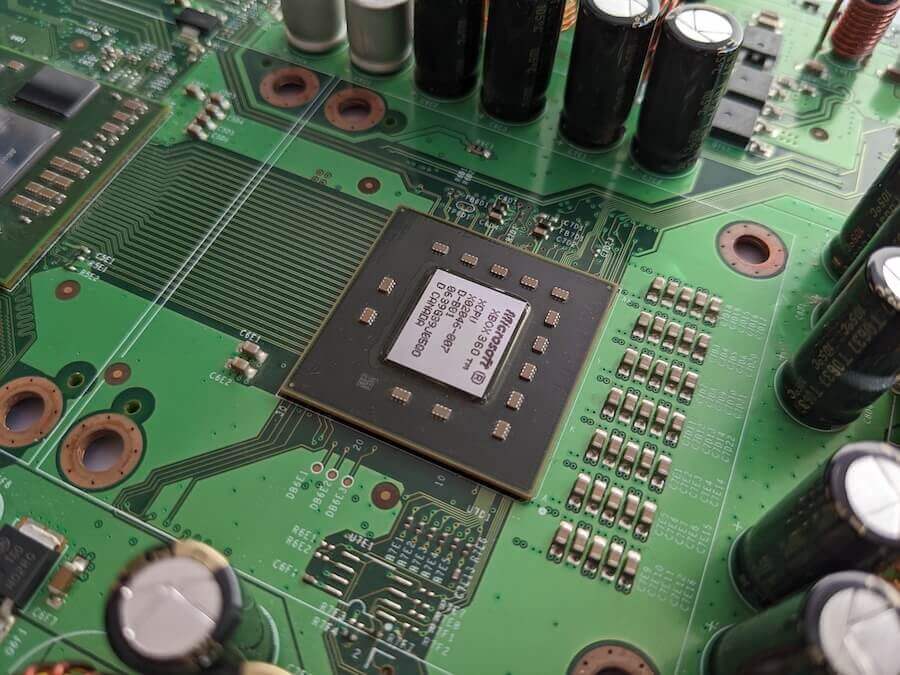
Showing the 'Xenon' revision (the first one), taken from my model from 2005. Xenon motherboards are also famous for being defective by design (they get too hot to play games with!). Remaining GDDR3 chips are found on the back.
Diagram
A quick introduction
Released a year before its main competitor, the Xbox 360 was already claiming technological superiority over the yet-to-be-seen PlayStation 3. But while the Xbox 360 might be the flagship of the 7th generation, it will need to fight strongly once Nintendo and Sony take up retail space.
This new entry in the console architecture series will give you an additional perspective on how technology was envisioned during the early naughties, with emphasis on the emerging ‘multi-core’ processor and unorthodox symbiosis between components, all of which enabled engineers to tackle unsolvable challenges with cost-effective solutions.
Highly recommended pre-reading
The first section of this writing (titled ‘CPU’) makes recurring references to IBM and Sony’s joint venture, Cell. If you don’t know about that component, I highly suggest that you read my previous article about the PS3 beforehand, the latter is written as if the Xbox 360 never existed. This was intentional to avoid confusing the reader with circular references. Hence, the new article completes the timeline by adding Xbox 360 into the mix.
For those who are already familiar with the PS3’s architecture, I’ve structured this study similar to the PS3 article, so you’ll be able to compare both side-by-side objectively if you choose to do so.
Personal video introduction
Because this article is way longer than my previous ones, I also made a quick video where I (attempt to) present this article and give you an idea of the content you will find. You can watch it here. It’s my first ‘personal introduction’, so you’ll have to forgive my occasional fillers!
CPU
Once again, we find ourselves with a new type of CPU that is unlike anything seen on the store shelves. After all, this is another 7th-generation console that reflects an obsessive need for innovation, a peculiar trait during that era.
Introduction
Before we discuss the architecture, I’ll start with a bit of history to bring you up-to-speed. The following paragraphs focus on the business aspect of the Xbox 360’s CPU, whose sequence of events you may find amusing, to say the least.
I’ll try to keep it short so we can focus on the main topics of this series, but if in the end, you are interested in more, you may enjoy a book called ‘The Race For A New Game Machine’ which is written by the former executives at IBM.
From complier to ruler
After enjoying the surprising success of the original Xbox, it was time for Microsoft to work on the successor. The company started by looking for vendors that could face off against Sony’s upcoming technology, however, unlike their previous development, Microsoft now enjoyed the upper hand in forthcoming negotiations.
To put things in context, back when the original Xbox project was still at an early stage, neither Intel nor Nvidia were willing to share their intellectual property with Microsoft. This decision limited Microsoft’s capacity to mould Nvidia’s or Intel’s chips for the specific needs of the Xbox.
For instance, the security subsystem that protected the console against the execution of unauthorised code was implemented outside these two critical chips. This made it vulnerable to snooping attacks that eventually paved way for the execution of Homebrew and piracy. Moreover, Microsoft did not control the manufacturing stage either, so the production of Xbox systems was at the mercy of Intel’s and Nvidia’s supply.
Well, now that Microsoft had gained more leverage in the console market, they weren’t willing to give away those rights anymore.
Sharing common problems
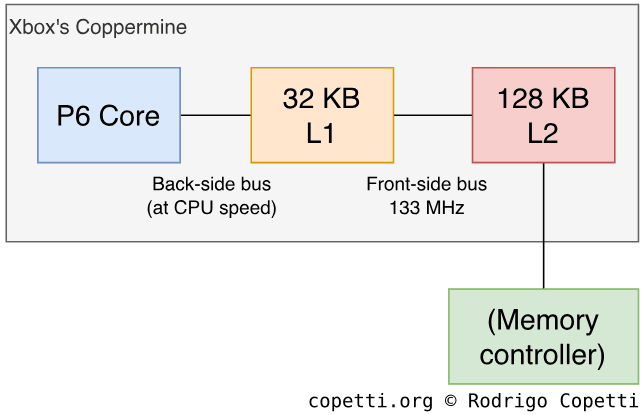

As with any other company in the computer business, the innovation crisis of the early noughties affected both Microsoft and Sony indiscriminately. The difference, however, was that the two placed their bets on different designs for their CPUs. The original Xbox relied on popular off-the-shelf stock (Intel’s Pentium III) with slight customisations, this was a single-core CPU extended with vectorised instructions and a sophisticated cache design. On the other side, Sony’s vectorised venture (the Emotion Engine) consisted of a low-end CPU surrounded by proprietary but potent assistants.
For their new generation, Microsoft settled for a conservative design combined with some experimental ideas. According to their checklist, the new CPU would be multi-core (that is, a chip housing many CPU cores in a symmetrical and homogeneous layout) and the supplier would have to share their Intellectual Property (IP) with Microsoft [2].
The last condition was as critical as the first, as it would enable the Xbox team to bundle a security system inside the chip (which, unlike the original Xbox, would be properly shielded). Furthermore, the IP rights would grant Microsoft a choice of third-party manufacturers to handle demand and negotiate better costs, resulting in a new console with competitive pricing.
Thus, Microsoft began meeting with Intel, though the talks didn’t last long, as Intel wasn’t willing to give out its secret recipe. So, Microsoft kept looking.
Resentful old friends
It so happened that one of the potential candidates for Microsoft was none other than IBM. Maybe I watched too many dramatic documentaries, but I always pictured the two as the kind of passive-aggressive ‘friends’ who only smile at each other if they are among other people.
You see, in the past, IBM and Microsoft formed many partnerships that ended up with bitterness between the two. Be that as it may, their agreements ended up disrupting the status quo of the global market and paved the way for new types of consumer products and developments. To name a few examples:
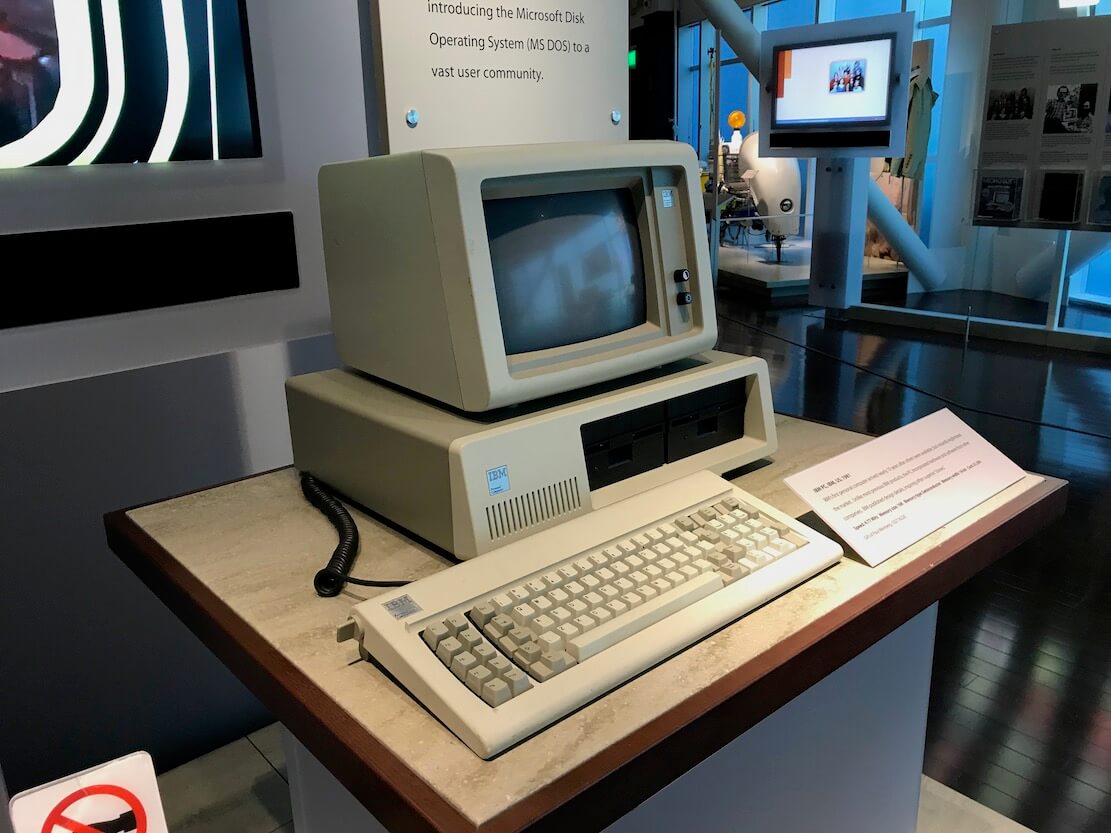
- The arrival of the IBM Personal Computer in 1981 led to a new market of ‘personal computers’ and the subsequent choice of Microsoft’s ‘MS-DOS’ as the default operating system. This granted Microsoft a monopolistic dominance in the PC business in the years to come.
- In the 90s, with the advent of home networking and affordable servers and workstations, IBM and Microsoft’s new venture resulted in OS/2, a new operating system targeting high-end IBM computers. However, upon the unexpected release of Microsoft’s Windows NT, IBM was left alone to fight in an arena already favouring Windows.
By the turn of the century, IBM returned its attention to in-house products, including a partnership with Apple and Motorola that resulted in a series of CPUs with a unique architecture called PowerPC.
When Microsoft approached IBM for a new frictionless venture, IBM was already working with Toshiba and Sony to create a superior PowerPC processor for scientific applications. Nevertheless, IBM was open to new business opportunities.
The new CPU partner
In a turn of events, IBM agreed to share its IP and to design a new multi-core processor, and so the Xbox 360’s CPU supplier became IBM. Although, you may remember this was the same IBM that already signed an agreement with Sony and Toshiba to produce the PlayStation 3’s CPU (‘Cell’). Apparently, IBM assumed Microsoft was not aware of the Cell project [3], and their current contract with Sony did not forbid them from selling to third parties.
All three companies [IBM, Toshiba and Sony]… legally all had rights to go and put any of that technology, any of those processor cores into other spaces. (…) It is very common to develop an interesting, leading-edge new technology and then utilize that technology across multiple platforms. (…) I guess what everyone didn’t anticipate was – before we even got done with the Cell chip and PS3 product – that we’d be showing this off specifically to a competitor. [4]
– David Shippy, chief architect of the Power Processing Unit (PPU)
Ironically, as of 2022, IBM’s PowerPC chips have vanished from both desktop computers and video consoles, maybe this set a bad precedent and greatly affected IBM’s trust in future businesses? I go over this effect later on.
To sum it up, IBM signed an agreement with Sony and Toshiba to develop Cell in 2001. Two years later, in 2003, IBM agreed to supply Microsoft with a new low-powered multi-core CPU. Microsoft’s CPU will be called Xenon and will inherit part of Cell’s technology, with extra input from Microsoft (focusing on multi-core homogeneous computing and bespoke security). Also, while IBM would brand Cell with its ‘BladeCenter’ line of servers, Xenon could only be fitted on an Xbox 360 motherboard.
Cell’s half-sibling
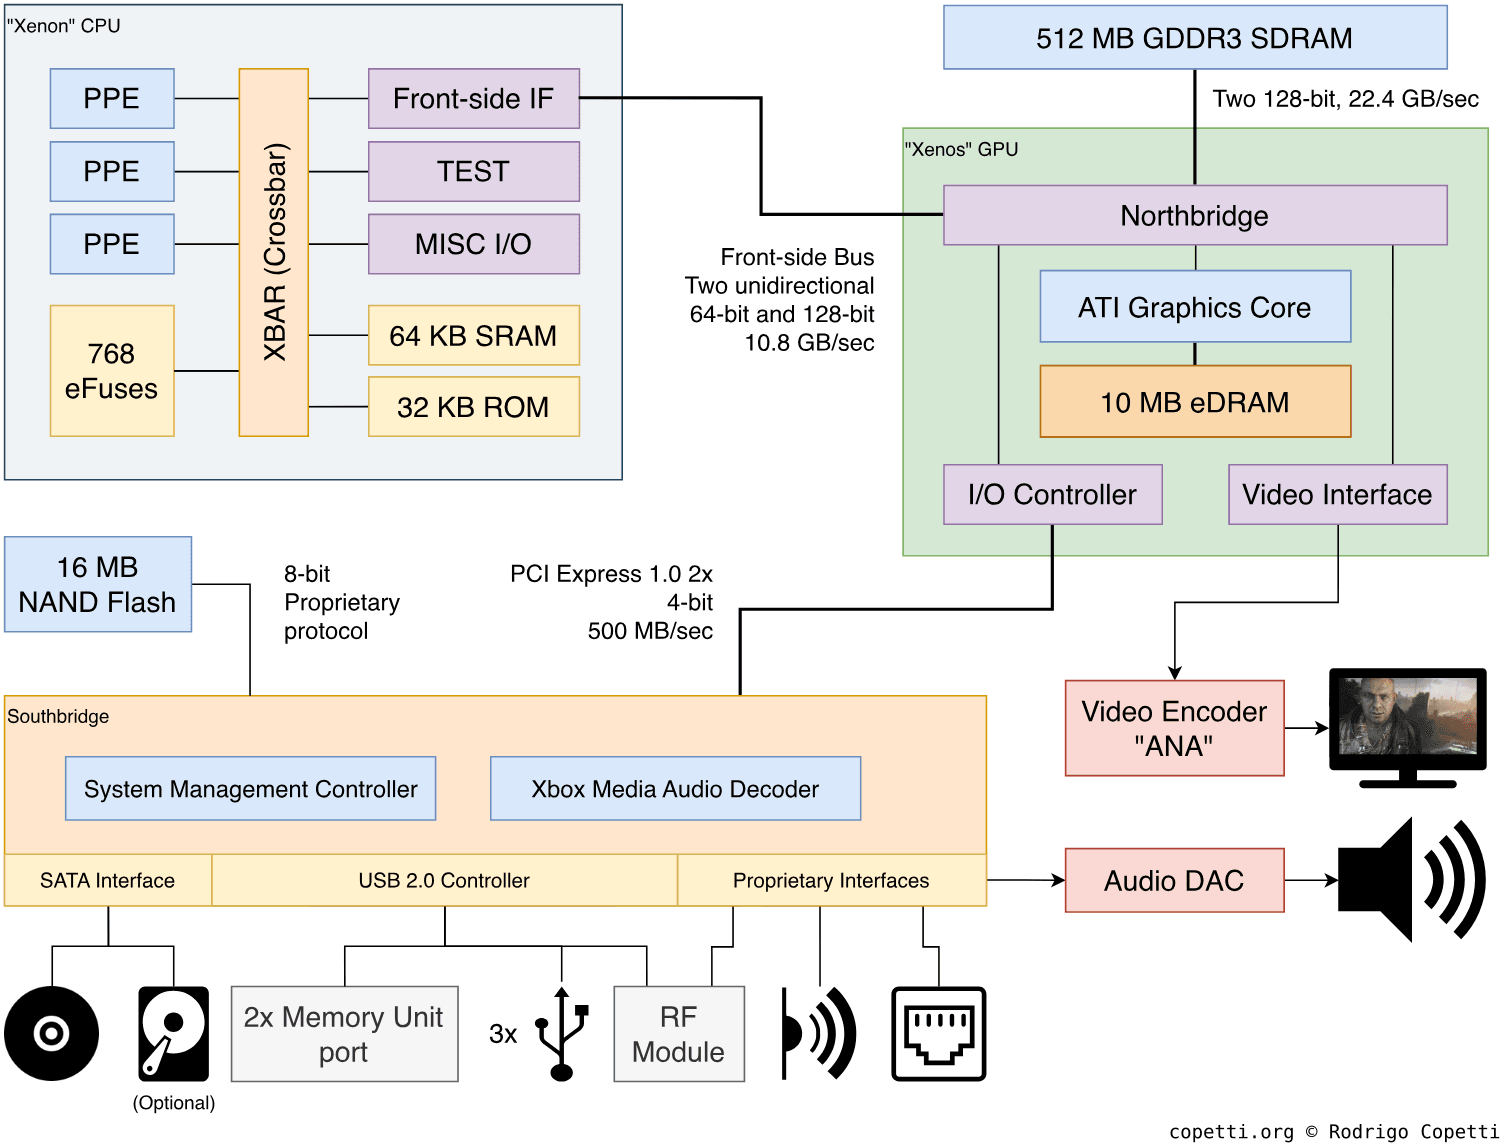
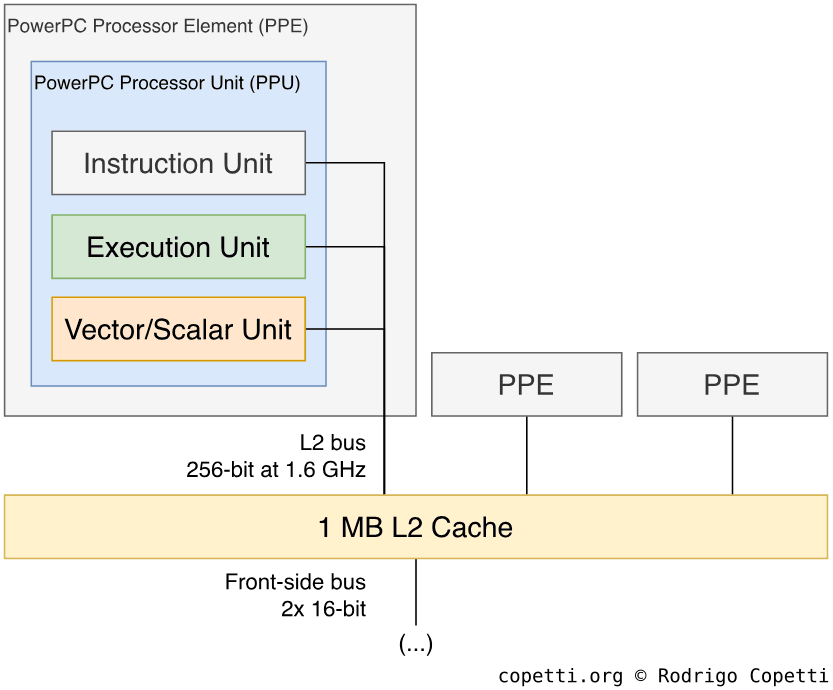
Now that we’ve positioned Microsoft and IBM on the map, let’s talk about the new CPU. This is how Xenon materialised at the end of the Xbox 360 project…
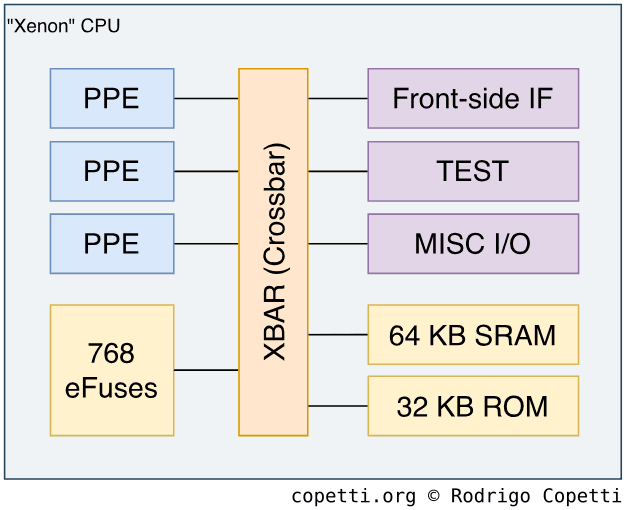

Don’t worry, all of these components will be explained throughout this article, starting with the PowerPC Processor Element (PPE) blocks shown at the top left corner.
A new look at CPU history
The Cell project, with its obsession with vectorised computations, introduced very interesting proposals to radically tackle the ongoing constraints that hindered technological progress. These constraints, however, are very complex. So it wouldn’t be fair to say that Cell’s methods were the only -or even best- solution. In other words, by studying Xenon’s architecture (which competed side-by-side with Cell’s) we can gain a different perspective on how CPU architecture evolved throughout that era (the early 00s) and subsequently influenced the next decade of CPUs.
In doing so, you’ll perceive that Xenon takes a more conservative approach than Cell. If we take another look at the previous diagram of Xenon, you can notice that the latter is equipped with the famous PowerPC Processor Elements (PPEs), which is also the most important piece of Cell. However, Xenon’s is now equipped with three of them. Additionally, the Synergic Processors Units (SPUs) are no more.
After all, Microsoft didn’t want processors of very different natures squashed in their CPU. They instructed IBM to compose three powerful cores and enhance them with the ingredients game developers would expect to find. With this approach, IBM and Microsoft were also able to add non-standard features without disrupting the traditional modus operandi of developers.
Truth be told, this also resulted in aggressive budget cuts to keep this design (and the rest of the system) at a competitive price range. To put it in context, multi-core CPUs for PCs weren’t on the store shelves while IBM was building Xenon, and when they debuted in 2005 (coincidentally, the same year the Xbox 360 reached the stores), AMD priced their cheapest Athlon X2 at $537 (equivalent to ~£452 in 2021 money) and Intel charged $241 (equivalent to ~£203 in 2021 money) for their low-end Pentium D [5] - and let’s not forget the box only included the CPU.
How this study is organised
We’ll now take a look at the main components that comprise Sony’s counterpart. To avoid repeating existing information, I’ll focus on the novelties of Xenon.
Having said that, the new CPU runs at 3.2 GHz and it includes so much circuitry that, for this study, we have to split it into different groups:
- The three leaders that execute the program’s instructions. At first, each resembles Cell’s PowerPC Processor Element (PPE), but you’ll soon see that they are actually a superset of it. Additionally, since we’ve got three of them now, it may seem as if the whole chip behaves like a Cerberus monster, where each core may claim control of the whole system. Alas, that’s not feasible in a computer, so the first core is the designated master core while the others will be taking assistant roles.
- A single interface that interconnects the cores with the rest of the system. This bus is called XBAR (pronounced ‘Crossbar’).
- Like in Cell, there are other proprietary interfaces used for debugging or maintenance (i.e. temperature) but these will not be mentioned until we reach the ‘Anti-piracy’ section.
- The security block which Microsoft oversaw to implement the anti-piracy system. It’s a very complex section, so to avoid overwhelming you with information, I’ll explain it in the ‘Anti-piracy’ section as well.
The different approach for Xenon
To explain the aforementioned groups, I’ve organised the study of Xenon into these areas, in that order:
- The bus connecting all the cores, the XBAR and its special L2 cache block.
- The new refinements of the PowerPC Processor Element (PPE).
- The unusual abundance of general-purpose memory.
- The new programming model suggested (and, in some ways, enforced) by Microsoft.
Inside Xenon: The messenger
The original chip (Cell) was required to house twelve independent nodes actively moving data around, this forced IBM engineers to devise a complicated system that could tackle emerging bottlenecks, which materialised in the form of the Element Interconnect Bus (EIB). With the Xbox 360, Xenon only accommodates three units (the three PPEs), so the EIB has no purpose here. Thus, a simpler solution called XBAR was produced to focus solely on the three PPEs, with space for extra functionality.
XBAR relies on a mesh topology that doesn’t direct traffic in a ring-style manner. Instead, each node is provided with a dedicated lane to move its data through [6]. This may appear more optimal than the ring topology of the EIB, but that’s because the XBAR only needs to serve a small number of nodes. Furthermore, the XBAR operates at full speed (3.2 GHz).
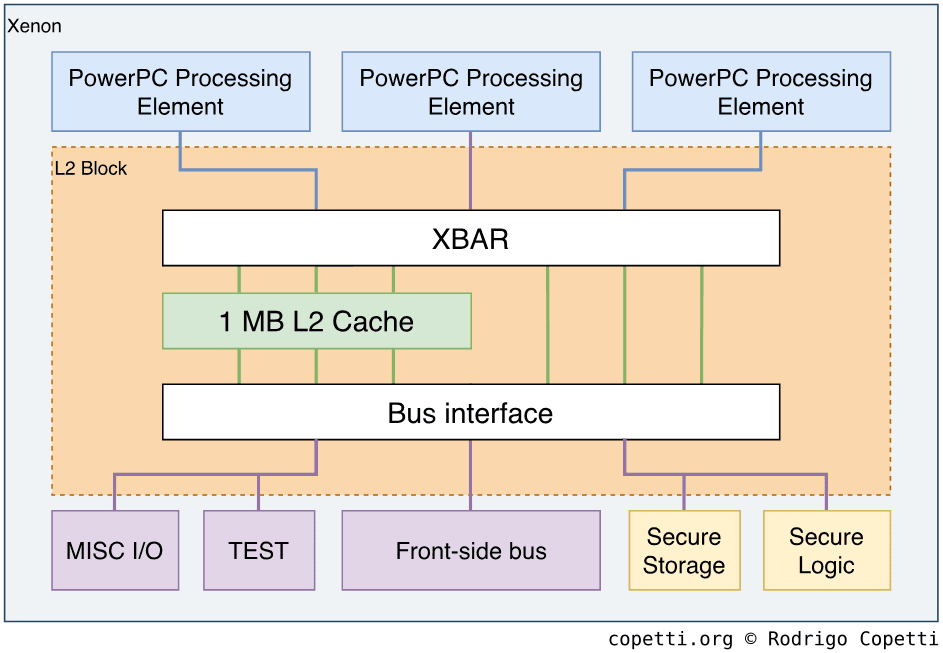

To be fair, until now I only talked about the particular interface that interconnects the PPEs. Well, the XBAR is just one piece of the sizeable chunk IBM designed for Xenon. It turns out the leftover space gave them room to incorporate another very important block that speeds up the transactions between the PPEs and the rest of the system: L2 Cache.
Shared cache
Once the PPEs pass through the XBAR, they get access to 1 MB worth of L2 cache. The L2 block is also connected in a meshed manner, where each PPE gets a separate 256-bit bus but is now clocked at 1.6 GHz (half the PPEs’ speed) [7].
Coincidentally, Cell also houses 512 KB of L2 cache for its single PPE. I only described it in one sentence in my previous article. Now, however, we find ourselves with a larger space that’s also shared between three cores, so I find it necessary to dive into the properties of the L2 block so we can understand how it will condition the performance of the PPEs.
First things first, every time the cache fetches data from memory (in the event of a ‘cache miss’), it does so by pulling a large slice called ‘cache line’, which is 128 Bytes wide in the case of Cell and Xenon. Then, L2 records the cache line on an internal list for locating it in the future. Moreover, in Xenon/Cell, L2 is 8-way associative, which means that cache sets may store up to eight different cache lines. Don’t worry if you don’t know what this means, the theory behind CPU cache can be hard to follow, especially if you only want to learn about game consoles. In layman’s terms, the greater the number of associations, the fewer probabilities of cache misses, but the slower it becomes to iterate through the internal list.
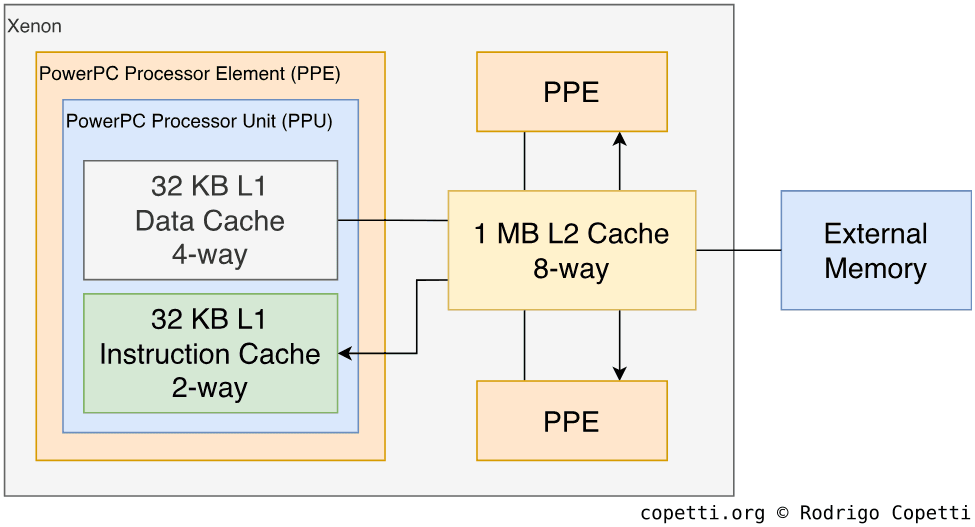
The choice of an 8-way associative cache was not a rash decision for Xenon, as providing eight associations can alleviate the six simultaneous threads (each PPE is dual-threaded) trying to access the L2 block at the same time. This also balances frequent cache misses and lookup times. All of this, while keeping the costs down. For comparison purposes, the expensive Intel ‘Smithfield’ (a Pentium D from 2005) provides two cores with 2 MB of L2 cache each! [8]
It wouldn’t be the first time Microsoft trimmed the cache for pricing purposes, so it will be up to developers to optimise its usage. To assist with this, XBAR bundles additional logic like ‘cache locking’ which will be further explained in the ‘Graphics’ section.
Inside Xenon: The leader(s)
This is as far as we go with our description of the XBAR and L2 cache, let’s now talk about the actual CPU. Just a reminder that, since I’ve already dissected the standard PPE (found in Cell) for the PS3 article, I’ll be focusing on the novelties here.
To start with, Xenon’s PPEs don’t feature a PowerPC Processor Storage Subsystem (PPSS) anymore, presumably since the interfacing part is handled by the XBAR and the L2 cache is now shared across the three units.

To be honest, I’m not sure why technical manuals keep calling Xenon’s PPEs a ‘PPE’ as they better resemble a PPU.
Anyway, let’s go over the significant changes that Microsoft liked to brag about when being compared with the PlayStation 3.
The new vector units
As the Synergistic Processor Elements (SPEs) were Sony’s secret weapon and Microsoft was only interested in homogeneous systems, IBM presented an alternative approach to speed up the manipulation of vectors and matrices in Xenon [9]. In a nutshell, IBM boosted the VMX unit (the SIMD block found within the PPEs) which evolved into VMX128, now housing more registers and opcodes.
The initial VMX specification implemented in the PlayStation 3 provides 32 128-bit registers and instructions for operating up to three 32-bit scalars. This worked to an acceptable degree with general-purpose applications that depend on SIMD operations, although the real performance would be unlocked once the SPEs are added into the equation. By contrast, Microsoft wanted programmers to port SIMD-hungry applications without extra hassle, and the new VMX128 unit reflects that.
VMX128 supplies 128 128-bit registers instead, along with an adapted instruction set to manipulate the larger set of registers. To accomplish that, IBM changed the opcode format to allocate 7 bits (as opposed to 5 bits) for referencing its extended register file [10]. This is possible thanks to some trickery applied on the last five bits at the end of the 32-bit opcode [11]. The last five bits are mostly, but not completely, unused by VMX. Consequently, VMX128 is incompatible with a subset of VMX instructions (related to integer multiplication and additions).
Furthermore, VMX128 adds new instructions that compute the dot product of two vectors composed of up to three 32-bit floating-point numbers; and others that handle Direct3D’s data compression formats [12] (it’s worth mentioning that DirectX is the sole Application Programming Interface (API) for programming this console). Finally, thanks to the symmetric design of Xenon and its multi-threaded model (dual-issuing), VMX128’s register file is duplicated, so there are 256 128-bit registers per core!
As we reach the end of this section, there’s still one question left unanswered: which is faster for vector operations, 1 VMX + 6 SPEs (as in the PS3) or 3 VMX128 units (as in the Xbox 360)? Well, their designs are too divergent, so it’s hard to quantify. One could say ‘The SPE can execute up to two instructions per cycle while Xenon takes 12 cycles to add two vectors (due to the long pipeline of the PPE)’ but that’s relative, as the SPE’s memory scope is restricted to its local memory (requiring DMA calls to interact with the outside), while Xenon’s PPEs can access any memory location. So, in conclusion, these are two contrasting models and programmers will just have to get the best out of them.
A new but short-lived instruction
With the advent of a larger cache system, Microsoft and IBM extended the PowerPC instruction set to accommodate some instructions that operate these blocks from the program side, in case programmers wish to make manual interventions (such as caching data ahead of time or saving L2 space). In any case, the standard PowerPC specification already provides the dcbt (‘Data Cache Block Touch’) instruction to fetch data from memory into the L1 cache (individual for each core) [13]. Nonetheless, Microsoft took a step forward and added xdcbt (‘Extended Data Cache Block Touch’) to fill the L1 cache without even going through L2 (shared across all cores) [14]. This makes sense as the shared L2 is a new addition of Xenon. However, bypassing L2 is a risky operation as two cores may end up seeing different data (cache incoherency), so it will require correct handling from the program side to keep cache incoherency and race conditions out of the way.
As luck would have it, xdcbt worked fine until Microsoft started receiving error reports from game studios [15]. Initially, Microsoft relied on this instruction for common routines available through their API (such as memcpy()) but they didn’t account for the consequent lack of cache coherence. Thus, uses of xdcbt were subsequently removed from their APIs. Yet, studios found a bigger problem: branching instructions followed up by xdcbt always execute the latter. It turns out the branch predictor will attempt to execute xdcbt (as any other instruction that may be undone later on, if the prediction turns out to be incorrect) with the exception that once the cache blocks are mangled, there’s no way to undo it (becoming a hazard). Thus, the program will not synchronise the caches as it assumes xdcbt hasn’t been triggered, leaving the PPEs in a disarrayed state.
In the end, Microsoft purged xdcbt from the compiler due to its non-deterministic (thus unpredictable) behaviour, and what’s left of it is just an anecdote.
Revisiting old paradigms
There’s a recurring subject found in noteworthy writings from 2005 like ‘Inside the Xbox 360’ by Jon Stokes [16] or ‘Understanding the Cell Microprocessor’ by Anand Lal Shimpi [17], and that is the lack of out-of-order execution that once debuted in early PowerPC chips like Gekko, but for some reason is completely absent in Cell & Xenon. If you recall from the GameCube article (which I wrote two years ago), Gekko is an out-of-order CPU, meaning it’s able to analyse the instruction stream as instructions come in, and subsequently reorder them to better distribute the load on Gekko’s internal units.
By then, CPU cores employing out-of-order execution were in the order of the day (pun intended). IBM’s PowerPC 604 (1994) brought it to high-end Macintosh computers, Intel’s P6 (1995) introduced it to the x86 line and MIPS implemented it with the R10000 (1996) CPU, a successor of the R4000 (found on the Nintendo 64). Afterwards, all of a sudden, Cell and Xenon arrive with an in-order execution style… care to explain?
To understand this turn of events, let’s take a closer look at the Out-of-order execution (OoO) model. OoO is not a Lego piece that engineers fit and then move on to the next part. Pipelined CPUs are susceptible to a whole new range of hazards, which means that the slightest addition may lead to a complete redesign. For instance, OoO requires altering the register file to fit register renaming [18], a clever technique where the CPU houses more registers than the instruction set references, enabling the CPU to store multiple copies of the program state and prevent dependency problems that arise after altering the original order of the instructions. All in all, while these solutions are interesting, they add complexity to the CPU chip, and that can pose a threat to future scalability.
The PowerPC Processor Element (PPE) derives from POWER4 which is itself an OoO core. However, POWER4 is an independent (and power-hungry) chip by itself, while the PPE is either surrounded by 7 SPEs (as with the PlayStation 3/Cell) or by two more PPEs (as with the Xbox 360/Xenon). These changes take up space and the dimensions of the CPU chip are critical in terms of price and heat emission. So, in the end, I imagine IBM didn’t see enough advantages for applying OoO on an application-specific machine like the PS3 or Xbox 360.
An alternative solution
Look at it this way, why was OoO invented in the first place? To prevent the CPU from idling (as idling = wasted resources). So, will the applications (3D gaming) be prone to this issue? Maybe, but it’s also true that OoO is not the only possible solution to this problem! Introducing Thread level parallelism (TLP).
What if instead of sorting out which instructions should be executed first, we duplicate the resources into two (or more) groups called ‘threads’ and let the program switch between the different groups of resources (multi-threading) as it sees more fit. This is what IBM’s engineers went for, hence the reason the PPE is dual-issued. The new technique, called Thread level parallelism (TLP), differentiates itself from Instruction level parallelism (ILP) by letting the program, as opposed to the CPU, to come up with its own solution. With Xenon and Cell, it’s now left to the compiler and the program’s multi-threading implementation to produce an efficient sequence of instructions.
The interesting thing is that neither approach is better or worse, out-of-order processors are still found in the market (Intel/AMD still supports OoO along with an obscene amount of other techniques, while ARM adopted OoO with the Cortex-A9 in 2007). On top of that, those CPUs have multi-threaded cores and even bundle multiple cores within the same chip, so you get a mix of both techniques (TLP and ILP).
Eroded relationships
Conversely, whilst the omission of out-of-order may look justified from an engineering standpoint, this would ultimately wither trust in IBM’s long-term abilities. Apple, sensing that future PowerPC chips would no longer stand against Intel [19], was the first to abandon its partnership and switch to Intel in 2005 (just in time for Yonah). Nonetheless, this didn’t worry IBM, who preferred to focus on its server and gaming sector.
The long-term outcome of the PowerPC CPU, however, became extinction. The aforementioned technical constraints (after all, IBM used to be a trailblazer in out-of-order design), combined with questionable business ethics (the fact IBM secretly designed for two close rivals at once), resulted in the loss of the entire console market: Sony and Microsoft selected AMD CPUs for their next-generation console. A decade later, Nintendo’s Wii U would become the last console to bundle a PowerPC chip.
Inside Xenon: Main Memory
Unlike its competitor equipped with 256 MB of XDR DRAM, there’s 0 MB of external memory installed next to Xenon. That’s right, a 100% decrease compared to the Japanese counterpart.
Okay… let me rephrase that. On the motherboard, multiple chips provide a total of 512 MB of GDDR3 SDRAM, but they are sitting next to the GPU, not the CPU. So… you probably guessed it. Just like the original Xbox, Microsoft went for the Unified Memory Architecture (UMA) layout, where all components share the same RAM chips. This provides more flexibility in the amount of memory reserved for the CPU or GPU. However, a single point of access for various components means the far away components (like the CPU) will suffer higher latency compared to the hypothetical case where the CPU was given dedicated memory. This was duly noted by IBM and Microsoft engineers and subsequently tackled with the aforementioned L2 cache along with extra circuitry (which is explained in the ‘Graphics’ section).
The type of memory chips (GDDR3) is the same one found in the Wii and PS3. Conversely, the Xbox 360 gets the crown for including the largest amount. In fact, it’s been reported that Microsoft initially planned to house 256 MB, but later doubled the amount out of fear for Sony’s upcoming competitor [20]. Though, unlike Sony, Microsoft was extra sensible with the retail price, so it had to cut down on other features. That’s why the hard drive was made optional. Furthermore, Microsoft expected Samsung (its memory supplier) to deliver their chips operating at 1.4 GHz but then settled for 700 MHz at the time of shipping the console.
Memory Controller
With all being said, how can Xenon access this memory? Well, the CPU communicates with the GPU through an interface called Front-side Bus, this combines serial and parallel communication models to keep costs down and reduce latency as much as possible [21].
On the outside, there are two unidirectional lanes named ‘PHY’, each is made of 16 buses that operate at the exceptional speed of 5.4 GHz [22]. In there, information is transmitted in serial form. Internally, however, the CPU and GPU only understand whole words. Thus, both endpoints are tasked with serialising the data before sending it through PHY and/or deserialising it after receiving it. The CPU’s inner interface is 64 bits wide and runs at 1.35 GHz, while the GPU’s is 128-bits wide and runs at 675 MHz [23]. If we do the math, both lanes provide a bandwidth of 10.8 GB/s.
The Front-side bus route only takes you to the GPU. So, between the GPU and the GDDR3 chips, two memory controllers inside the GPU manage this connection using one 1024-bit bus each. To reduce latency, the memory controllers use address tiling for GPU-related operations and path-finding to reduce CPU congestion. In general terms, Microsoft states that there’s a bandwidth of 22.4 GB/s between GPU and memory.
It’s all jolly on paper, but let’s not forget that the CPU still has to walk a long road to get to memory. To give you an idea, if you grab PIX (the CPU profiler included with the SDK) and run the sample tests that come with the utility, you’ll see that for every cache miss, the CPU spends ~600 cycles to get to memory! This is one of the features of UMA-based systems you don’t see marketed very often :), but also helps you understand why cache is so critical.
Inside Xenon: Programming styles
With all being said, how can anybody take advantage of this fascinating chip? Well, there’s only one way: Multi-threading.
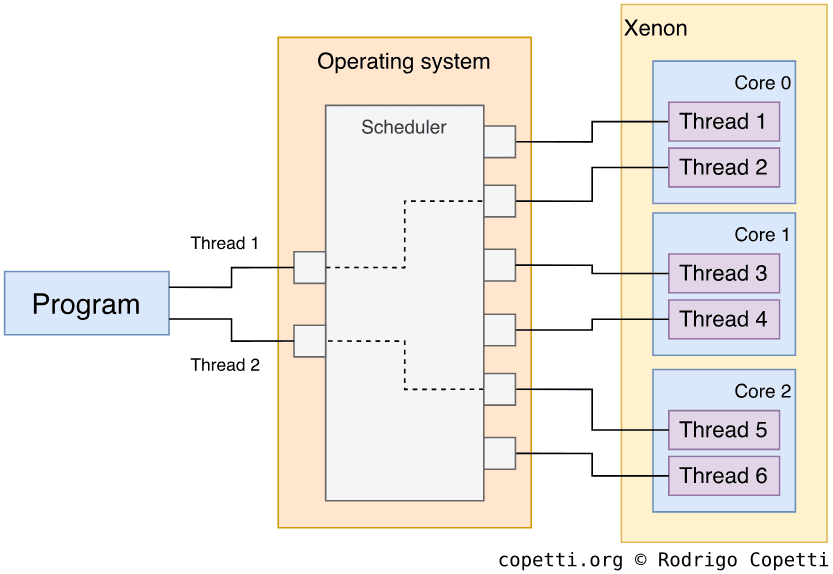
From the programming perspective, a CPU that’s made of multiple homogeneous cores sharing the same memory is what we call a Symmetric Multi-Processing (SMP) design. This conditions how the application will be designed and implemented. As of 2022, this is the de-facto layout for consumer multi-core CPUs (i.e. x86 and ARM) as well.
SMP programming abstracts access to physical CPU cores with the use of ‘virtual threads’. A virtual thread is a sequence of instructions the programmer defines. Threads can then be submitted to a ‘scheduler’ for their execution. The scheduler is another program (often part of the operating system) that handles how virtual threads are dispatched to the physical CPU cores.
This abstraction layer allows the programmer to avoid discriminating against the type of core used (therefore making the program cross-compatible with similar platforms) and hard-coding the number of cores (making it scalable).
It’s no surprise that this style became a standard in future console generations, as it’s easier to scale and program with symmetric systems than asymmetric ones (i.e. Cell). The latter often depends on unusual programming styles, eroding compatibility with other systems.
Also, it’s worth mentioning that, while SMP programming is not necessarily restricted to one platform, Xbox 360 developers will only be writing threads for Xenon (which provides a total of six threads). This enables them to optimise their multi-threading design for the Xbox platform as well.
Graphics
Here’s a peculiar aspect of Xenon. While the chip, by itself, incorporates interesting technology to make it a powerful contender against the competition, Xenon was never conceived as a one-man band. To make this console, as a whole, extremely competitive and long-lasting, Xenon was closely bonded to another chip, the GPU.
The graphics chip is designed and manufactured by none other than ATI, Nvidia‘s direct rival. To put it into perspective, a new company called ’ArtX’ was set up by former SGI employees who developed the Nintendo 64’s graphics chip, the Reality Co-Processor. Afterwards, Nintendo hired them again to produce the GameCube’s Flipper chip… at the same time ATI was in the process of acquiring them [24]. By then, ATI was competing in the PC arena with their ‘ATI Rage’ graphics cards and will soon inherit Flipper’s engineers. Fast forward to 2005, Nvidia (now supplying Sony) was now facing ATI again in the console market.
Good old competition, one can only wonder what new innovative product will come out of it.
Overview
Since the early naughties, Nvidia and ATI have been trying to outmatch one another in terms of performance, often by adding incremental improvements to their flagship brands.
Nvidia enjoyed considerable leverage after the introduction of programmable pixel pipeline which later became part of the OpenGL and Direct3D specification. Thus, ATI had no other choice but to follow suit. However, in 2003, ATI recovered its user base after Nvidia’s anticipated ‘GeForce 5’ line disappointed Direct3D 9 users, who were expecting better performance and functionality from Nvidia’s flagship card [25]. As a result, attention shifted towards ATI’s Radeon 9000 series.
These events allowed ATI to keep the crown for a while longer, but unbeknownst to Nvidia, ATI had been working on a new disrupting ingredient that could hold Nvidia for another decade. This project eventually materialised in the form of Unified Shaders and debuted in none other than the Xbox 360, with the new graphics chip called Xenos.
A new foundation on the way
You’d be surprised that Microsoft’s push for homogeneous computing also dragged the GPU into this mix.
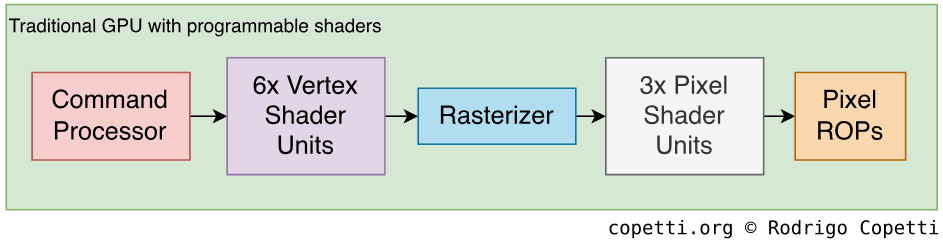
You see, there was a time when GPUs were mere rasterisers with ‘take it or leave it’ functionality, meaning they provided a fixed set of functions and programmers could either activate them or not. Later on, thanks to SGI’s innovations, workloads were offloaded from the CPU thanks to the new programmable vertex pipelines. Finally, the ‘mere rasteriser’ definition was rendered obsolete (pun intended) as Nvidia promoted a new stage called programmable pixel shader which gave programmers the liberty to control what happens after rasterisation.
This pattern shows us that, as GPUs grow in performance and functionality, they eventually open up to allow developers to implement the exact functionality they seek. However, this also increases the overall complexity of the silicon.
Over the years, both vertex and pixel pipelines kept enlarging to accommodate current needs, with new scalability problems emerging. Space, costs and heat emissions have a limit. So, which tasks should be prioritised? Vertex operations or pixel effects? A weak vertex pipeline will stall the pixel pipeline. Alternatively, a disappointing pixel unit won’t attract users with its dully-composed frames.
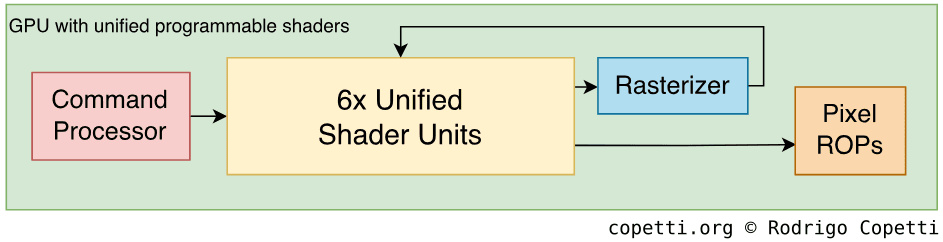
Thus, architects at ATI took two steps back and asked themselves ‘Is there any way to simplify this model instead of adding more transistors on top of it?’ which later became ‘Why are pixel and vertex pipelines segregated?’. And so, the two stages were ultimately merged into a single -unified- block of circuitry. This is what we call the Unified shader model and a GPU implementing it still provides both programmable vertex and pixel pipelines, but the circuitry used for computations is shared.
The new model has two primary benefits: a more balanced scaling (as it will now improve both pixel and vertex pipelines to the same degree), and programmers can now develop shader programs that are not constrained by the limitations of an individual pipeline type. Though the latter will require major changes in the API to standardise its behaviour and availability, which won’t arrive until 2006 with DirectX 10 or in 2010 with OpenGL 3.3.
Suffice to say that the unifier shader model is now another standard in the graphics industry.
Architecture of Xenos
To construct Xenos, ATI borrowed material already present in their consumer products. Though it’s hard to say which existing card they based Xenos on. Wikipedia pairs it with the ‘R520’ core (found in the Radeon x1800) [26], though I find it hard to believe as the R520 contains fundamental differences (related to the new unified architecture) that make me doubt about such relation. In the absence of any reliable source, I turned to the Xenia emulator Discord where I luckily received a lot of input from the community, especially TriΔng3l, who works in emulating Xenos.
In essence, Xenos is based on R400 (also known as ‘Crayola’), a new architecture from the ground up that never materialised in the form of a consumer card (except Xenos, being the only incarnation to this day). Instead, ATI shipped R500-based cards to PC users, which are a continuation of the R300 architecture. Curiously enough, some R520 cards incorporated part of Crayola’s technology, but were marketed as ‘ATI Avivo’ and only used for accelerating video decoding.
In the end, ATI brought the unified shader model to the masses through their new R600 architecture (an evolution of R400), also known as ‘TeraScale’, released in 2007 with the Radeon HD 2000. And the rest is history.
Interestingly enough, the R400 branch carried on in the smartphone world with the ATI Imageon Z430 [27], later called Qualcomm Adreno 200, which also went through many iterations. This is another example of innovative technology that finds its way into the mobile market!
Organising the content
Another unusual element from Xenos is its triple memory architecture (so much for emphasising the UMA…). Xenos relies on two different chips to render graphics, one is the aforementioned 512 MB of GDDR3 DRAM (which is shared with the CPU) and the other is a smaller but way faster memory chip residing within the same package (which only Xenos has access to). The latter piece provides 10 MB of Embedded Dynamic RAM (EDRAM) [28]. Curiously enough, EDRAM is not a new ingredient, having been found in the Graphics Synthesiser, the Graphics Engine and, most importantly, Flipper (also ATI’s invention).
Those 512 MB store most - if not all - the materials Xenos needs to render a frame, including textures, shaders and many types of buffers as the game sees fit. On the other side, the 10 MB of EDRAM are left for small elements that require rapid access, such as the Z-buffer, the stencil buffer, the back buffer (intermediate frame buffer) and any other custom buffer if needed. This mitigates congestion from the shared GDDR3 RAM and speeds up operations that make use of those buffers.
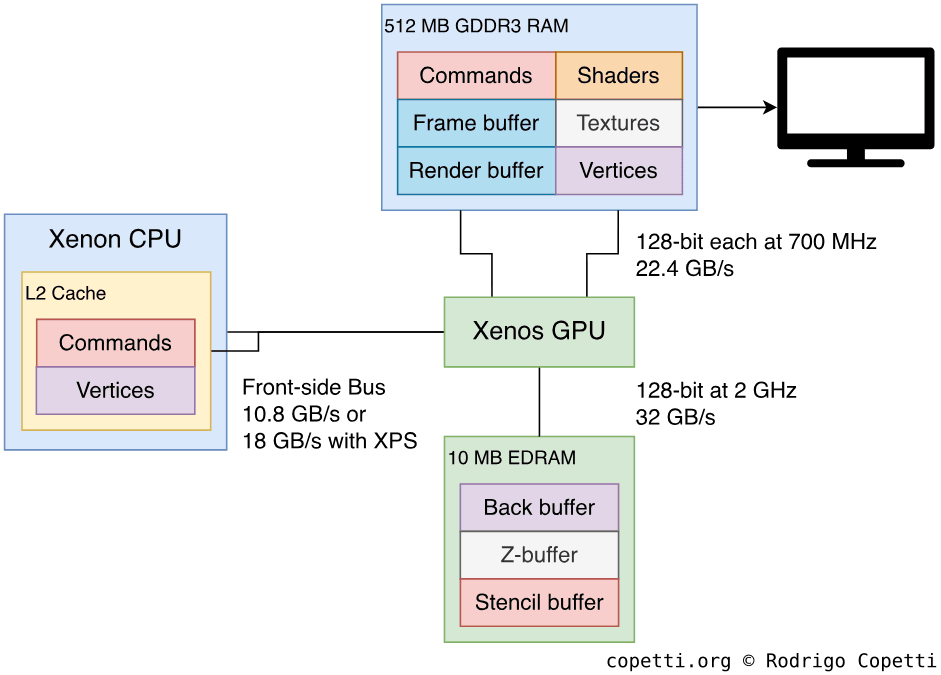
As if this wasn’t enough, there’s a third source that can feed the GPU, and that is a direct line to the CPU! Unlike anything seen before, the CPU can stream commands and geometry without going through the traditional steps of storing command buffers in external memory, thereby saving once again traffic from main RAM. This is what Microsoft advertised as Xbox Procedural Synthesis (XPS) and made possible by two changes [29]:
- Firstly, the CPU’s front-side bus was adapted so the GPU can directly fetch data from the CPU’s L2 cache (where the CPU may procedurally generate the geometry) in blocks of 128 Bytes (the size of a cache line).
- Secondly, a separate cached location was added into Xenon so the GPU can notify its current state to the CPU as fast as possible. Microsoft calls it the Tail pointer write-back and keeps both components in sync while the CPU updates the L2 cache and the GPU pulls from it. According to Microsoft, this routine provides a theoretical bandwidth of 18 GB/sec [30].
Overall, this synergy is what has enabled the Xbox 360 to achieve such a high level of performance without requiring overpriced hardware.
Constructing the frame
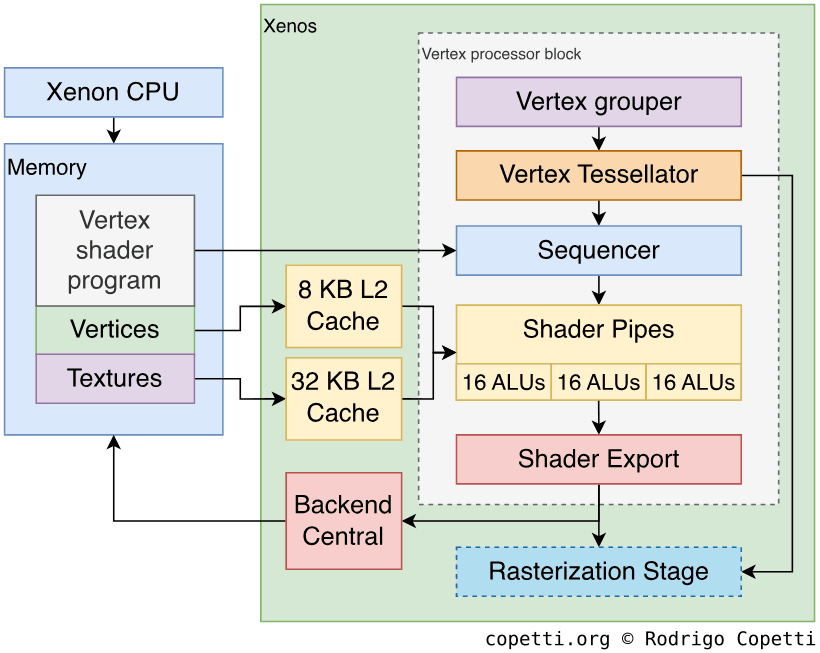
Having said all that, how does Xenon actually render a frame? Well, similarly to other GPUs in the market, there are many steps involved. Take a look at this diagram of Xenos’ pipeline.

As you can see, the pipeline stages are not different at all compared to other graphics chips that don’t employ the unified shader model. This is because the actual change happens at the circuitry level and not at the API level (for now). This way, developers are not forced to learn new techniques that will disrupt their traditional methods, but they’ll soon find that the new underlying design will benefit them in terms of performance and extra functionality (on top of the ‘traditional’ one).
Conversely, this GPU is strongly aligned to a proprietary API developed by Microsoft called Direct3D 9. This API has enjoyed increasing adoption in the PC market due to its wide compatibility rate with off-the-shelf graphics cards, making the job of game developers a bit more enjoyable. And even though Xenos will also expose some behaviour not seen in the off-the-shelf market, Direct3D is the only high-level API that Microsoft provided to talk to Xenos. So, what we find in the Xbox 360 is a semi-customised version of Direct3D 9 that makes room for the extra functions of Xenos. Curiously enough, Direct3D influenced the design of Xenos in the same way Xenos influenced future revisions of Direct3D (starting with version 10).
Now it’s time to make a full dive and see how this pipeline works, just like we did in the other articles.
Commands

Welcome to the tour of the 12th polygon factory of this series. As always, the starting point is the command stage. Commands tell the GPU what, where and how to draw something on the screen. This time, however, commands may be stored in Main Memory (within a buffer) or directly streamed by the CPU. Both are subsequently fetched by the Command Processor [31], which parses it and forwards it to the respective unit that performs the required operations (as commands may encode different types of instructions, such as ‘draw a triangle’ or ‘set X register’).
It’s worth mentioning that by this generation, the traditional practice of using Display Lists for composing commands has been long superseded by a new structure called Command Buffer (as OpenGL and Direct3D call it). While both terms sound similar, the new entity makes room for new operations that weren’t originally envisioned when Display Lists were conceived (primarily related to vertex, pixels and GPU control). As the APIs evolve, Command Buffers are adapted to reflect modern needs, while Display Lists have been deprecated since 2008 (OpenGL removed them with OpenGL 3.2) [32].
Furthermore, Direct3D 9’s command buffers (found in the official SDK of the Xbox 360) provide the option to embed an interesting data format called Index Buffers. This enables developers to reuse existing vertex points to avoid duplicating geometry data in memory [33].
Finally, this GPU can also conditionally execute commands depending on arbitrary conditions set by the developers. In Direct3D’s world, this is called Predication and saves the GPU from processing geometry that may be occluded, for instance.
Vertex Shader
Since the times of Flipper (or even the RCP, as it shared its core team members), ATI maintained the initiative of providing a geometry block to accelerate vertex operations. With Xenos, it is now fully programmable using Direct3D’s High-Level Shader Language (HLSL), which is similar to C but used for implementing vertex shaders without needing assembly, although the latter is still possible.
Both Xenos and RSX implement the Vertex Shader Model 3.0 (vs_3_0) specification, which outlines a common set of capabilities and limitations. This includes providing 512 or more slots for instructions, branching opcodes and support for texture fetching, among others. The difference, however, is that PlayStation 3 programmers must use Nvidia’s CG compiler (once a collaborative work with Microsoft’s HLSL) while Xenos developers rely on Microsoft’s toolkit instead, and thus use Direct3D’s HLSL compiler.
Furthermore, let’s not forget that the hardware carrying out those operations relies on a new formula. The new unified design means vertices are processed through a shared but bigger pipeline, which works as follows:
- Based on the received commands, the Vertex grouper reads the memory addresses where vertices are located in main RAM and the Tessellator transforms non-triangular geometry (i.e. quadrangles and parametric curves) into triangles, so the rest of the GPU can process it. The latter can also split triangles into smaller primitives, so bigger detail can be achieved without consuming extra bandwidth. The grouper can read 16 Bytes of data per clock and caches the last 14 vertices processed.
- The Sequencer loads the vertex shader and pulls vertex data using 8 KB of cache.
- Now that all vertex data is ready to be processed, 3 Shader Pipes (groups of 16 ALUs, each) execute the shader program. Each shader pipe receives batches of 64 Bytes. Vector-to-vector arithmetic takes four cycles while vector-to-scalar operations take only one.
- The Shader Export buffers the results and sends them back to the start of the line where Primitive Assembler picks them up for rasterisation. Alternatively, the shader export can forward the results to the Backend Central, where they are exported to main RAM.
- The latter capability means a shader can write raw data into main RAM, remember this when we reach the ‘Anti-piracy’ section…
Rasterisation
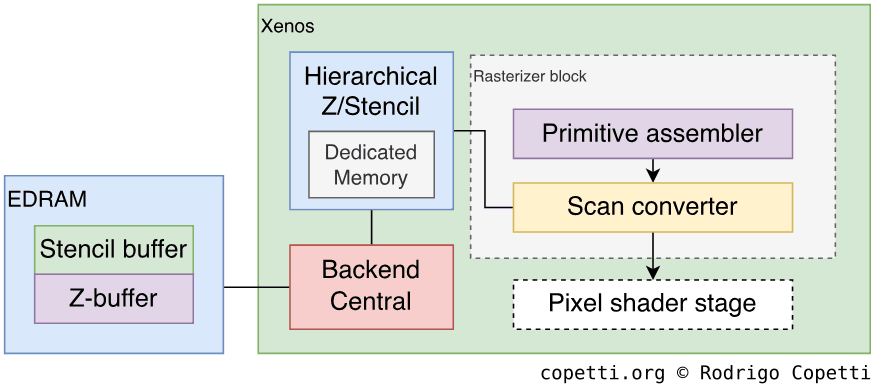
Once the primitives have been transformed or subdivided as requested, the rasteriser begins the transformation to pixels.
Firstly, the Primitive Assembler receives vertex data from the Tessellator and/or Shader Export and begins building triangles out of vertices. This operation takes one cycle, except when vertices require clipping and culling applied (to discard unseen triangles outside the bounding area).
Secondly, the Scan converter receives triangles and packs them into 8x8 pixel blocks called tiles (yes, the same word appropriated by 2D consoles…). The converter generates one tile per cycle and sends them to a dedicated unit that performs early Z and Stencil test. So far so good? Well, here’s the interesting part: the latter unit implements a new and efficient rejection technique called Hierarchical Z (Hi-Z).
Instead of testing each pixel of the triangle, Hi-Z evaluates groups of pixels (2x2 pixels in this case) by calculating the maximum and minimum Z-value among the four pixels. Then, if the maximum z-value of the quadrant is less than the respective value stored in memory, the whole portion is assumed to be occluded and the quadrant is discarded [34].
The Hi-Z block uses dedicated memory for these operations, this memory can store up to 16 different Z-values for Z-testing 64 pixels per cycle. The downside is that available memory only allows Xenos to perform Hi-Z if the framebuffer’s resolution is no greater than 1280 x 720 pixels along with MultiSampling Anti-aliasing with up to two samples (2x MSAA) activated.
Finally, the scan converter gets back groups of 2x2 blocks (so 16x16 pixels in total) and sends them in batches of 64 pixels to the next stage, where the pixel shader adds the eye-catching effects.
Pixel Shader
To execute the pixel shader, Xenos re-uses the same components of the vertex pipeline with slight detours. Similarly, HLSL’s Pixel Shader Model 3.0 (ps_3_0) specification states what developers can accomplish at this stage, which is not significantly different from Sony’s counterpart. Nevertheless, since the underlying foundation has been simplified (well, unified), resources have been homogenised, improving the balance of performance across all stages.
That being said, the pixel stage works as follows:
- The Sequencer loads the pixel shader program and forwards pixels to the interpolator.
- The Shader Pipe interpolator interpolates colours between four vertices (creates intermediate values to fill in the gap between two extremes) that will be used by the pixel shader. It can generate 16 colours per cycle.
- 32 KB of Texture cache fetches and decompresses textures from main RAM, then, the Texture pipes send up to 16 texels per cycle to the shader pipes. The texture pipes can instantly apply bilinear filtering, but they also offer trilinear and anisotropic filtering at the cost of extra cycles.
- The 3 previous Shader pipes are now used to execute the pixel shader, each pipe operates vertex made of 16 2x2 pixel blocks coming from the interpolator. The ALUs can process 32-bit floating-point numbers (IEEE 754 compliant) without penalties.
- The Shader Export and Backend Central forward the results to memory. The latter outputs two blocks of 2x2 pixels (8 pixels in total) per cycle. Other kinds of data that can be exported include new Z-values for the Z-buffer and arbitrary data to main RAM.
- The result from the shader export doesn’t necessarily have to be the final frame buffer, games with lots of scenery often render multiple buffers (called ‘render targets’) that are used to derive the final frame. This is called Multiple-pass rendering and Xenos supports outputting up to four Multiple Render Targets (MRT) at the same time [35].
Pixel Operations
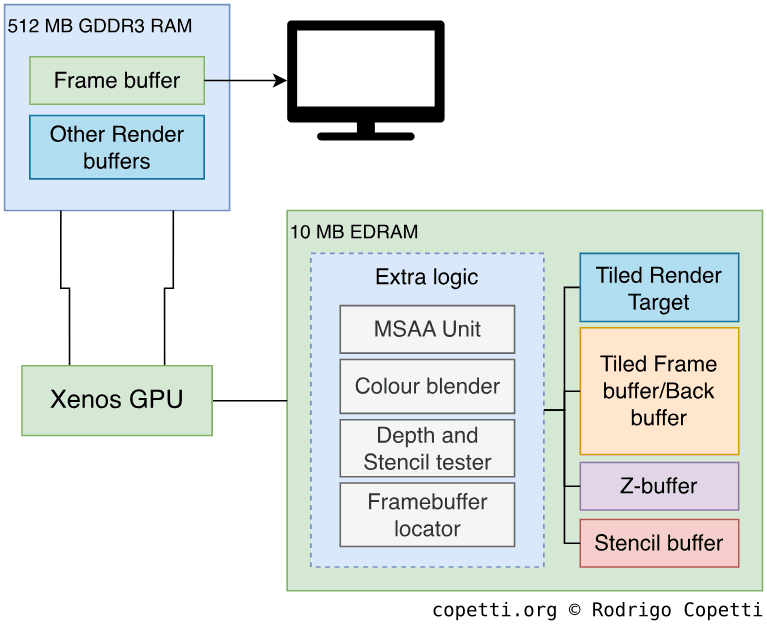
This is as far as it goes for rendering, but one thing we haven’t explored yet is how those 10 MB of EDRAM benefit all of this. Well, this chip is very special, because it contains internal logic to perform automatic Multisample Antialiasing (MSAA) along with Depth and Stencil testing. Its internal bandwidth (between its internal logic and internal memory) provides an absurd 256 GB/second, which makes it very attractive for storing intermediate buffers (as opposed to storing them in main RAM).
The only drawback is that 10 MB is not enough for storing large buffers, especially those needed for rendering high-definition frames (1280x720 pixels wide with 2x MSAA enabled), let alone 1920x1080 frames. But fear not, as ATI supports tiled rendering (the same featured in the Dreamcast!). This enables to render portions of the screen, store the results in EDRAM (for performance reasons) and, finally, reconstruct the tiles in main RAM to form the final frame. Tiled rendering became so critical that Microsoft took a step forward and devised Predicated Tiling [36], a function in Direct3D that automatically sets up and optimises the rendering pipeline specifically for tiled rendering. This prevents developers from manually programming each pipeline stage to handle tiles.
Thanks to the new bandwidth achieved, game designers may push for a level of quality that otherwise would’ve been unfeasible with a traditional rendering system. This includes applying extended antialiasing methods (4x MSAA) or even High-dynamic-range (HDR) rendering. You see, HDR requires 64-bit pixels, where each channel is encoded as a 16-bit float. This has always been very expensive in terms of bandwidth, but in exchange, it provides the right precision to obtain realistic lighting and colour effects, something the Xbox 360 can now enjoy.
The impact on the industry
The state of the industry after 15 years has demonstrated that the unified shader model was meant to become another building block within GPUs. Interestingly enough, when Direct3D 10 and OpenGL 3.3 debuted in 2006 and 2010, respectively, not only did they standardise this model, but they also defined new features and applications that were now possible to implement. For instance, a new pipeline stage called Geometry shader was added in Direct3D 10 to expand the uses of the tessellator.
On a related note, Xenos also introduced new encoding methods for storing HDR pixels using no more than 32-bit values (thus, saving bandwidth and storage). One of their proposals was to encode the three primary colors using 10-bit floats and leave the remaining two for the alpha channel (transparency) [37]. A year later (2006), Direct3D 10 and a new OpenGL extension took this idea further and implemented the (now standardised) ‘packed float’ structure, consisting in encoding Red and Green using 11 bits and Blue using 10 bits [38].

Similarly, over the next years since the console’s release, the concepts of Xenos’ shader exports would be embraced by many new APIs, namely Apple & Khronos’ OpenCL, Nvidia’s CUDA, Direct3D 10’s DirectCompute and OpenGL 4.3’s Compute shaders. All of which provide a platform to access the power of GPUs without necessarily having to render anything, just perform computation using the fast shader pipes. Overall, this was another great leap for General-purpose GPU programming.
Now, if you wonder if any of these advancements were later incorporated into the Xbox 360. I’m afraid by the time this console debuted, the unified shaders were still a relatively new concept. So, unfortunately, none of the consequent developments (i.e. Direct3D 10) were ever back-ported to the Xbox 360. But hey, that’s a legacy left for the next generation of consoles to enjoy!
On the other side, the PC market experienced a different revolution that strangely didn’t originate from ATI. It turns out Nvidia won the race on becoming the first company to ship a graphics card using the unified model, I’m referring to the GeForce 8 series (and its Tesla architecture) that landed in 2006 [39]. Ironically, it was the same year the PlayStation 3 arrived (also powered by Nvidia’s technology, though with an older architecture…).
Video Output
Unlike the PlayStation 3, which arrived a year later, the release of the Xbox 360 in 2005 got caught up in the middle of a transition from analogue video (i.e. RGB and composite) to digital (i.e. HDMI), so the first shipments of the console didn’t bundle the famous HDMI connector that quickly displaced the analogue video salad.

Instead, the first revision (called Xenon, like the CPU) is only equipped with a multi analogue socket called ‘A/V’. This carries all the signals previously featured with the original Xbox, with the addition of VGA-compliant pins [40] (its predecessor had the wires in place but, for some reason, were never powered [41]).
Later on, in 2006, the follow-up motherboard revision called Zephyr ultimately added an HDMI socket to catch up with Sony’s quality of signal. Internally, the original video encoder (known as the ANA chip) had been replaced with the ‘HDMI ANA’ (or HANA) block [42].
As outdated as this may seem today, Microsoft still required developers to consider their games being played on CRT screens, which are prone to overscan. Thus, games couldn’t place any important indicators within the Danger Zone.
Short-lived features
Following the requirements of the Video Electronics Standards Association (VESA), Microsoft released a software update in November 2008 to support 16:10 aspect ratios, although only available through the VGA signals. Games were still only required to support 16:9 and 4:3 ratios, so using 16:10 would show a black backdrop (a.k.a. letterbox). Curiously enough, the operating system contains routines to allow games to detect whenever 16:10 is activated, though they were never made public.
Additionally, Microsoft shipped a software update in May 2011 to add support for 3D TVs, much like the PlayStation 3 did.
New attitudes towards resolutions
Even though the video encoder can broadcast signals in a multitude of formats, including PAL, NTSC, 720p and 1080p, Microsoft pushed publishers to focus on 720p for two reasons:
- The general consensus from 2005 predicted that most consumer TVs will soon be equipped with high-resolution and widescreen screens.
- Since it would take time to master Xenos’ capabilities, launch titles were assumed to not use all of the GPU resources. Thus, games painlessly added HD support to compensate.
With the same rationale, why is 1080p not the focus instead? Well, 1080p puts a significantly higher workload on Xenos, which limits effects like anti-aliasing. Instead, Microsoft suggested developers to render at 720p and direct the internal video scaler to upscale the frame to 1080p, if required. To assist with this, Microsoft released another software update in October 2006 to enable 1080p output (initially, only 1080i had been available).
Audio
As CPUs evolved to become multi-core jack of all trades, the grounds for housing dedicated audio hardware slowly dissipated. In the end, Microsoft decided that the Xbox 360’s audio department would be the responsibility of the CPU, and as such, the audio pipeline was implemented through software. So, the operating system provides routines which games access through the official SDK. This brings in new advantages, as the general-purpose capabilities of CPUs are not restricted to a fixed set of audio functions.
A year later, the PS3 would follow suit, and thus cement this practice across the video game industry.
The hidden audio chip
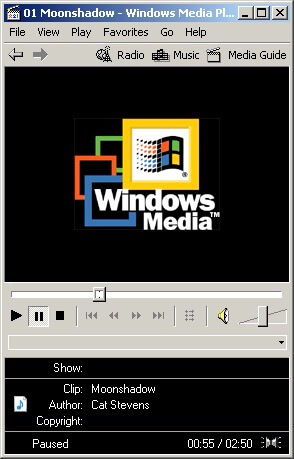
Conversely, in the case of the Xbox 360, we find a huge exception to this rule: Microsoft fitted a hardware audio decoder on the motherboard [43]. Although, this circuit is hidden within the Southbridge chip (explained further in the ‘I/O’ section) and it only supports one codec called Xbox Media Audio (XMA). The latter is a variant of Microsoft’s proprietary Windows Media Audio (WMA), which you may have heard about already. In any case, why was that codec so crucial that Microsoft invested extra hardware in a console already facing budget cuts?
A codec-rich industry
Back in the naughties (and even the late 90s), during the rise of the World Wide Web and affordable multimedia products (e.g., accelerator cards, SIMD-capable CPUs, and fast network bandwidth), many companies that were once narrowly focused on productivity software suddenly ventured into a new area of multimedia services.
It so happened that, all of a sudden, users began asking to watch full-motion movies on a PC, listen to music while working on a spreadsheet, and even compile their own audio CDs (the iconic rip and mix). We, of course, take all of this for granted now, but mind these ‘abilities’ had to be implemented at some point in history. Initially, they were delivered through third-party software (Nero and Winamp, to state a few) and later bundled with the operating system: Windows XP had built-in CD burning features, albeit mediocre, and Mac OS X 10.1 integrated iTunes.
Now, if we focus on the events surrounding the music world and its never-ending sharing systems, we also see that the MP3 became the de-facto codec for transmitting music [44] and that brought huge demand for media players that could decode MP3 (well, technically, MPEG-1). That being said, what was Microsoft’s response to this trend? Well, develop another codec to displace MP3, a new format called Windows Media Audio or ‘WMA’ [45].
One more push for WMA
Unfortunately for them, the adoption of WMA was not as popular as MP3, presumably due to Microsoft’s licensing schemes. To top it off, Microsoft later fragmented their user base by releasing non-backwards compatible revisions and offering multiple tiers. Yet, the company still kept pushing for adoption by other means, for instance, through DirectX’s audio playback libraries, namely ‘DirectShow’ [46].
You can see now that it’s not difficult to put two and two together. The original Xbox was conceived as a ‘DirectX-compatible console’ and, while one could debate about such statement, the same slogan also applied to the Xbox 360. So, it’s no mystery that WMA carried on in this console.
However, Microsoft didn’t bring WMA in its current form. Instead, they enhanced it to make it an attractive codec for game studios (already adopting Sony’s ATRAC3). In essence, Microsoft grabbed the high-end WMA tier (called ‘WMA Pro’) and added more levels of compression that were favourable to the bandwidth capacity of the Xbox 360. Finally, they renamed it Xbox Media Audio or ‘XMA’.
For the coup de grace, Microsoft added dedicated circuitry to offload CPU cycles during decompression tasks, so the CPU can focus on other parts of the game.
A look at the XMA accelerator
In terms of functions, the XMA decoder can decode up to 5.1 audio channels with a sample rate of 48 kHz and a resolution of 16-bit. No surprises here!
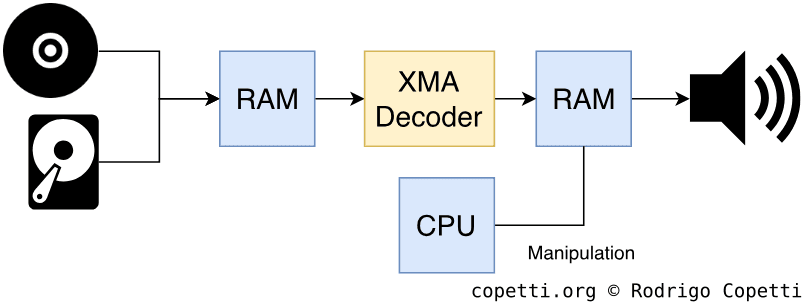
Moving on, the decoder works as follows:
- It starts by reading XMA-encoded data from main RAM.
- Decodes it.
- Outputs PCM data, ready to be streamed, in an arbitrary location in main RAM.
- Finally, the CPU can apply effects on it and/or forward it to the audio DAC for hearing.
All of this is abstracted with the use of Microsoft libraries, which handle how data is streamed, optimised in cache and moved around in memory. Developers have multiple APIs at their disposal, each offering thinner-to-thicker layers of abstraction. Be that as it may, the thinnest API won’t provide direct access to the XMA decoder, as it’s still a proprietary and undocumented block of circuitry, after all.
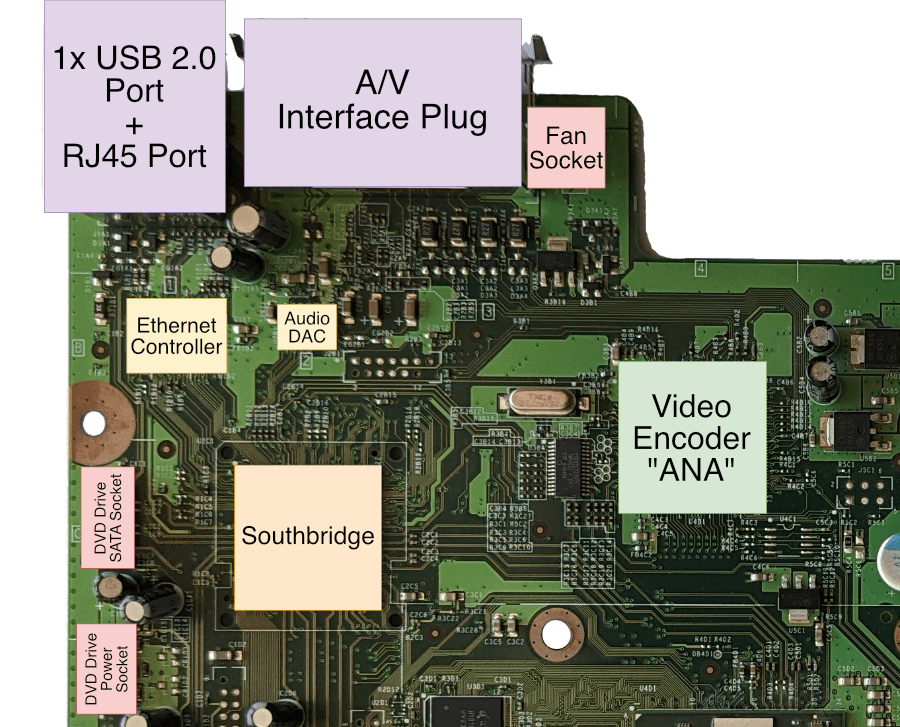
I/O
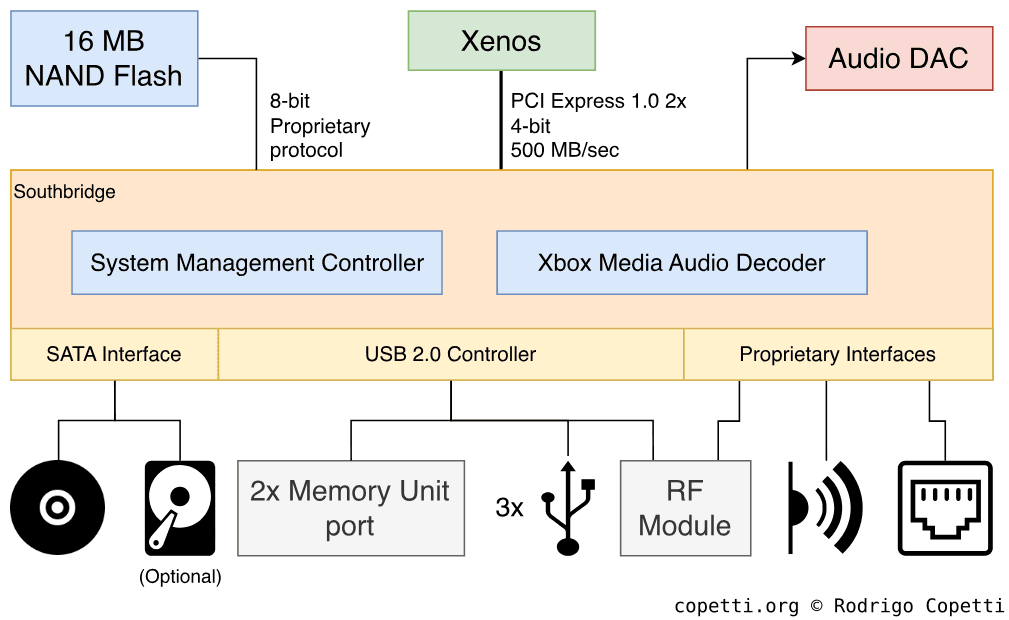
Following in the footsteps of the original Xbox, all I/O operations are handled through a thick and opaque chip called Southbridge (though in various documents I’ve seen it referenced as ‘I/O chip’ or ‘XBS’ as well). The Southbridge connects to most, if not all, internal and external interfaces. This chip is only connected to the GPU (not the CPU), so Xenon has to go through Xenos to reach it and subsequently request data from any socket.

The Southbridge communicates with Xenos using the PCI Express protocol, composed of two unidirectional serial buses, one for each direction. In the case of this console, each bus can transfer up to 500 MB/sec [47].
Clever L2 access
To keep up with the demand, the Southbridge can write to main RAM. Consequently, there needs to be a mechanism in place to maintain data coherence between the CPU’s caches and the changes done by the Southbridge. Hence, the latter is equipped with an automatic trigger that flushes the CPU’s L1 and L2 if, and only if, the memory address the Southbridge wrote to had been cached by the CPU. Nevertheless, the CPU will have to cache that memory again, though programmers won’t need to worry about manually synchronising the CPU caches every time the Southbridge fiddles with main RAM.
The core of Southbridge
You’ve seen before that the abundance of services in 7th generation consoles has led to the inclusion of many black boxes. These are meant to offload most of (if not all) the security and I/O tasks away from user-accessible components like the CPU and GPU.
The Xbox 360 is no stranger to this. Hidden within the Southbridge chip there’s a component called System Management Controller (SMC) and, like the Wii, it draws current even on standby mode. The SMC abstracts lots of I/O operations, including power management, real-time clock, temperature control, LED control and the infrared sensor [48]. The CPU communicates to the SMC using a First In, First Out (FIFO) command buffer, though this task is restricted to the Kernel only (more about it in the ‘Operating System’ section). So, neither the user nor the game can fiddle with it.
Internally, the SMC is nothing more than a classic Intel 8051 microcontroller with its own ROM and RAM [49]. Upon getting power, it boots its internal program and proceeds to read from a separate NAND chip to fetch configuration files.
There are other interesting aspects of the SMC, but we’ll discuss them in due time (don’t worry, I’ll be waiting in the ‘Anti-piracy’ section…).
External interfaces
The set of external ports is not particularly overwhelming, but there are a fair number of them.
In any case, the console offers:
- Three USB 2.0 A sockets: one is found at the back of the console and it’s meant to connect to an external accessory (like an official Wi-Fi module) that Microsoft sold separately. The other two are on the front and can be used to connect wired controllers.
- With the arrival of the ‘Slim’ Xbox 360 model in 2010, an internal Wi-Fi card has since been bundled with (internally connected with USB as well) and two more USB sockets were added on the back.
- A special socket (combining USB and proprietary interfaces) for the RF module, also known as the front panel that lights up when the console turns on. This component also handles the communication between the wireless controllers (through a proprietary wireless protocol) [50].
- Two Memory Unit ports: these are mangled USB ports that fit a Memory Unit, a proprietary Memory Card of up to 512 MB of size [51].
- An RJ45 port for Ethernet connectivity.
- Infrared Receiver to capture infrared light sent by an Xbox-themed remote controller (an optional accessory).
- One SATA II socket: mixed with power lines (resulting in a proprietary socket) and exposed at the top of the case (if the console is placed vertically) to connect the optional external hard drive.
Wired with a chance of Wireless
While Sony went straight for wireless controls using Bluetooth technology, the Xbox 360 shipped with different kinds of controllers depending on the ‘edition’ purchased (this doesn’t necessarily affect the motherboard revision, only the amount of accessories bundled with the box).
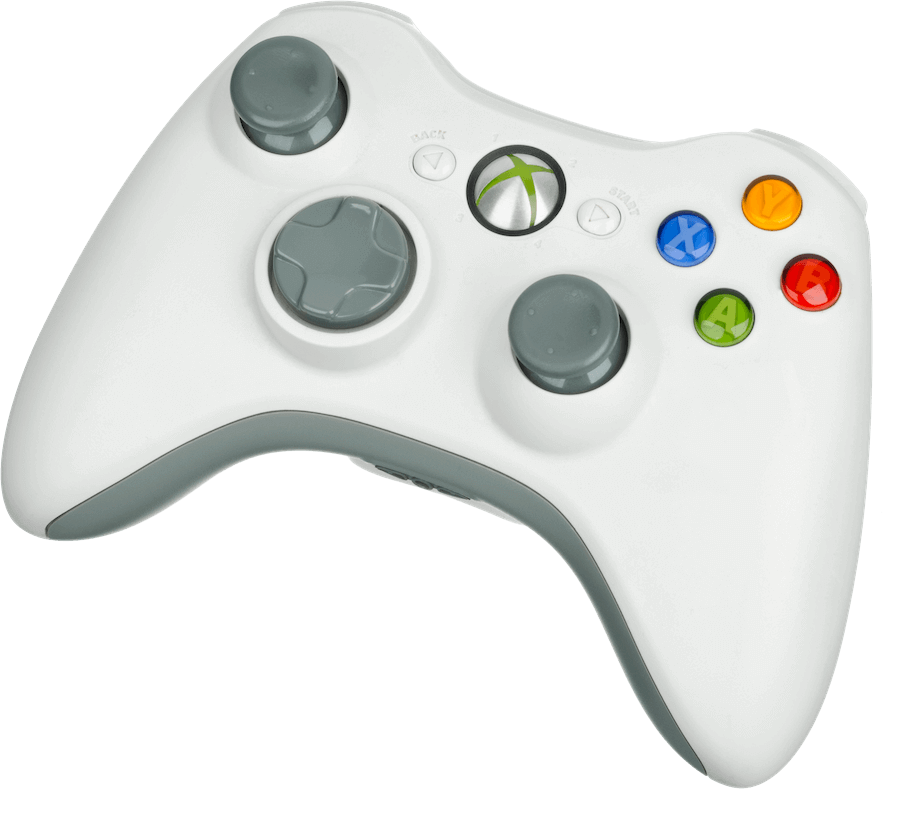
As you may guess, wireless controllers were only given out with the posh ‘premium’ editions, while the low-end & HDD-less ‘Arcade’ model shipped with a single wired controller (this time, using a standard USB A cable). Wireless controllers required two AA batteries, though Microsoft also sold a rechargeable battery block.
The console can handle four controllers at the same time, whether wireless or wired, but note that the console only provides three user-accessible USB ports.
Compared to the old duke, the controller doesn’t take two memory cards anymore, but it keeps the headphone jack (2.5 mm TRS type). The wireless model has a special socket on the front to plug the ‘Play and Charge’ cable, an optional accessory to connect wireless controllers to the console and charge the battery at the same time. The cable uses a proprietary bus layout composed of USB-compliant pins with additional undocumented ones [53].
Internal interfaces
These are the interfaces that the Southbridge handles to interconnect chips within the motherboard:
- One SATA II socket to plug the internal DVD drive.
- A proprietary 8-bit bus to communicate with a 16 MB NAND Flash chip.
- Another proprietary bus to talk to the Audio DAC.
That interactive accessory
I don’t tend to give too much attention to accessories because they deviate from the main focus of the article, but there is one special case where Microsoft dedicated an obsessive amount of marketing effort. They were even convinced that ‘gamepads are a thing of the past’ and it’s only a matter of time before this new product would eradicate current user interaction methods.
Well, that didn’t happen, but Kinect is still worthy of study. Released in November 2010 with huge fanfare, Kinect is a sensor bar (very different to the Wii’s sensor bar, Kinect’s ‘competitor-slash-inspiration’) that captures the user’s position, movement and voice in an effort to provide control of the game without requiring any physical object in the user’s hands.
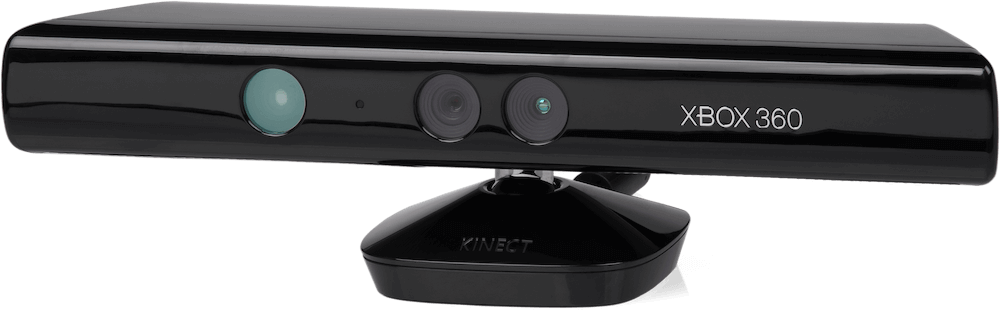
The construction of this device isn’t anywhere simple, and as such, the sensor carries many forms of technologies:
- An RGB camera to capture images of the room and the player [55].
- A IR emitter and IR sensor that projects IR light and captures its reflection, respectively. This allows deriving a z-buffer of the room, thereby identifying the depth of objects.
- A microphone that listens to the player.
- A chip salad that handles the sensors and signals to produce meaningful data from it. This includes 64 MB of DDR2 SDRAM (as a working area), 1 MB of Flash memory (where the main program is stored), a Marvell AP102 SoC (presumably containing the main CPU inside) and a PS1080-A2 DSP (to process the image coming from the cameras), among others. All of this is fitted on three different boards stacked together [56].
The sensor is operated through the use of Microsoft’s opaque APIs, which in turn communicates to super-secret software installed on both the Kinect and the Xbox 360’s Operating System. The Kinect uses a USB 2.0 A connection to plug into the console. The ‘Slim’ re-design of the Xbox 360 released in the same year was also branded ‘Kinect compatible’ as it could supply power to the bar as well (with the provision of an extra proprietary port on the back of the console), older models require a separate power brick for the Kinect.
Operating System
The Xbox 360 was subject to the same needs and fashions that the PlayStation 3 went through. So the former offers many services, including online gaming (through Xbox Live), a digital marketplace, media player, file system explorer (albeit extremely simple) and other utilities.
Overview
The Operating System of the Xbox 360 is a collection of bare-metal utilities and userland applications tightly squashed together to fit into 16 MB of NAND. Just like the PlayStation 3, Microsoft built their OS to provide multimedia and networking (i.e. multi-player) capabilities, plus the ability to play games and secure the system from external intrusion.
That being said, the system contains a few core components that take care of the low-level area of this console (hardware access, security and resource management). The rest is composed of applications (i.e. the splash animation, the interactive shell called ‘Dashboard’ and the game itself) and user data (i.e. game saves, user profile, network settings).
A tumultuous progress
Throughout the life of this console, I noticed a more chaotic evolution than its competitor, which involved constant re-branding and radical redesigns of the user interface. I presume Microsoft was trying to shift from one target audience to another. So, to understand this section better, I’ve organised its evolution into these periods:
- The multimedia hub era (2005-2008): as the first home console to debut in the 7th generation, high-definition graphics, Xbox Live (online platform) and HD movies were the main selling points. And in the case you got bored with them, you could resort to buying accessories [57] (i.e. the remote controller, the headset, the HD DVD reader) to ‘enhance’ your experience.
- The competitive era (2008-2011): with the PlayStation 3 and the Wii now occupying store space, Microsoft found itself in need to aggressively compete for the consumer’s attention. First, a new system update called ‘New Xbox Experience’ overhauled the old interface to increase user personalisation (i.e. 3D avatars) and enhance the social aspect of this console. Meanwhile, a new ‘killer app’ lands in the form of a physical accessory: Kinect. Nobody knows its outcome, yet it proves a very engaging topic of conversation.
- The cloud era (2011-2013): as all the previous enthusiasm slowly dissipates, Microsoft simplified its user interface to align with its other platforms (Windows 8 and Windows Phone 7) and provided users with the chance to move their local data to the cloud (a.k.a Microsoft’s servers). In the process, third-party advertising became more prominent in the user interface (possibly to increase their source of income). Nonetheless, users are now expecting the successor of the Xbox 360.
- The capitulation (2014 onwards): with the new successor (Xbox One) reaching the stores, Microsoft dedicated minimum efforts to their (now old) console. Users will only receive system updates in the form of bug fixes.
A recallable security design
If you recall my deconstruction of the PlayStation 3’s operating system, the latter was divided into three areas:
- The Hypervisor, which has complete control of the hardware.
- The Kernel, interfacing user programs (mostly games) with the hypervisor, and in doing so it provides an extra layer of protection.
- The user space, encompassing all programs executing on top of the kernel, including games and other apps (i.e. the shell and media player).
This design is correlated to the PPU’s privilege levels (affecting both Cell and Xenon) which prevents ‘casual’ applications, like games, from accessing sensitive resources, such as decryption keys.
IBM enacted three privileges (instead of just two) to allow multiple operating systems running at the same time. With this idea, each OS would only live under the two lowest levels while the highest level would be reserved for the program supervising all operating systems. In practice, the PlayStation 3 and Xbox 360 only require a single operating system (except for OtherOS, but that was quickly scrapped). Consequently, Sony and Microsoft designed a hypervisor that enforces their respective security model and performs memory management tasks. Conversely, the architectural differences between Cell and Xenon led to very distinct implementations of hypervisors, so each is subject to unique flaws and strengths.
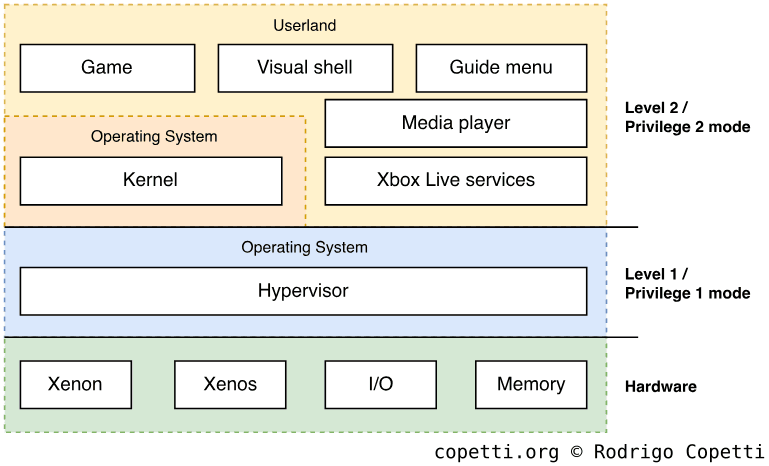
The most notable difference between the security model of the Xbox 360 and the PlayStation 3, is that the former runs both the Kernel and user-space programs under the same privilege mode (the second level) [58]. So, all critical tasks rest within Hypervisor, which enjoys extra acceleration from the hardware side (I’ll explain more about it in the ‘Anti-piracy’ section).
Architecture
Let’s take a deep dive at the operating system’s main components, note this doesn’t include the boot loaders, but for that, I’ve dedicated a separate section. For now, we’ll check the components that reside in memory after the console boots up.
The Hypervisor
The Hypervisor is an incredibly small program that only occupies 128 KB [59]. Furthermore, by being assigned the highest privilege level available, it’s tasked with:
- Preventing programs from accessing areas beyond the permitted boundaries.
- Combined with the use of page tables, it restricts which areas of memory can be executed by the CPU. This technique is called Write Xor Execute or ‘W^X’.
- Encrypting executable code.
- Refusing to load executables that aren’t signed by Microsoft.
- Protecting memory data from being tampered with. This is done by encrypting the data in main RAM and decrypting it just after the CPU fetches it from L2 cache.
- This is a complex but interesting feature which is explained further in the ‘Anti-piracy’ section.
The hypervisor is operated through the use of ‘system calls’ [60], external programs invoke these to request functions from the hypervisor. Though whether the hypervisor complies or not is a matter of the program’s accreditations.
The Kernel
Since the Hypervisor focuses on bare-metal services, an extra layer of abstraction is added in the form of a Kernel. The latter also resides in memory but gets assigned a lower privilege level. The main job of the Kernel is to expose routines that userland programs can benefit from, for instance:
- Device drivers: in essence, I/O is interfaced by the Kernel so programs are not hard-coded to specific hardware (resulting in platform-dependent code), which would prevent old games from working on late Xbox 360 revisions.
- File system management: a file system defines how data is organised in a physical medium, the Xbox 360 supports many types of media and the Kernel implements various file systems for each one. This enables programs to manipulate persistent storage using files and directories and not raw sectors.
- Bootstrapping core applications: once the Kernel is up and running, it makes sure that the user interface and other executables are running, allowing the user to interact with the console.
- Thread scheduling: remember the previous paragraph about programming styles? Well, the thread scheduler is found here. Furthermore, the scheduler implements preemptive multitasking as its method for alternating between threads and avoiding jams.
- To balance performance across all running services, the scheduler applies some constraints. For instance, the fourth hardware thread is reserved for the audio pipeline and software downloads; and the second hardware thread is prioritised for concurrent file system operations.
To work, the kernel reserves 32 MB from main RAM to allocate all of its resources.
The User land
Userland programs encompass any executable running on top of the kernel. These are found in the form of a special container called Xbox EXecutable or ‘XEX’ [61]; and follow a similar structure to the traditional EXE container used by Windows - albeit tailored to the specifications of the Xbox 360. The most important difference is that XEX’s executable code follows the PowerPC ISA binary structure (instead of x86) and it must be encrypted to run (the code is signed with Microsoft’s private keys and the headers/meta-data store a hash to prevent tampering).
From the boot animation to the game itself, everything is a distinct XEX file. Some are automatically loaded by the Kernel (the boot animation and the interactive shell) and others by the user (the game, the media player, etc) using the shell. When the user or the Kernel request to run a XEX, the Kernel copies it to main memory and the Hypervisor checks its signature, re-encrypts it, marks the area as ‘executable’ and finally instructs the CPU to run it [62].
While this console doesn’t provide any fancy multitasking between games (which is not a priority for a console, in my opinion), the Kernel still takes the aforementioned 32 MB of main RAM as its working area. This is what makes it possible to open the Xbox Guide (that popup menu that shows up after pressing the ‘Xbox logo’ button on the controller) and/or play music mid-game. To switch between full-screen applications, the Xbox Guide contains an entry to return to the dashboard (loading it up again) so the user can select another program.
Finally, all user data is grouped into a virtual Profile. Thus, the Kernel runs another program called ‘XAM’ which provides profile-related services (achievements tracking, avatar selector, save data storage) [63]. A new profile is set up upon powering the console for the first time and there can be more than one profile stored.
Backwards compatibility
As a compelling side note, the Xbox 360 can run a considerable subset of games belonging to the previous Xbox (to avoid confusion, let’s call it the ‘classic’ one). This was done through pure and hard software emulation and, while it didn’t provide the same degree of compatibility of the CECHA PS3 revision, I believe the methods were more clever, cost-effective and consistent.
The emulator was called ‘FU’ [64] (found as xefu.xex) and it could only be installed in the Hard Drive, residing next to other optional assets for the operating system. FU loads every time the user booted up a classic Xbox game into the Xbox 360. However, for an ‘enjoyable experience’, FU only proceeds with the emulation if the game is listed in its local whitelist, where Microsoft tracks which games are deemed ‘playable’. As more system updates were released, more games were added to the whitelist.
Michael Brundage, one of the authors of FU, described the development process as ‘probably the hardest technical challenge of my career’ and also mentions ‘how inefficient most standard libraries are, especially at math.’ [65].
Storage medium
Now that we’ve seen the structure of the OS, let’s now check how information is scattered across this console. You’ll soon find that there’s an abundance of media available, and Microsoft had to devise different file systems and protocols to keep the security integrity in place.
Boot ROM
Here lies the most critical and fragile program of this console. Similarly to the PlayStation 3 (again, both share IBM technology), the Xenon hides 32 KB ROM that stores the first stage of the boot loader, along with Microsoft’s RSA public keys and SHA-1 hashes used to decrypt and validate further boot stages, respectively [66].
This area happens to be unencrypted, as the security system is not set up yet and the CPU only understands unencrypted machine code, but it’s not a concern for Microsoft since the boot ROM is sealed within the CPU die and the public key can’t be used against the system. Although, being a ‘ROM’ also means that this code can’t be patched after it leaves the factory.
In any case, the boot ROM is only executed once after the console is powered on.
Internal NAND

In the motherboard of every Xbox 360, you’ll find a NAND Flash chip. This is what Microsoft uses to store [67]:
- The remaining boot loaders after boot ROM.
- The Hypervisor and Kernel.
- System updates (in the form of delta patches for the Hypervisor and Kernel).
- Userland programs (i.e the splash screen, dashboard, XAM/profile manager, media player, etc).
- Console-unique information like serial number, region and unique encryption keys used for a variety of operations. This area is also known as the ‘Keyvault’.
- Configuration data read by the System Management Controller (that tiny computer inside the Southbridge) which includes calibrations for thermal control. This is also referred to as ‘config block’.
All of this data is encrypted in a multitude of ways. The majority uses Microsoft’s private key combined with others, which makes it quasi impossible to tamper with, in theory!
Contrarily to the PS3, Microsoft managed to fit all of this in a smaller 16 MB chip, although some revisions from 2008 and 2009 featured 256 MB and 512 MB NAND chips [68]. This wasn’t a breaking change, however, as the extra space was partitioned and treated as a Memory Unit instead.
Memory Units and HDDs
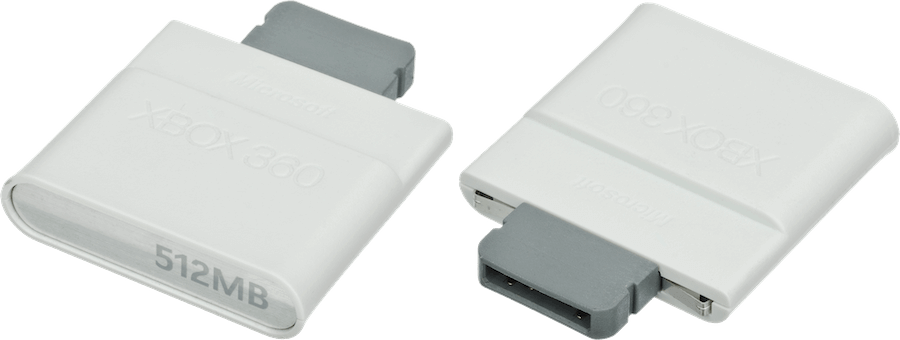
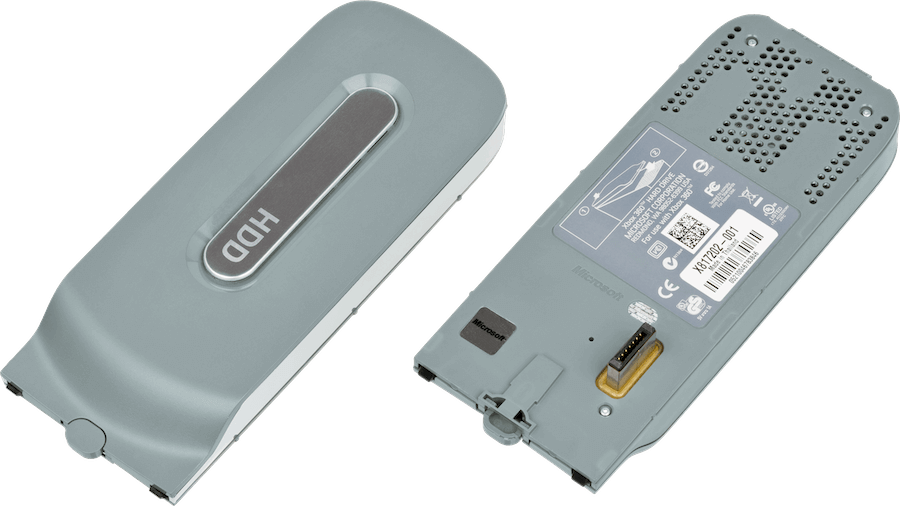
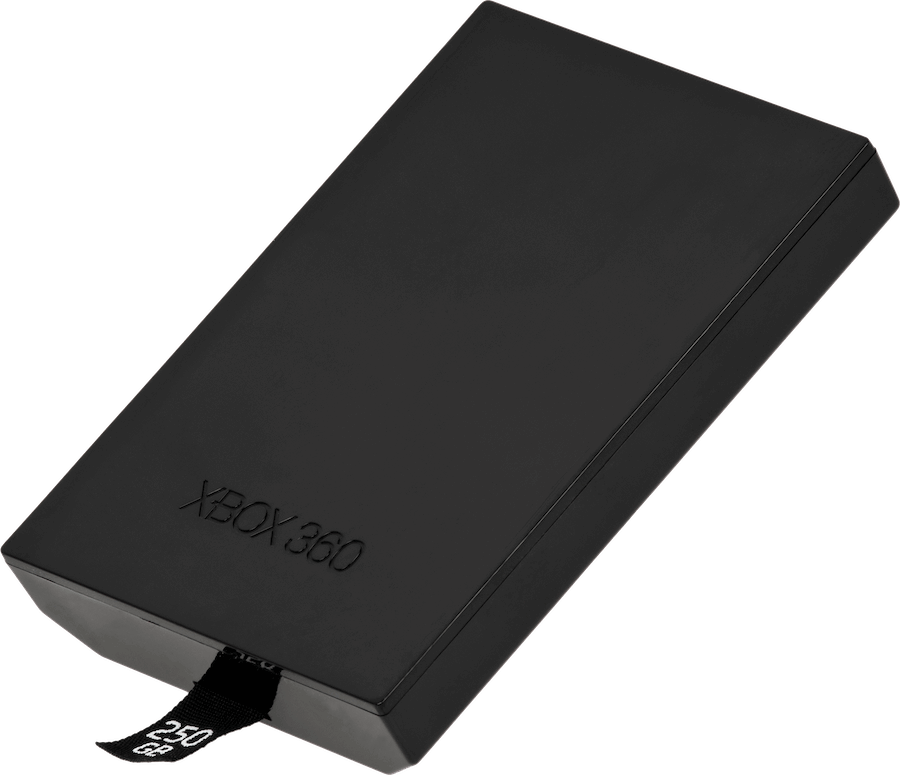
If you place the console in a vertical position, on the front you’ll see two ‘Memory Unit’ slots. On the top of it, you’ll find a modified SATA socket for a hard drive (only fits those encased and sold by Microsoft). Both of these media are optional and used as mass storage devices.
Upon fitting any of them, the Xbox 360 initialises it and adds a multitude of partitions. Though it doesn’t write a master partition table! It turns out the locations (offsets) of each partition are already hard-coded into the Kernel and all partitions - except the one storing user data - are fixed in size. Additionally, every partition uses proprietary and undocumented filesystems (recall that this is coming from the company that co-authored FAT, NTFS and exFAT), including one called ‘FAT Xbox’ (FATX) for generic data and ‘Secure Transacted File System’ (STFS) for caching purposes [69].
As long as there’s space, either medium can store user profiles, game saves, downloaded games (initially called ‘arcades’) and downloadable content (DLCs). Only the HDD can store the Xbox classic emulator (the console automatically downloads it after a classic disc game is inserted).
Microsoft sold Memory Units of up to 512 MB and hard drives of up to 500 GB [70]. You may think “Well, what if I swap the hard drive inside the case for a bigger one?” but that’s been predicted, as all hard drives sold by Microsoft embed a Security Sector partition that prevents users from using third-party hard drives [71]. This block encodes unique properties of the hard drive (serial number, model number, size, etc) that the Kernel compares with the hard drive’s metadata, along with a bitmap of Microsoft’s logo (to mitigate distribution with the use of trademark laws) and an RSA signature (to prevent third-parties from crafting their own security sector) [72]. Although, some users eventually found workarounds by manually overriding the hard drive’s metadata [73].
External USB
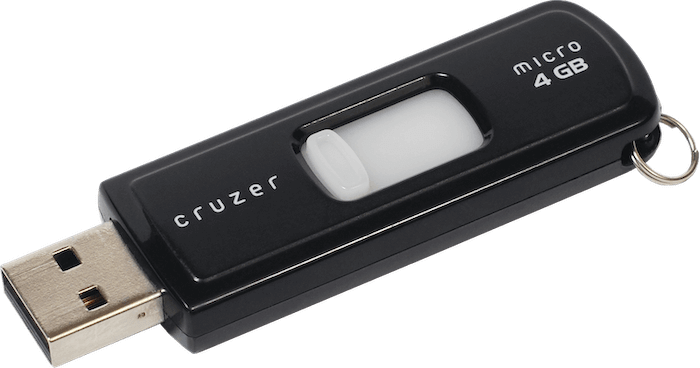
In April 2010, Microsoft conceded to the invasion of the cheapo USB sticks (which already conquered every household) and released a software update that allowed to use USB drives in the Xbox 360, as a method for expanding storage space.
USB drives can store most of the content located in hard drives (including games) except the Xbox classic emulator. It’s fair to say that the theoretical bandwidth of USB 2.0 (480 Mbit/sec or 60 MB/sec) is no match for the internal SATA I protocol (1.5 Gbit/sec or 187.5 MB/sec), but having an extra storage option is always appreciated.
Behind the scenes, USBs are formatted with the popular FAT32 filesystem. Now, the Kernel also adds a hidden folder storing blobs that contain FATX-structured data [75], which is where Xbox 360-related data resides. This design enables the console to maintain its security requirements within an ‘insecure’ medium, albeit at the cost of only accessing up to 16 GB from the USB drive [76].
Boot process
Okay, so you’ve seen how this system works, how it’s structured and where it’s stored. But, there’s still a missing piece, how do you go from ‘nothing’ (off state) to a ‘Hypervisor running an encrypted Kernel loading up executables signed by Microsoft’? That’s what the boot loader is for, and there are many, many stages in this system.
Multicore chaos
Before we begin, we need to address something fundamental. With homogeneous multi-core CPUs, all cores are entitled to ‘own’ the system, but this would only lead to chaos, so only one is tasked with directing the rest. The leader is commonly called ‘master core’ while the rest are named ‘slave core’ or just ‘core’.
Outside the Xbox world, this hierarchy is sometimes found hardwired into the chip, while other architectures need manual intervention. For instance:
- On ARMv7, all cores wake up at the same time and look for the same reset vector (
0x00000000). Thus, the program, now running multiple times, must make each CPU query itsmpidrregister to identify what type of CPU (master or slave) it’s running from. After this, it can take appropriate action (i.e. give orders or wait for commands) [77]. - With x86, the first core is the master one. Thus, the first core starts at
0xFFF00000while the other cores are ‘asleep’. The master then sends an interrupt to the neighbouring cores with an arbitrary address directing them where to start execution.
In the case of PowerPC, well… it’s a tricky situation because Xenon was a custom order and not part of IBM’s PowerPC 2.02 spec. But by looking at some low-level homebrew source code for this console [78], I presume the boot handling is similar to x86.
Boot procedure
With all being said, I will now describe what the Xbox 360 does after the user presses the power button.
First things first, the reset vector of the master core appears to be 0x80000200.00000000 [79], this points to a secret location within the CPU: the aforementioned 32 KB of BootROM, where the first stage of the boot process is located.
For the sake of completion, there will be a tiny mention of a special device called ‘eFuse’. This is another storage medium similar to ROM or RAM, but with distinct physical qualities. I’ll talk more about it in the ‘Anti-piracy’ section to avoid overwhelming you, so for now, just remember those basic facts.
Without further ado, here is how the boot chain works. It all begins with the boot ROM and proceeds as follows [80] [81]:
- 1BL (as in ‘1st Boot Loader’): The master core is instructed to fetch the next stage (called ‘CB’) from NAND into the internal SRAM. CB is found encrypted with the RC4 algorithm. So, the CPU derives a decryption key using a key stored in 1BL and another stored in the header of CB. Once decrypted, the CPU checks its validity by hashing the decrypted area and comparing the resulting hash with another stored in CB. The latter also uses Microsoft’s public RSA key, stored in the internal ROM, for validating the hash. Finally, if the whole process completes without problems, the CPU continues execution at CB, otherwise, the CPU triggers a POST error and the Xbox 360 starts flashing red lights.
- This process involves a combination of many cyphers, such as HMAC, SHA-1 and ROT.
- 2BL or CB: The CPU, now executing from the internal SRAM, queries the eFuses to check that the version of CB running matches the one written on the eFuses. Then, it initialises most of the hardware. Finally, the CPU proceeds to fetch another block from NAND called ‘CD’ onto main RAM and repeats similar decryption and verification tasks 1BL did, this time using another key derived from the ‘CPU key’ (stored in the eFuses). If everything goes well, the next stage proceeds.
- In later software updates, this process was split into two bootloaders (named CB_A and CB_B) to mitigate faults that were exploited to execute homebrew (more details in the ‘Anti-piracy’ section).
- 4BL or CD: This is another decryption stage, albeit closer to the actual payload. This time, the CPU fetches yet-another block called CE, which goes through familiar verification processes (involving RSA checks) and it’s subsequently decompressed in main RAM. Once unpacked, the CPU finds itself in front of the Kernel and the Hypervisor. But it’s not over yet, I’m afraid, as the CPU must now fetch system updates to apply to these two programs, a process known as CF. Before continuing, however, CD orders to compare the number of updates installed against a designated counter in the eFuses block. This is done to prevent downgrades.
- The decompression algorithm used is called ‘LZX Delta’ and it’s authored by Microsoft.
- CF: This stage takes care of fetching update blocks stored on NAND, these are decrypted and decompressed with LZX as well. Once they are ready, they are applied to the kernel and the hypervisor residing on main RAM. Once all updates are done, CF returns to CD.
- CD (upon return): Now that everything is set, the CPU is redirected to the Hypervisor in main RAM.
- Hypervisor: This program takes over the hardware and then redirects execution to the Kernel, which in turn loads up the Splash animation and the Dashboard.
- The user is now in control.
Updatability
I guess it’s no news for you, but yeah, this console has an updatable operating system.
Though, it may surprise you that no matter the revision, all consoles ship with the same initial kernel (version 2.0.1888) from 2005 [82]. What happens is that the software updater installs ‘update packets’ in NAND, in the form of delta patches, and these are applied during boot, as you’ve seen in the previous section.
Updates can be fetched from Xbox Live (as an online download), through a retail game, by burning a conventional CD (that’s how we shared files before the 2010s); or through a USB stick. A typical update will install the aforementioned patches for the hypervisor and kernel, but it will override userland files like the dashboard. Finally, to prevent rolling back, the updater will finish by blowing an eFuse so, from now on, the Xbox will only be able to boot the updated version of the system.
Updates don’t usually require extra storage. However, when Microsoft released the ‘NXE’ update in 2008, the updater also installed static resources onto the Hard Drive (mainly themes and assets for the new 3D avatars) as NAND wasn’t big enough. This led Microsoft to increase the size of NAND in further revisions of the motherboard to bundle up to 512 MB of NAND, and later include internal memory units of up to 4 GB instead. You would only find these enhancements on hard-drive-less models.
Interactive shell
I think it’s time to take a break from so much theory and go over the different graphical interfaces that this console underwent. I know this is an article about computer architecture, but user interfaces are as important as all the fancy hardware we’ve been discussing. Also, user interface patterns go hand in hand with my interest in hardware!
In the following paragraphs, you may sense that I’m very critical of each interface, but I think it’s important to correctly identify the strength and flaws of each design so we can understand the reasoning behind its next iteration.
The ‘Blades’ dashboard (2005)
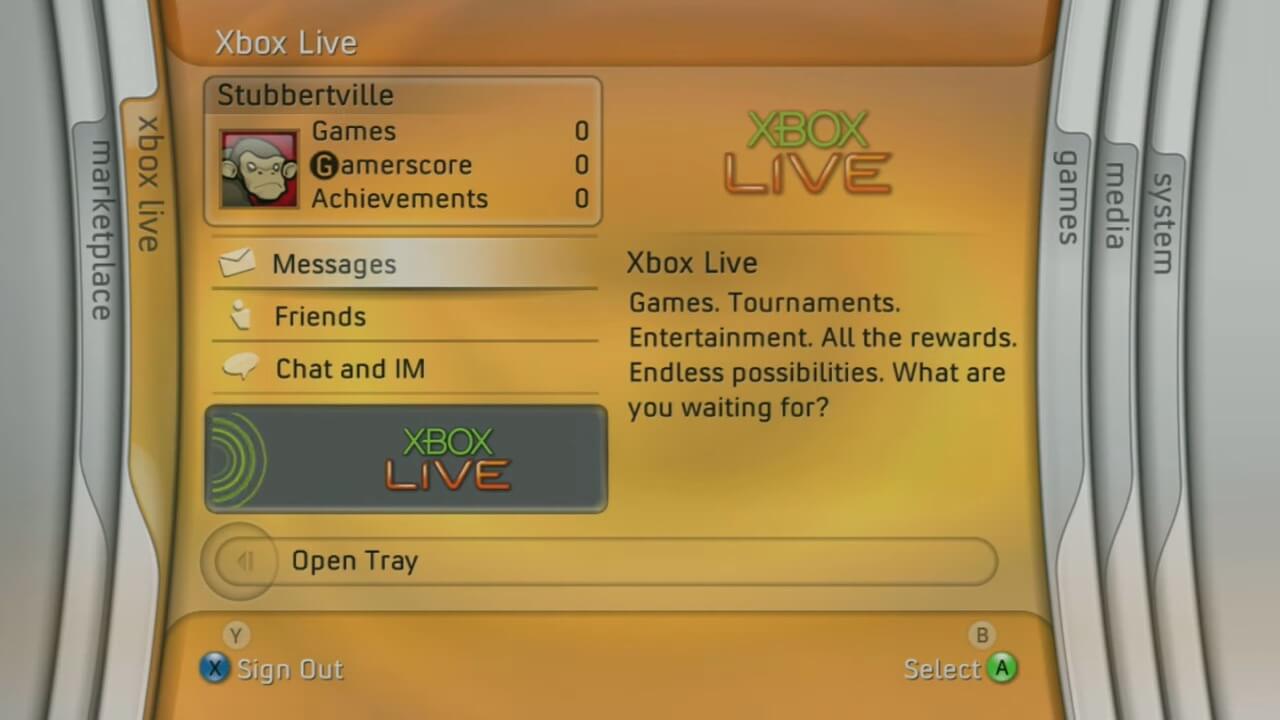
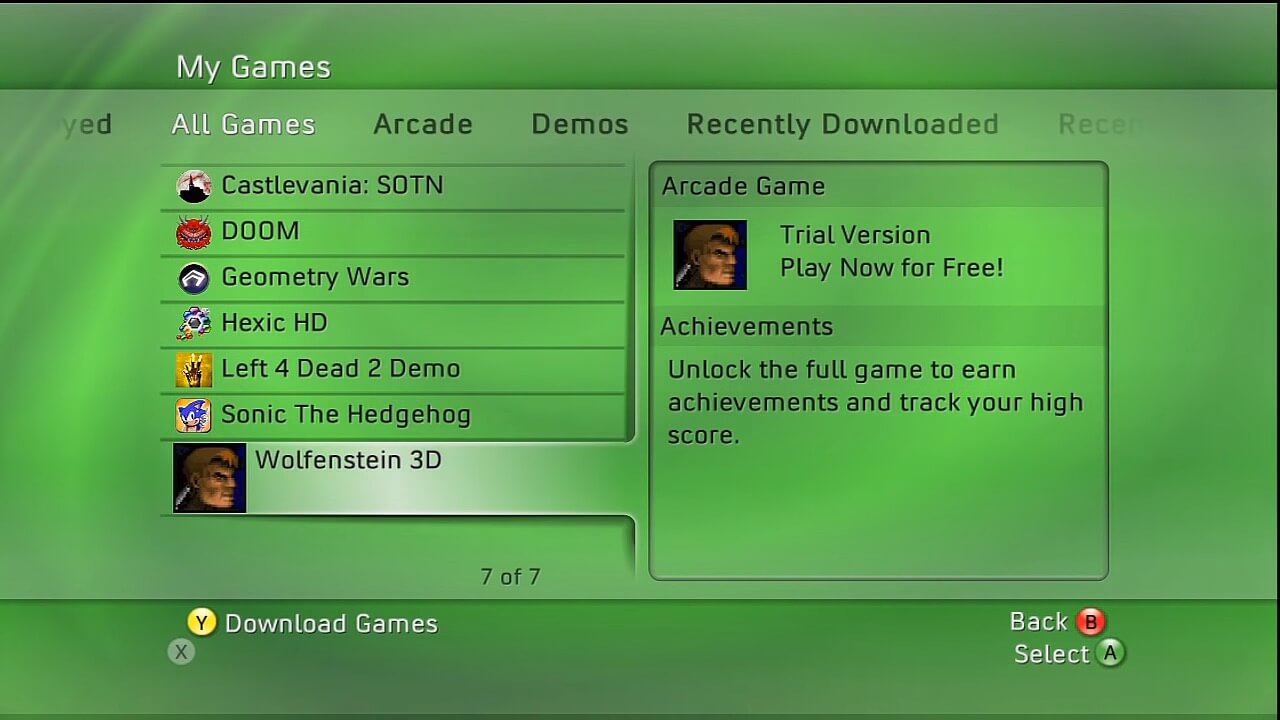
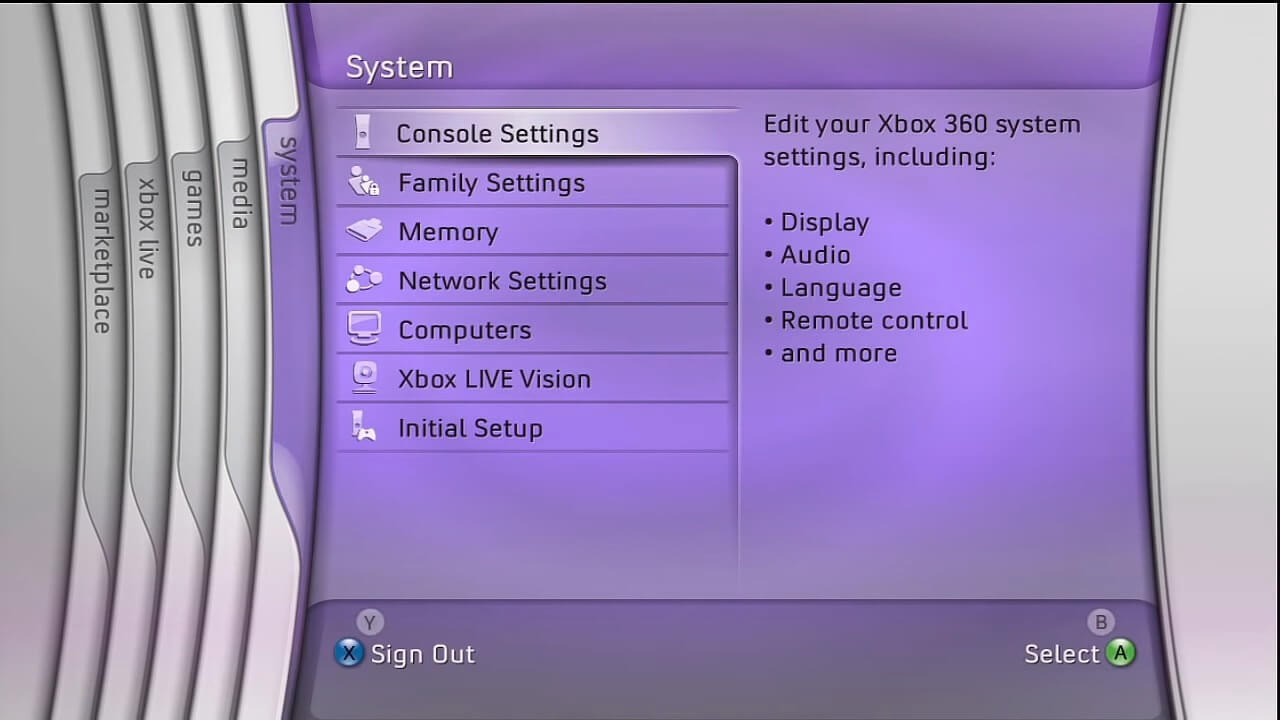
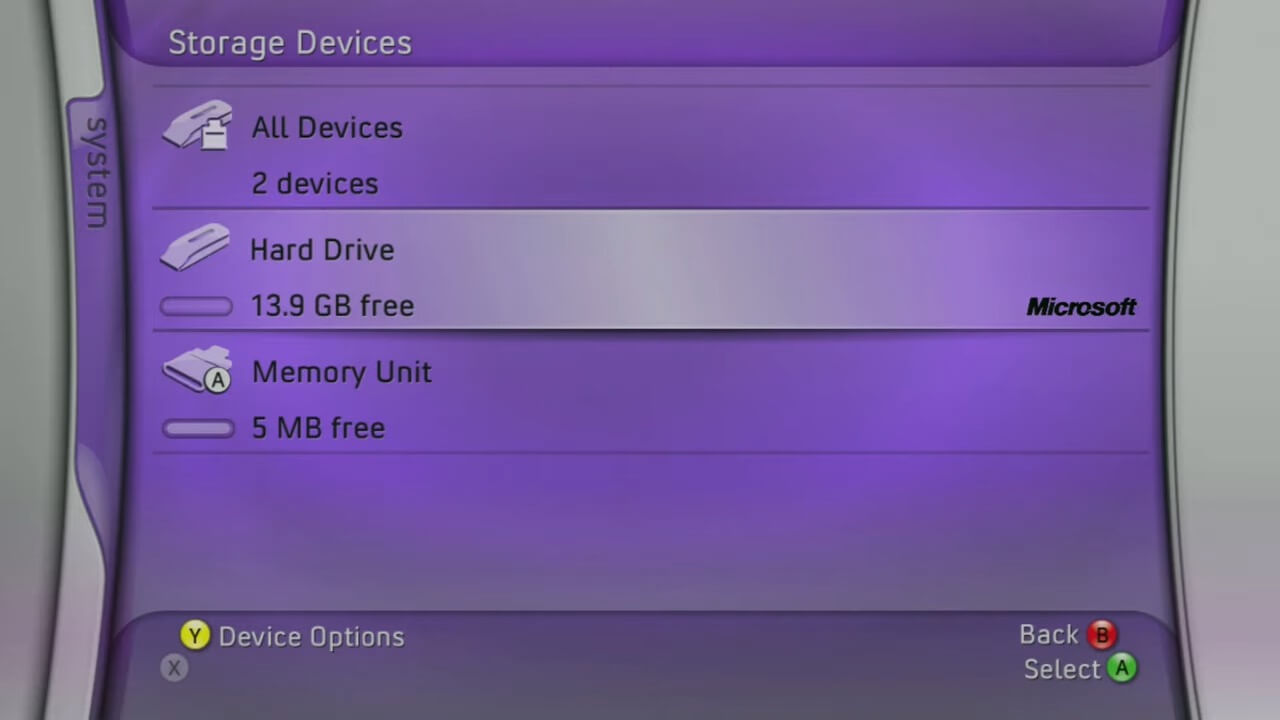

The first iteration of the user interface, now an element of nostalgia for some, was the Blades dashboard. Here, each group of services (game, multimedia, settings, etc) is organised into different overlapping layers called ‘blades’. All share the same hierarchy level and focus, meaning the user can only open one blade/category at a time. To navigate around, the user must swap between blades and interact with the actionable controls placed.
In my opinion, this style reminds me of one of those brochures with eye-catching foldable designs (in fact, the manual that came with the console replicated this). Furthermore, the design language (typography, colour palette and blur effects) is somewhat relatable to Windows XP and its Media Center pack, even the first iterations of Windows Longhorn exhibit common traits.

Truth be told, the overall design was strongly compromised to comply with both 4:3 and 16:9 aspect ratios, without being able to take advantage of the latter. The organisation of elements wasn’t very consistent either, as some views, like the Xbox Guide, felt like all controls had to be squashed into a small space. The most limiting aspect, in my opinion, is the fact the indicators for navigation (list of available blades) were always shown on both edges of the screen. This consumed useful space for the opened blade. Thus, exceptional navigation segues had to be used to move away from the home screen hierarchy and reclaim full-screen space, at the cost of adding more inconsistency to the user interface.
Nevertheless, this is the GUI that gave this console an identity, and it’s obvious that it targeted the ‘young’ audience group, which worked fine for a few years.
The ‘New Xbox Experience’ (2008)


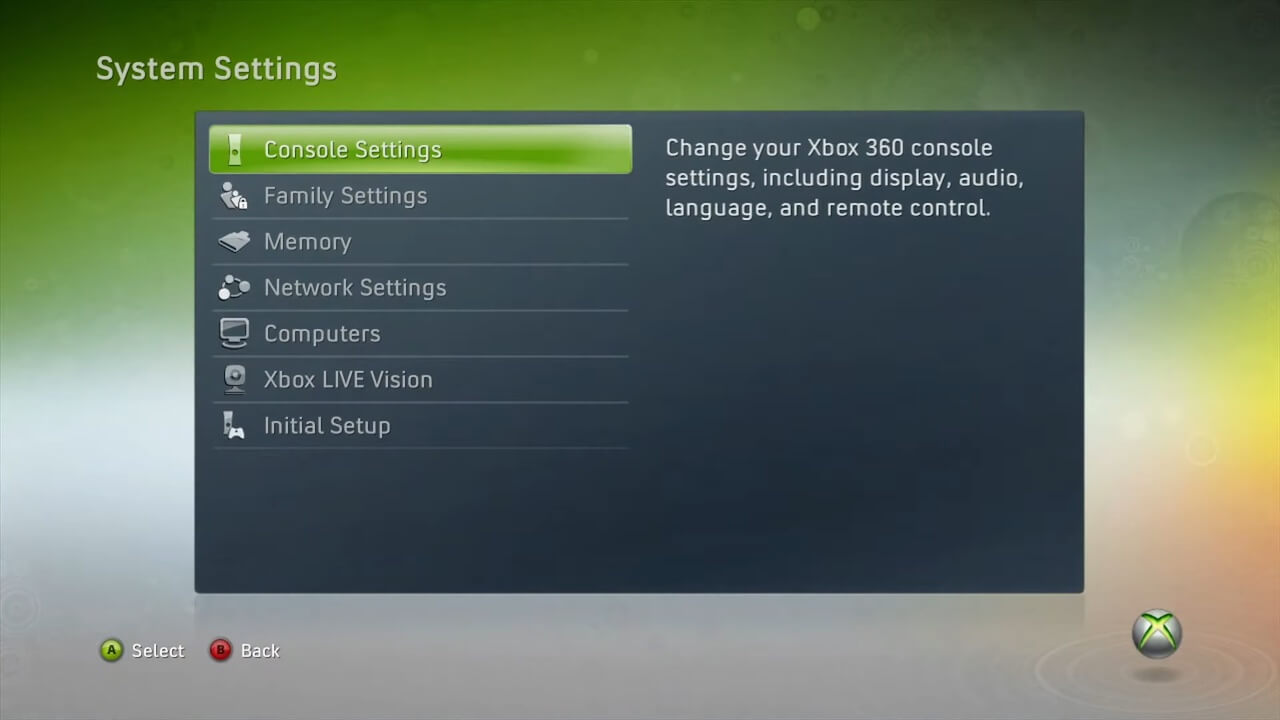
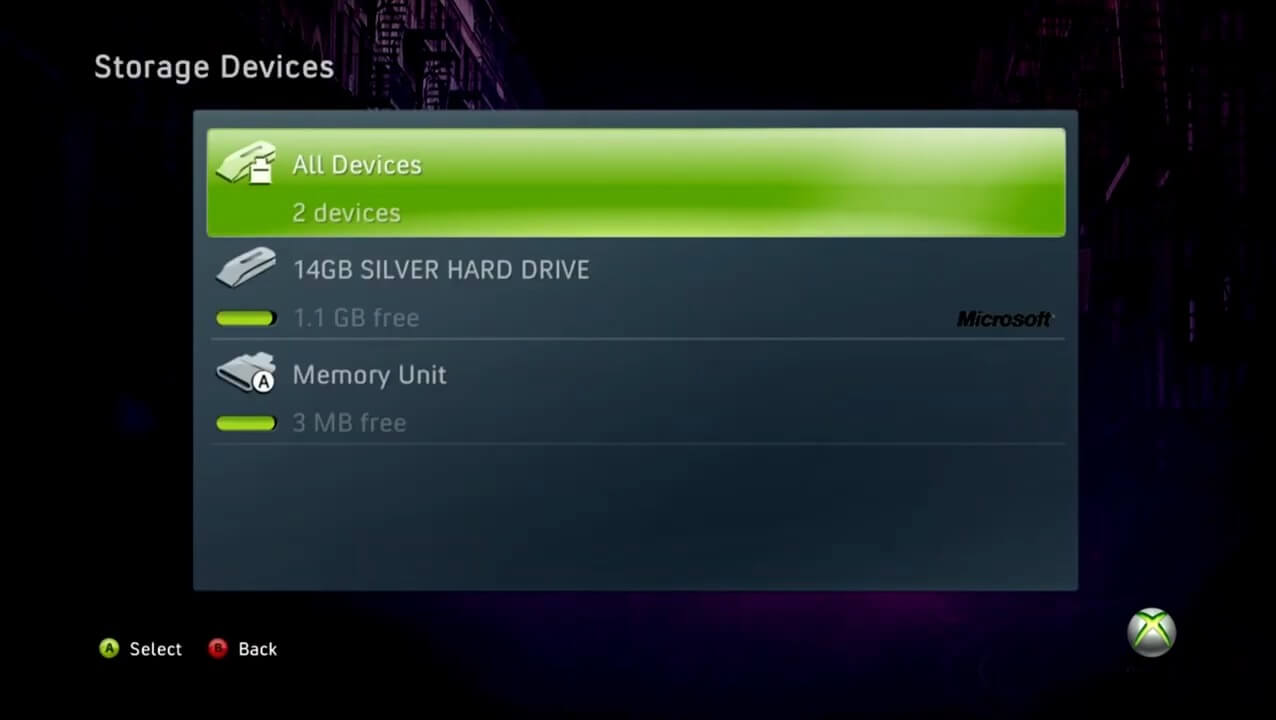
As Microsoft expanded its catalogue of services and features, the navigation pattern of the blades turned into a liability (as it constrained the number of navigation screens on the top hierarchy) and the lack of available space became apparent in later software updates. In 2008, Microsoft released a revamped Dashboard interface called New Xbox Experience (NXE) which focused on ‘infinite scrolling’ patterns to offer a wider selection of services on the front page. It also incorporated other elements like a glossy filter and 3D transitions recently popularised by Windows Vista and the new range of Windows Live applications.

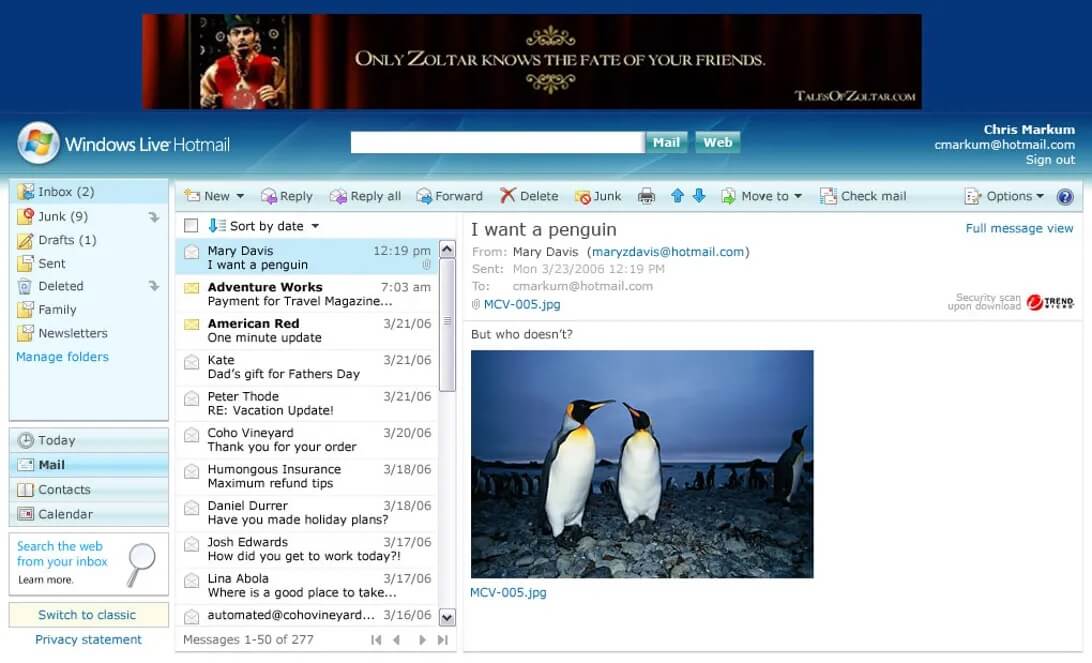
With the new design, screens could now enjoy full-screen space without being conditioned by the hierarchical level they were placed in. Curiously enough, the navigation layout is very similar to what Sony designed with XMB, where vertical arrows change category and horizontal arrows navigate through the elements of the same category.
The ‘Kinect’ update (2010)
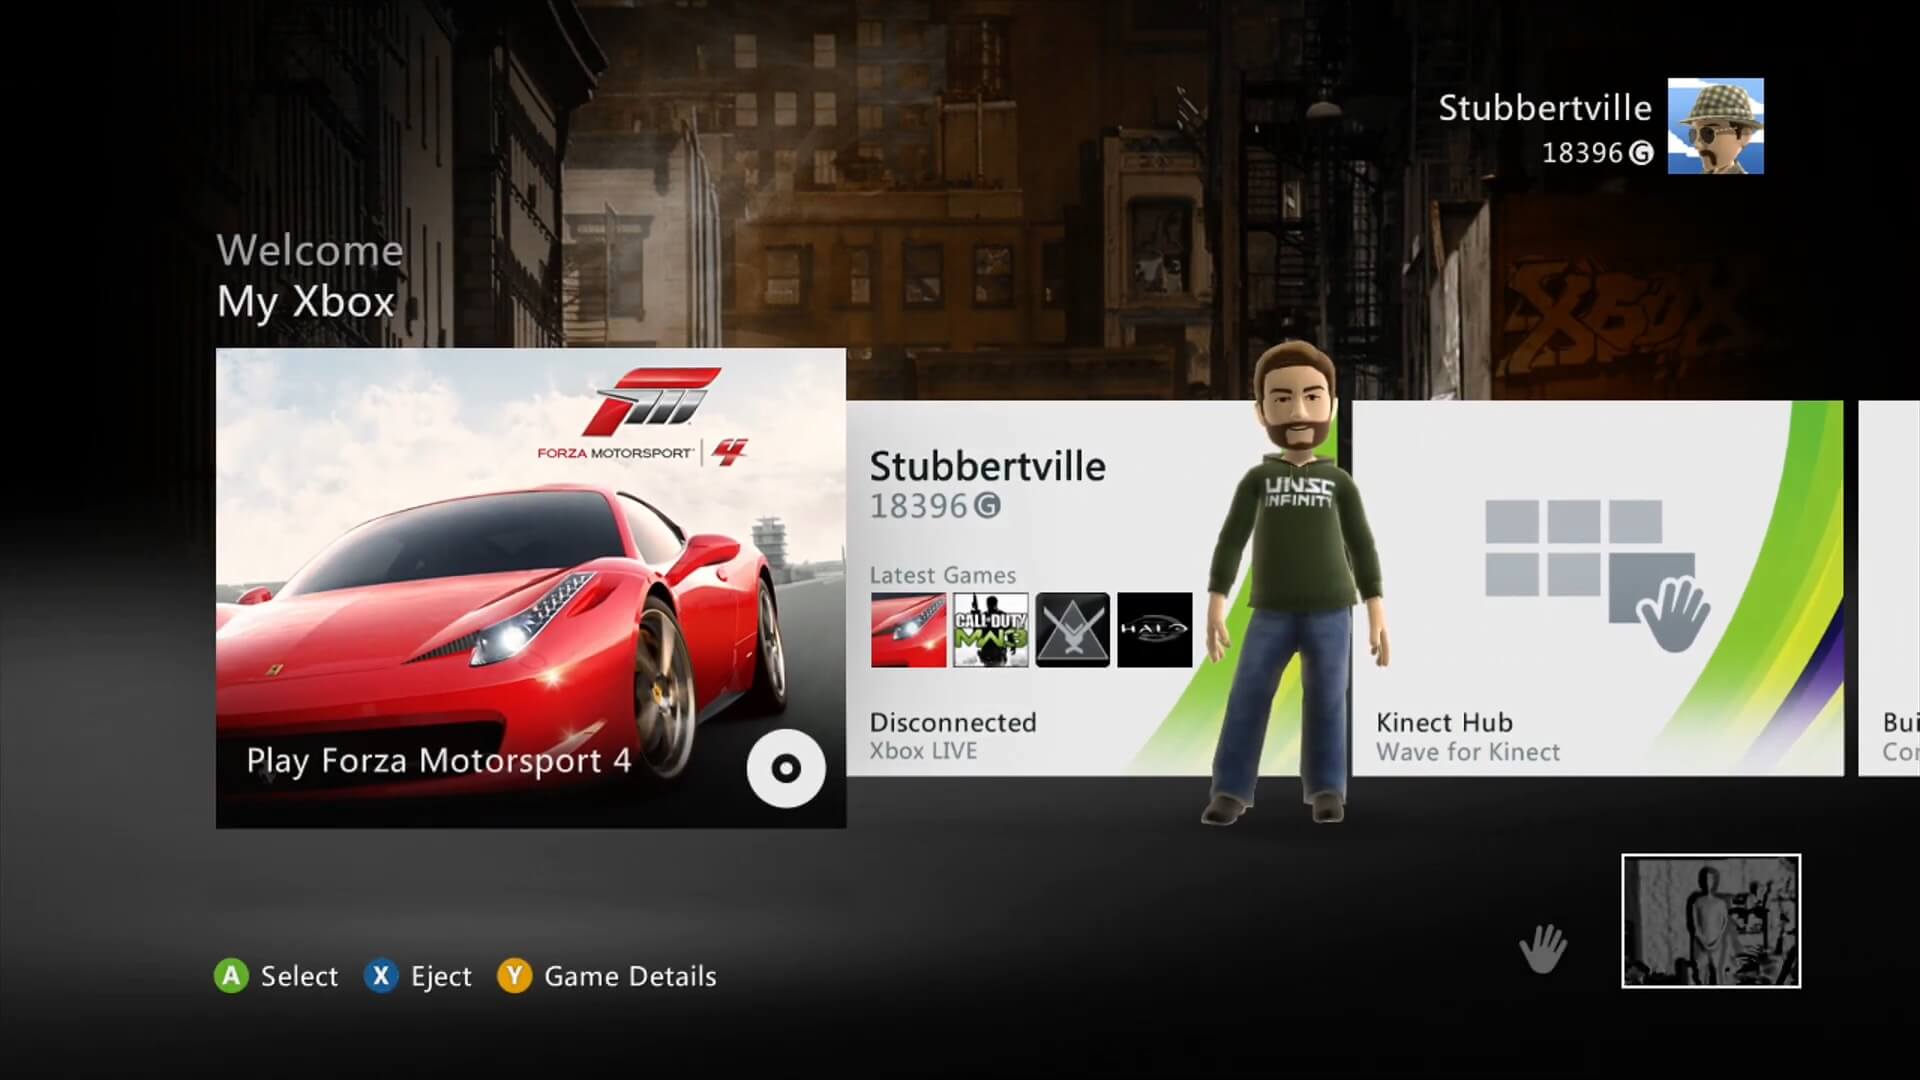
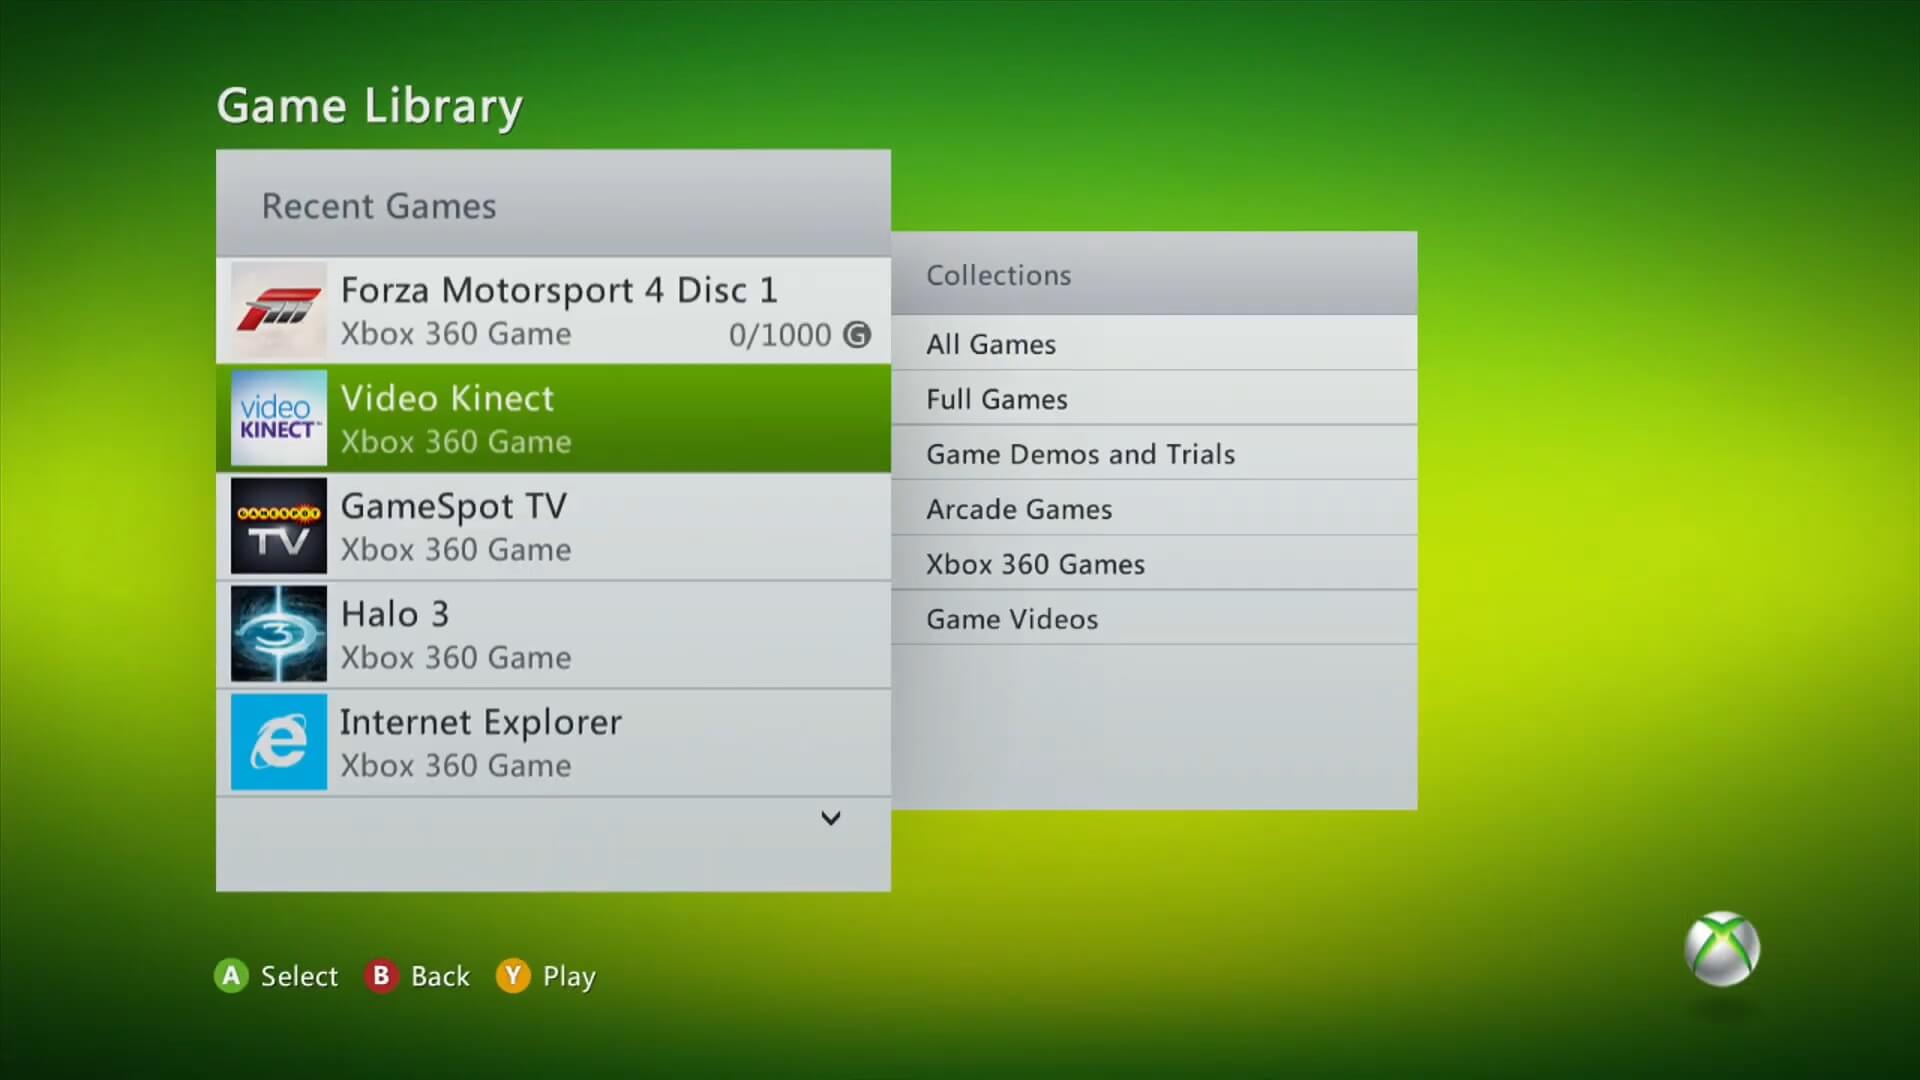
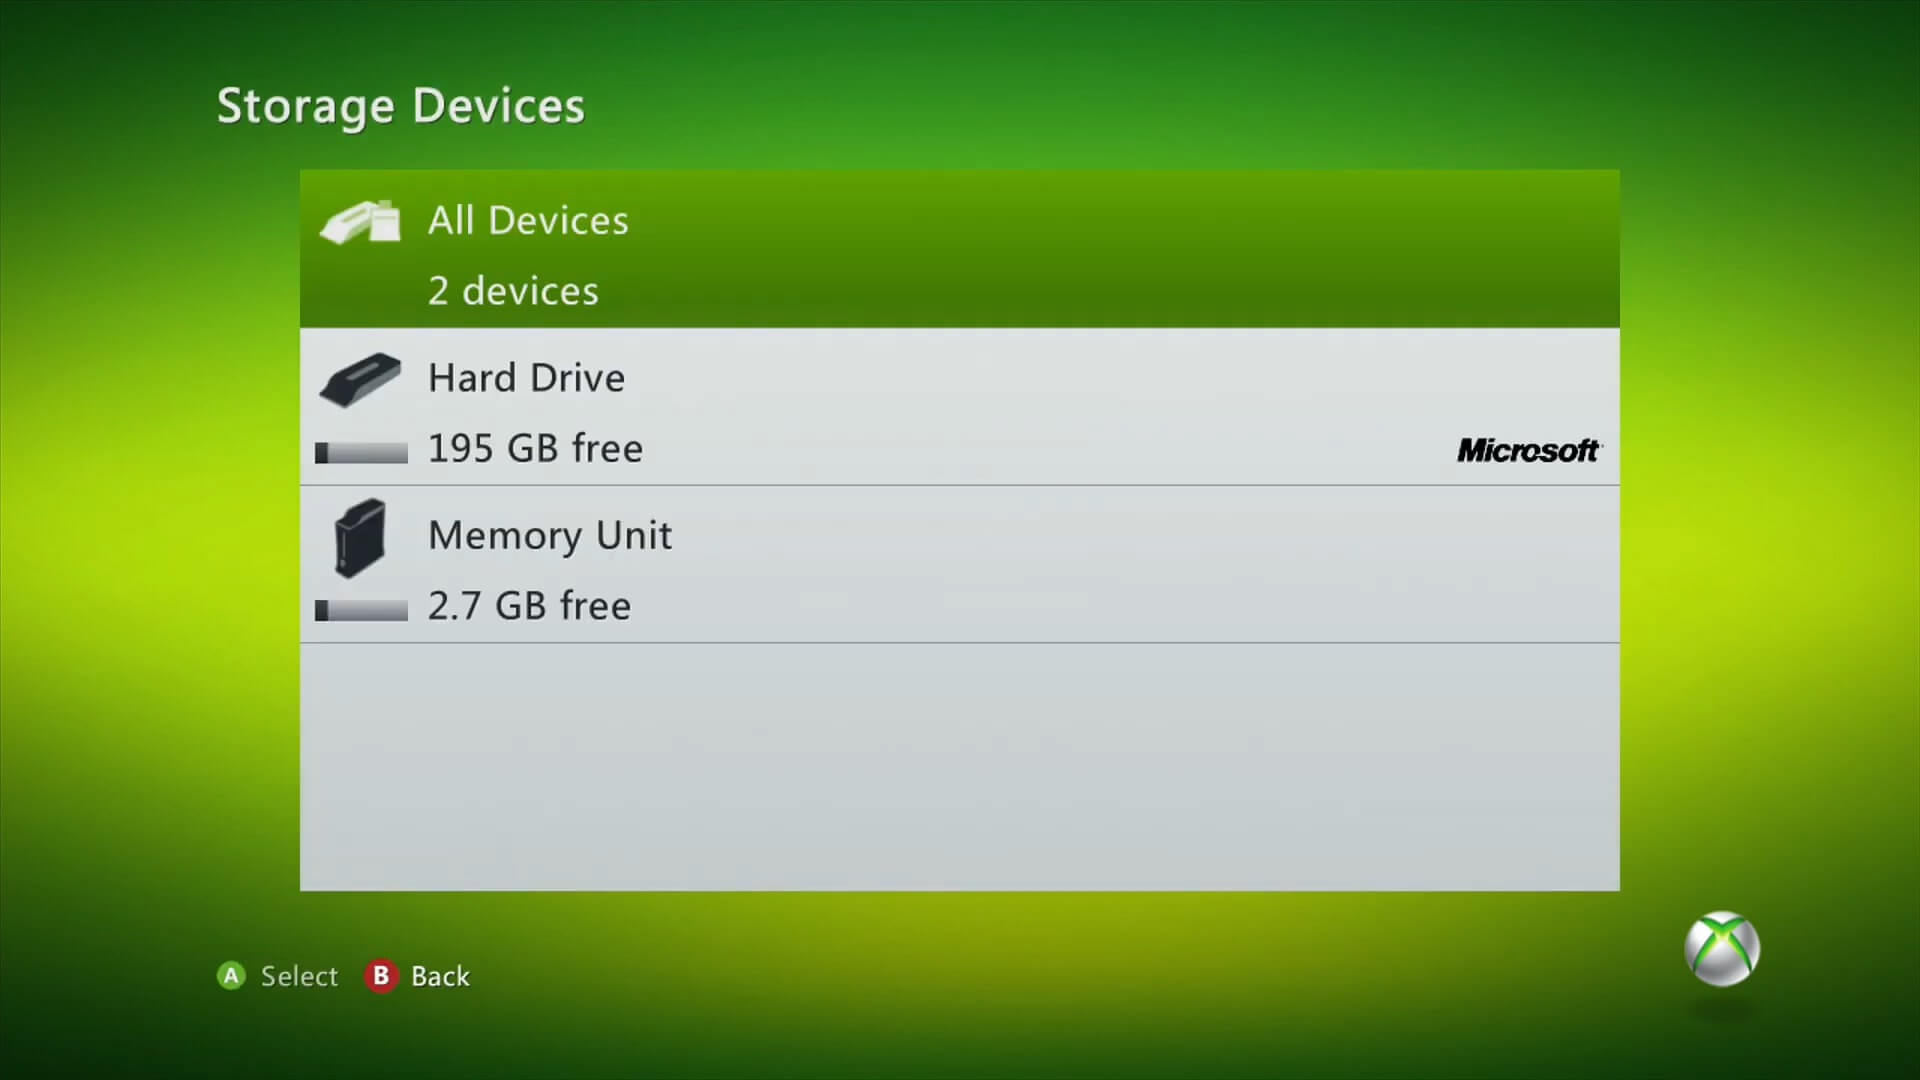

With the arrival of Kinect, Microsoft had to adapt the Dashboard to remove its dependency on the controller. As part of the update, the designers replaced the glossy touch with faded greens and greys. The 3D aero-like touches were also succeeded by typical zoom-in animations. This coincides with the arrival of Windows 7 and its modest reduction of visual effects.
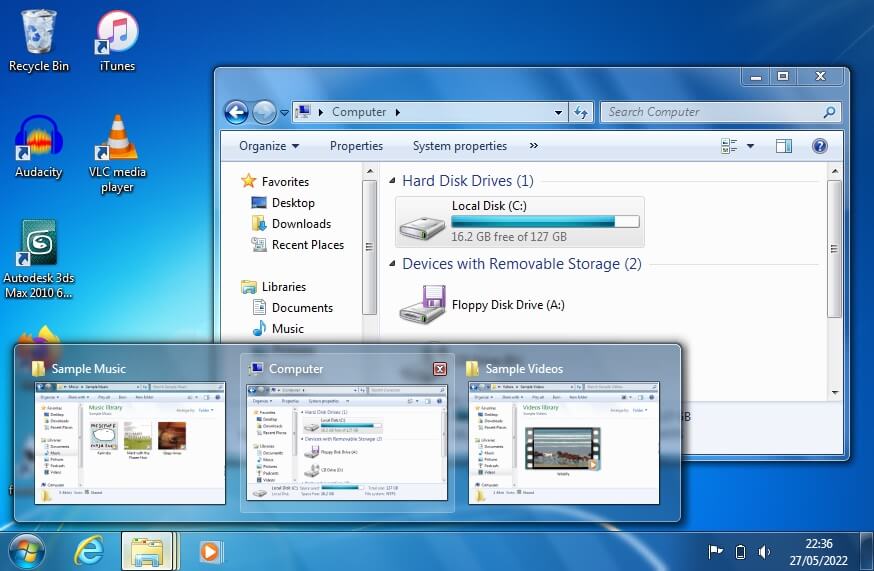
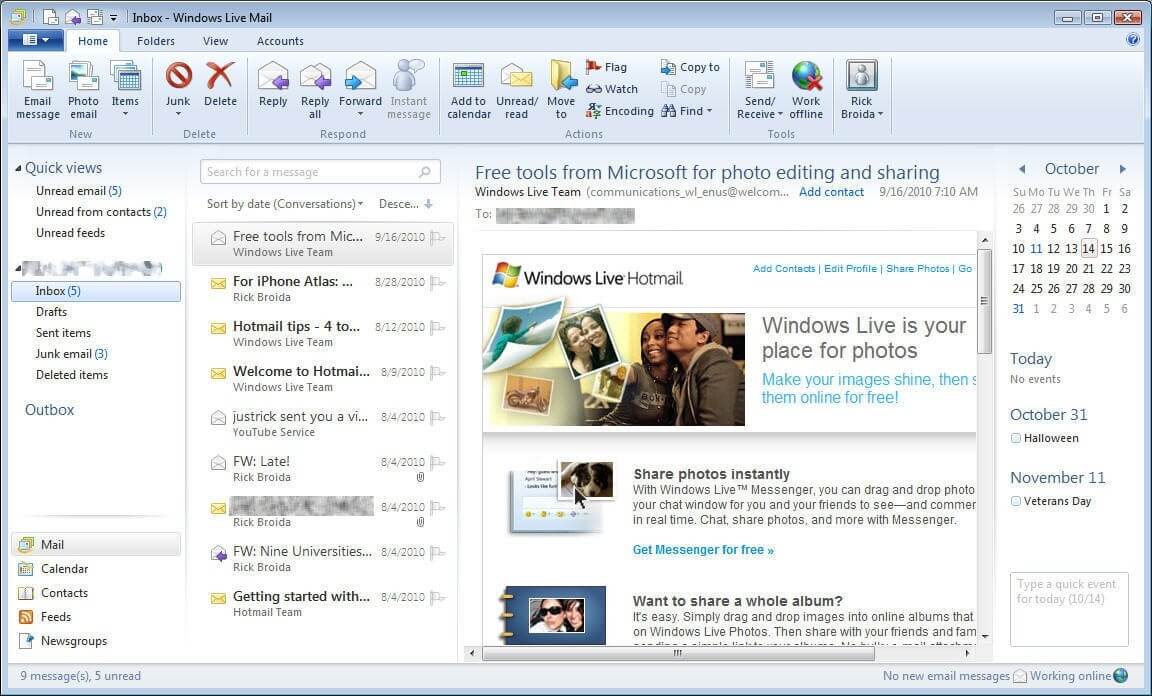
I don’t think there’s anything else to mention apart from the fact it only lasted a year before being replaced by a considerably more radical redesign.
The ‘Metro’ revamp (2011)
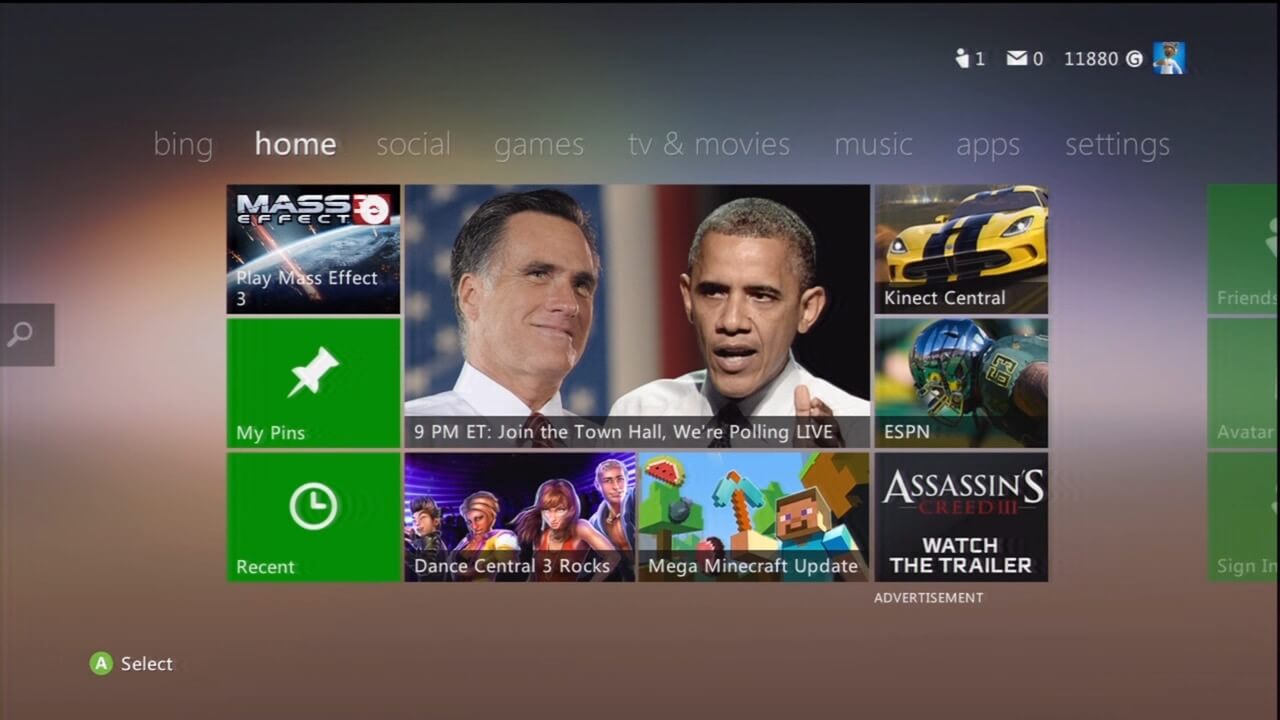
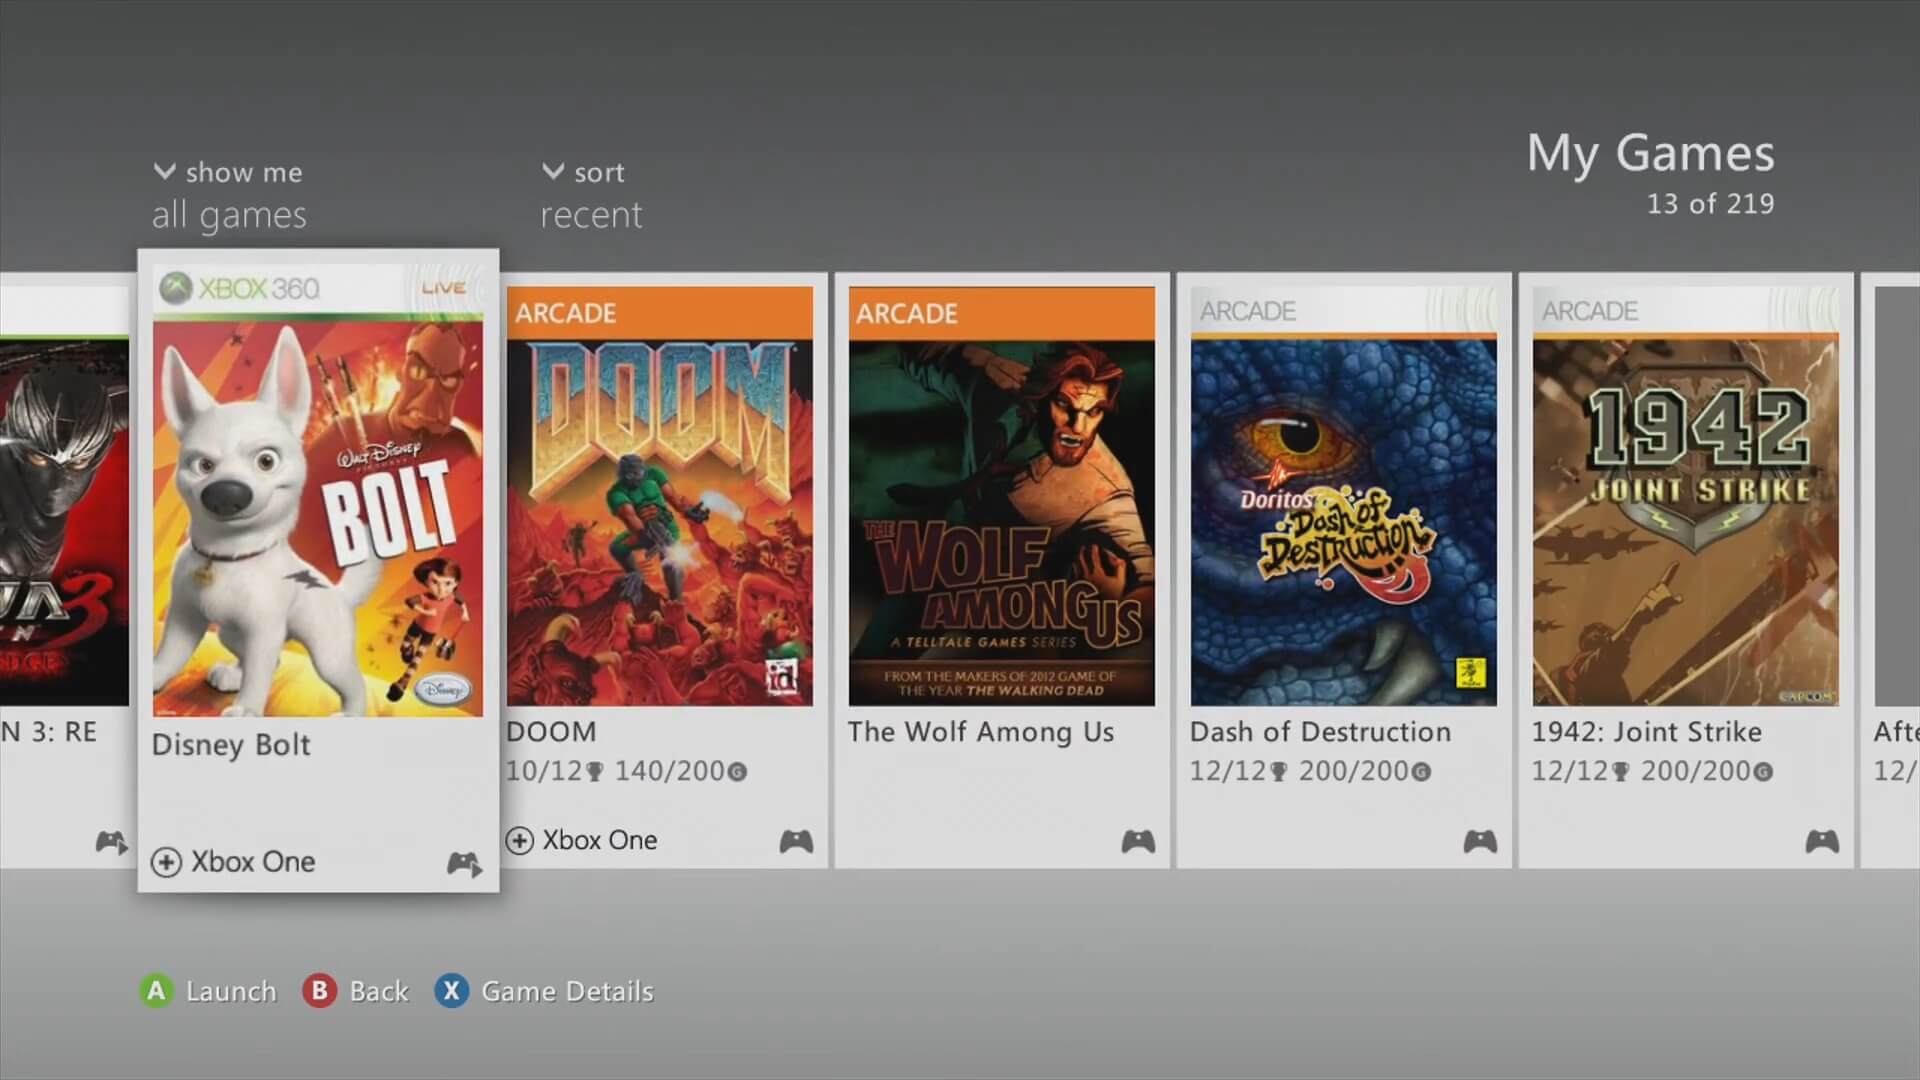
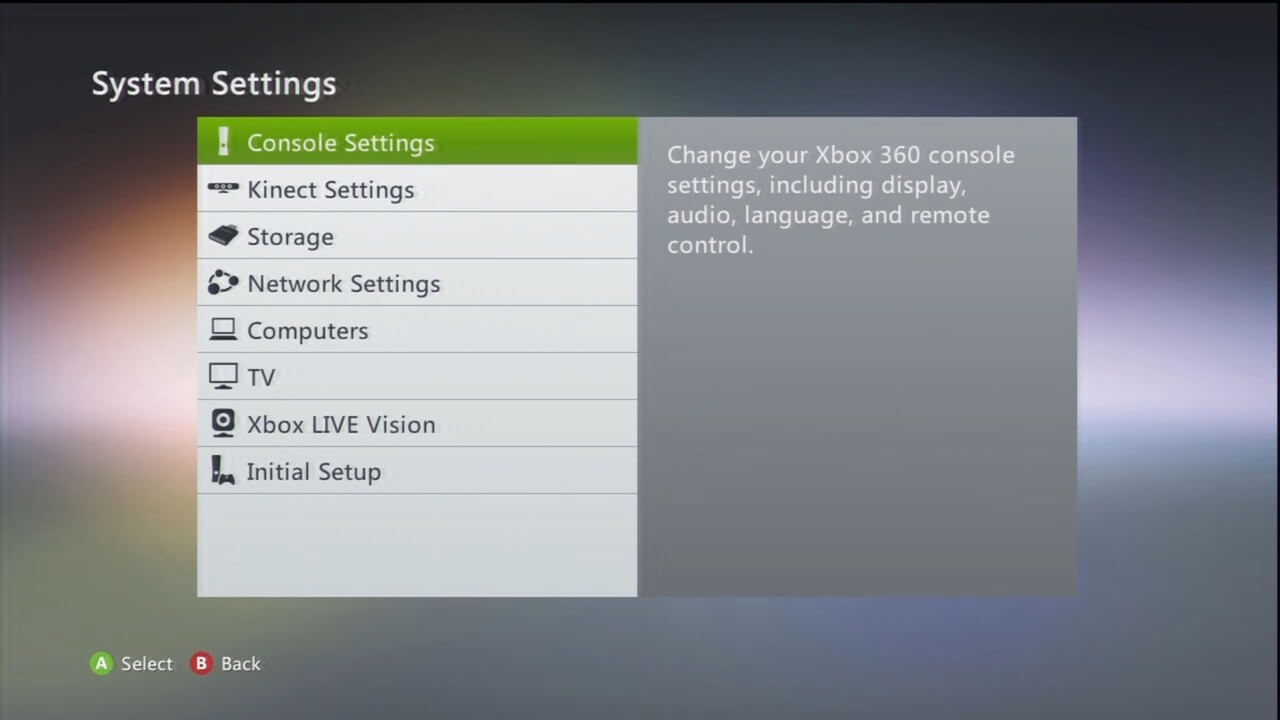
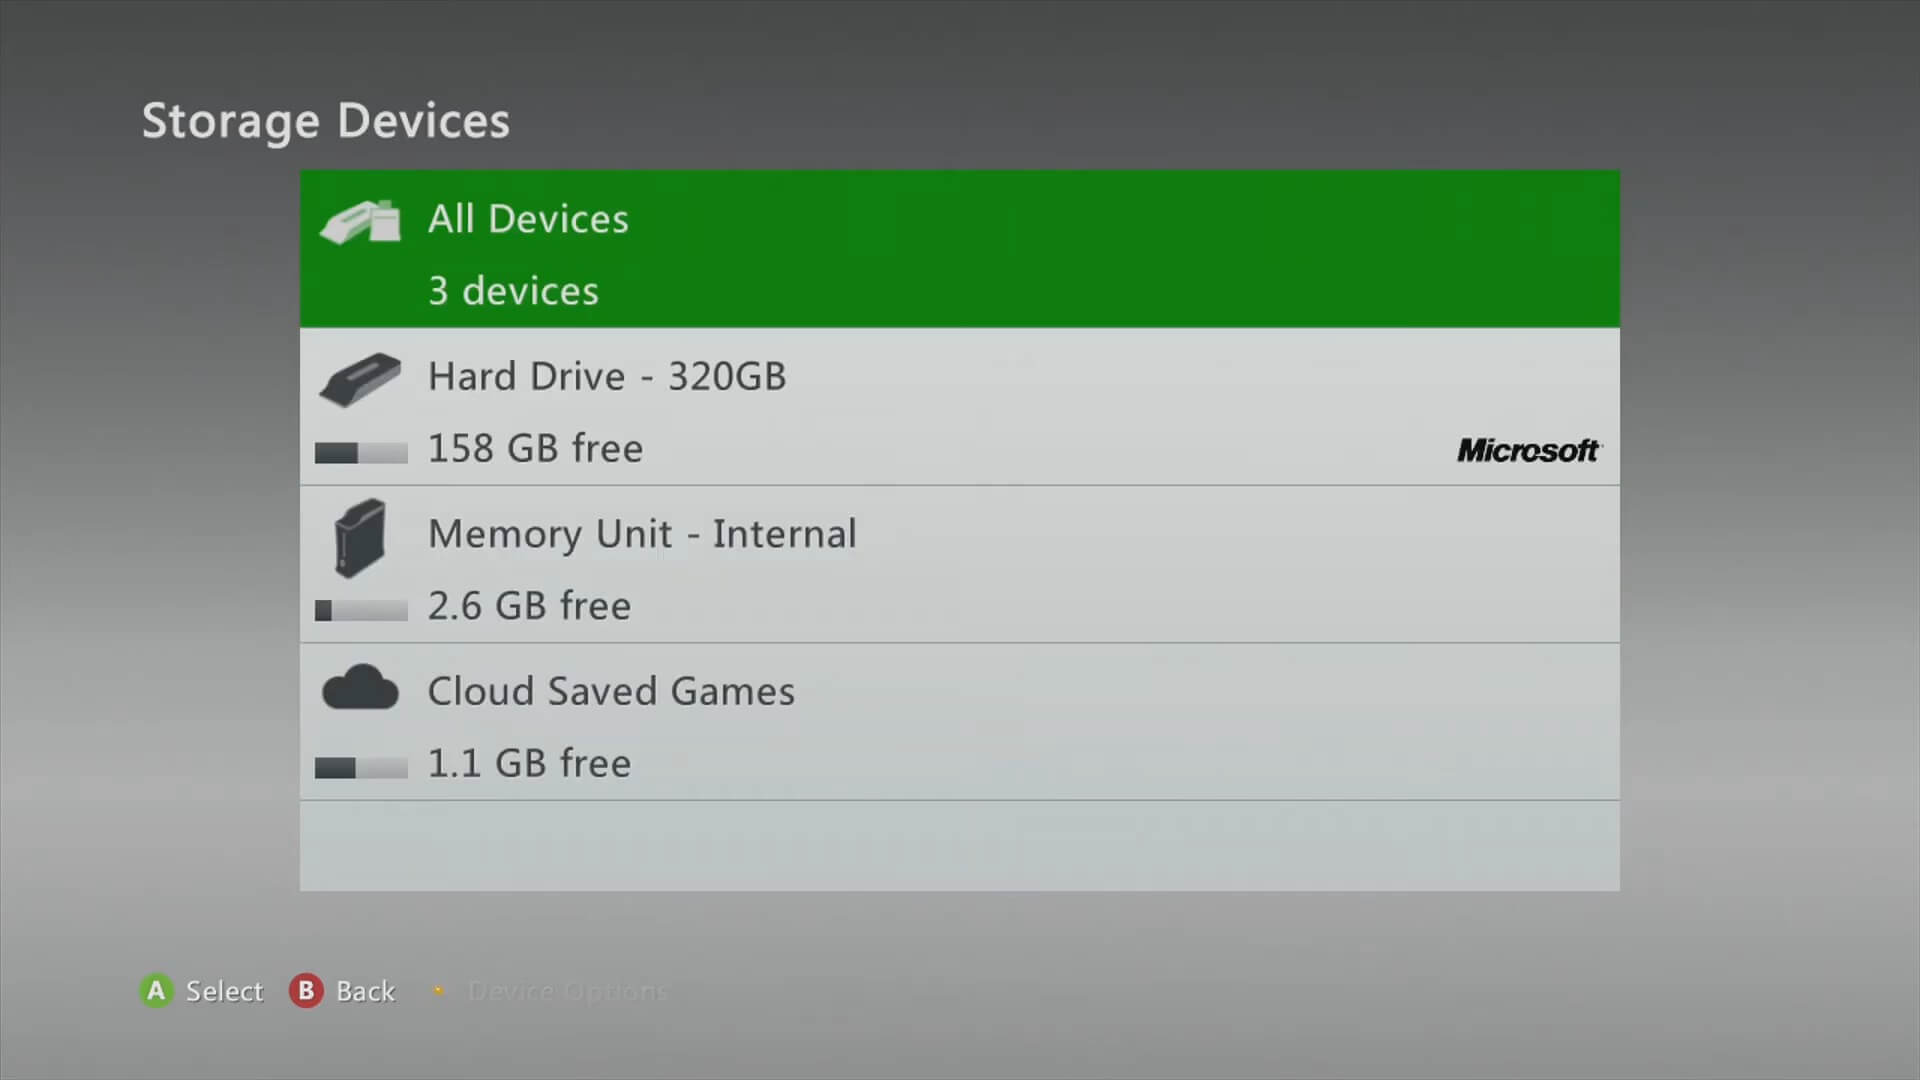
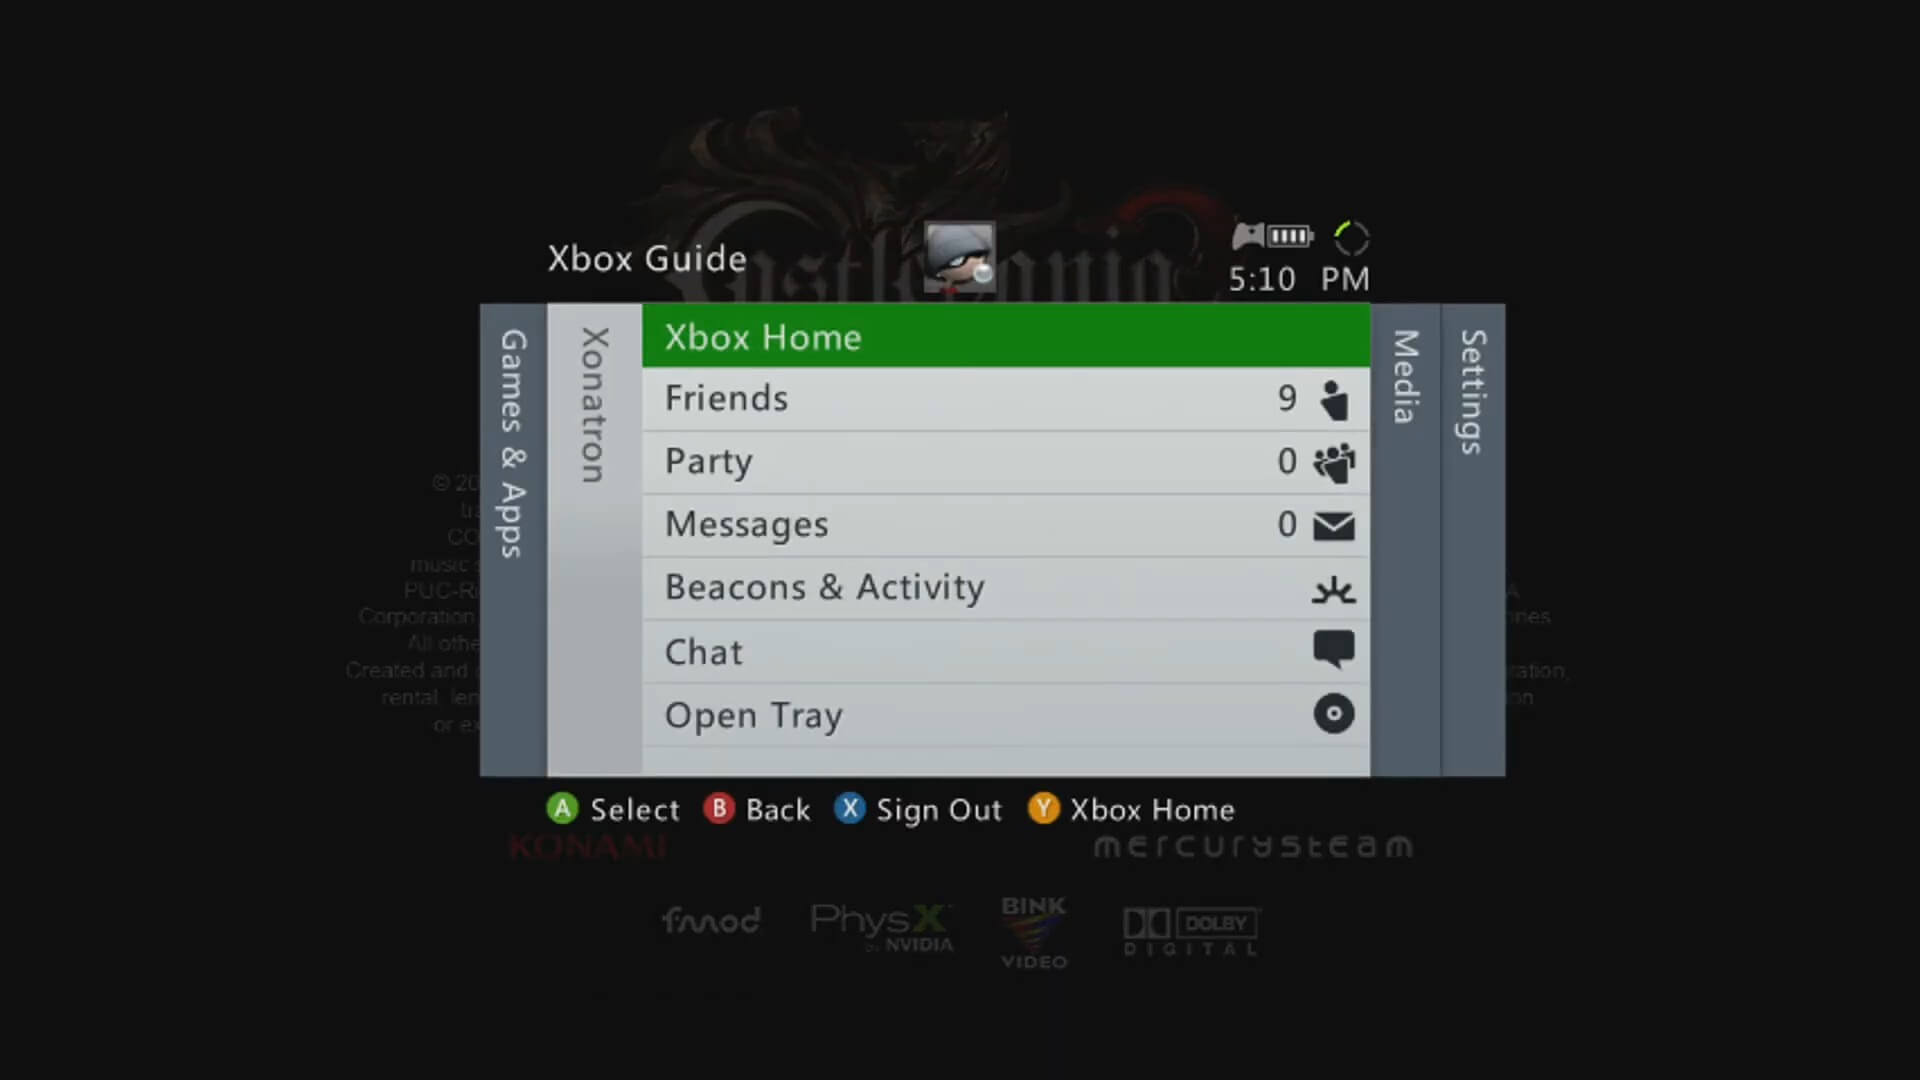
The year 2010 saw the debut of Windows Phone 7 and a new type of interface called Metro, whose style now relies on solid colours and white silhouettes. Due to its versatile design, Microsoft envisioned porting Metro to all of its platforms, which became a reality the following year with the arrival of Windows 8 and a new update for the Xbox 360. Though the degree of adoption varied drastically between device, the Xbox 360 enjoyed a mostly unified implementation of Metro (unlike Windows 8, where the majority of applications still relied on the ‘classic’ design).
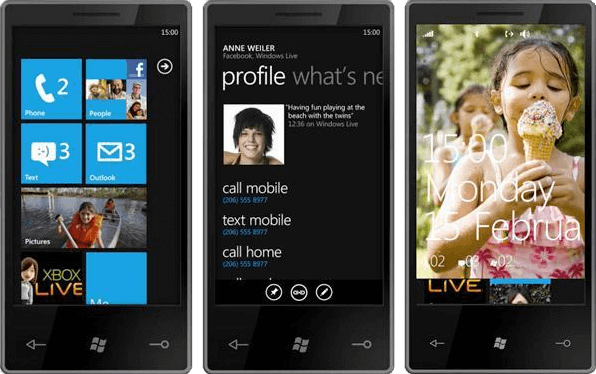
The most significant changes lie in the home screen, which has reverted its two-dimensional navigation style for a new multi-row distribution called ‘Panorama’. The latter borrows similar navigation patterns to the old Blades dashboard, except the new layout does not repeat the same mistakes. Icons now take prevalence over labels, and their uniform shapes lead to a more apathetic composition. But hey, at least the layout is now consistent across all home screen views (although I must confess I miss the unpredictability of previous eras).
Games
Following the practice of previous articles, this section discusses the aspects of game development, distribution and the infrastructure Microsoft built to complement them.
Development ecosystem
The development follows the semicentennial tradition where the manufacturer offers game studios cutting-edge development kits and libraries in exchange for a hefty fee. Additionally, with the advent of small companies venturing into the video game business, a new category of ‘Indy’ game developers emerged to define those game studios that share the same enthusiasms and/or talent but are obliged to work on a smaller budget.
As a consequence, Microsoft marketed two types of development kits [92]:
- Traditional game studios paying a full license would have access to the official Xbox Development Kit or ‘XDK’. This pack includes the entire SDK, many types of development hardware and, depending on their relationship with Microsoft, even prototypes.
- Indy studios were offered an alternative suite called Microsoft XNA, which includes similar development hardware but a different SDK called ‘XNA’.
To provide more resources, Microsoft deployed the Game Developer Network (GDN) and the XNA Creators Club, two online portals where developers would have access to more documentation and tools.
Available tools and kits
Those using the expensive XDK will see it follows the footsteps of its predecessor. The APIs provided are largely based on DirectX’s routines to ease the learning curve for PC developers already familiar with DirectX on the Windows platform. XDK implements DirectX version 9.0c (identified as ‘9_3’) extended with Xbox-unique features.
All in all, the suite includes a variety of libraries and tools, for instance:
- Existing front-end Visual C and C++ 2005 compilers (Microsoft’s variant of C and C++), along with a new backend that generates PowerPC machine code. There are also PowerPC, xvs_3_0 and xps_3_0 assemblers (the latter two are Xenos’ microcode shader languages [93]). The front-end compilers were later updated to the 2010 version.
- Microsoft’s Visual Studio 2005 as IDE. Later versions of XDK shipped with the 2008 version and, finally, the 2010 one.
- Debuggers for the Xbox 360 Development Kit.
- The well-known Direct3D API for graphics. Although it’s hardly a replica of the Windows version. For example, the shader compiler now generates microcode at compile-time, unlike Windows’ edition where it’s done at runtime (as Windows games must support a multitude of graphics cards). The APIs have also been extended to accommodate Procedural Synthesis, Predicated Tiling and many more cases. These have been documented by the Xenia emulator’s development team [94].
- Familiar functions from Windows 2000’s Win32 API, now targeting the Xbox 360’s Kernel, such as the
CreateThread()routine for multi-threading operations. - Old but soon-to-be-replaced APIs like DirectSound which, as seen in further revisions of the XDK, was soon succeeded with XAudio2. The latter was developed to take advantage of the unique features of the Xbox 360 and to unify the syntax with Windows’s DirectX APIs.
- Other non-DirectX APIs like the Natural User Interface to operate Kinect; and Xbox 360 Unified Storage to abstract the large number of storage media available.
Now, for the budget studios using XNA. Well, the latter was designed to facilitate cross-platform development for Windows XP and the Xbox 360 [95]. XNA worked as a wrapper of DirectX, so low-level functions were abstracted by routines that work on both Windows and the Xbox 360. Even though additional code is still needed to accommodate the small discrepancies between the two unequal platforms [96], the platform benefited many developers that were looking to port their games to the Xbox 360 without a lot of effort or cost. For those who are familiar with Windows’ development ecosystem, XNA is a successor of the old ‘Managed DirectX’ platform, which includes a subset of the .NET Compact Framework [97].
Later years will see new versions of the XNA framework supporting new devices (like Windows Phone 7) but slowly distancing itself away from the now-obsolete Xbox 360 hardware, until Microsoft abandoned XNA altogether in 2013 [98].
As a final note, for homebrew developers, libXenon is a free third-party library that provides low-level access to the hardware without copyright restrictions [99], although its executables can only be run from a hacked Xbox 360 with signatures verification disabled.
Storage medium
Let’s now see how the distribution of content worked.
Retail games
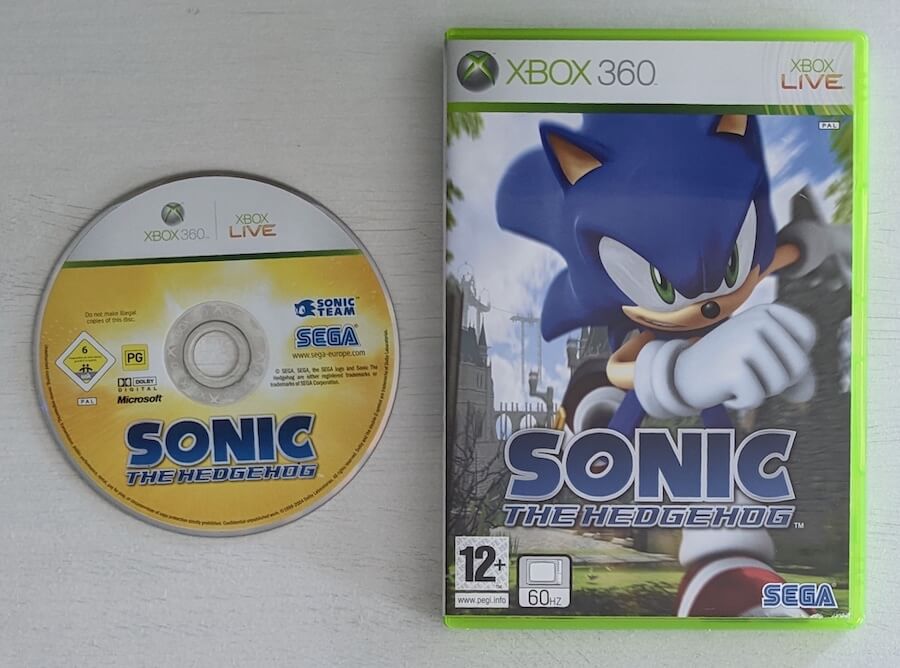
It may sound hard to believe, but for Microsoft, the same dual-layer DVD disc used for the original Xbox worked fine for their new console. I presume it was another cost-effective strategy, as the DVD disc got cheaper to produce and its readers could be outsourced to the most inexpensive and convenient manufacturer. Throughout the console’s lifespan, Microsoft had relied on Hitachi, LG, Toshiba, Samsung, Philips, BenQ and Lite-ON - including teams of two - to produce their DVD drives.
As a reminder, dual-layer DVDs (also called DVD-9) have a theoretical capacity of 8.5 GB. A big advantage compared to the new blue-lasered discs of the PlayStation 3, is that the Xbox 360 enjoys greater read speeds thanks to its 12x drive, another reason to expel the hard drive from the requirements.
On the other side, games were greatly constrained by the usable capacity, those 8.5 GB were further limited by a secure filesystem called Xbox Game Disc 2 or ‘XGD2’. This was Microsoft’s successor of the original format employed to prevent unauthorised copies. The actual available size for games was down to 6.8 GB (80% of the total capacity) [100]. In 2011, after many third-party tools managed to crack the protection, Xbox Game Disc 3 or ‘XGD3’ was made available to developers. In it, Microsoft managed to revamp the security tricks and reduce the space reserved for anti-piracy mechanisms, leaving a total of 7.9 GB for games.
Online store
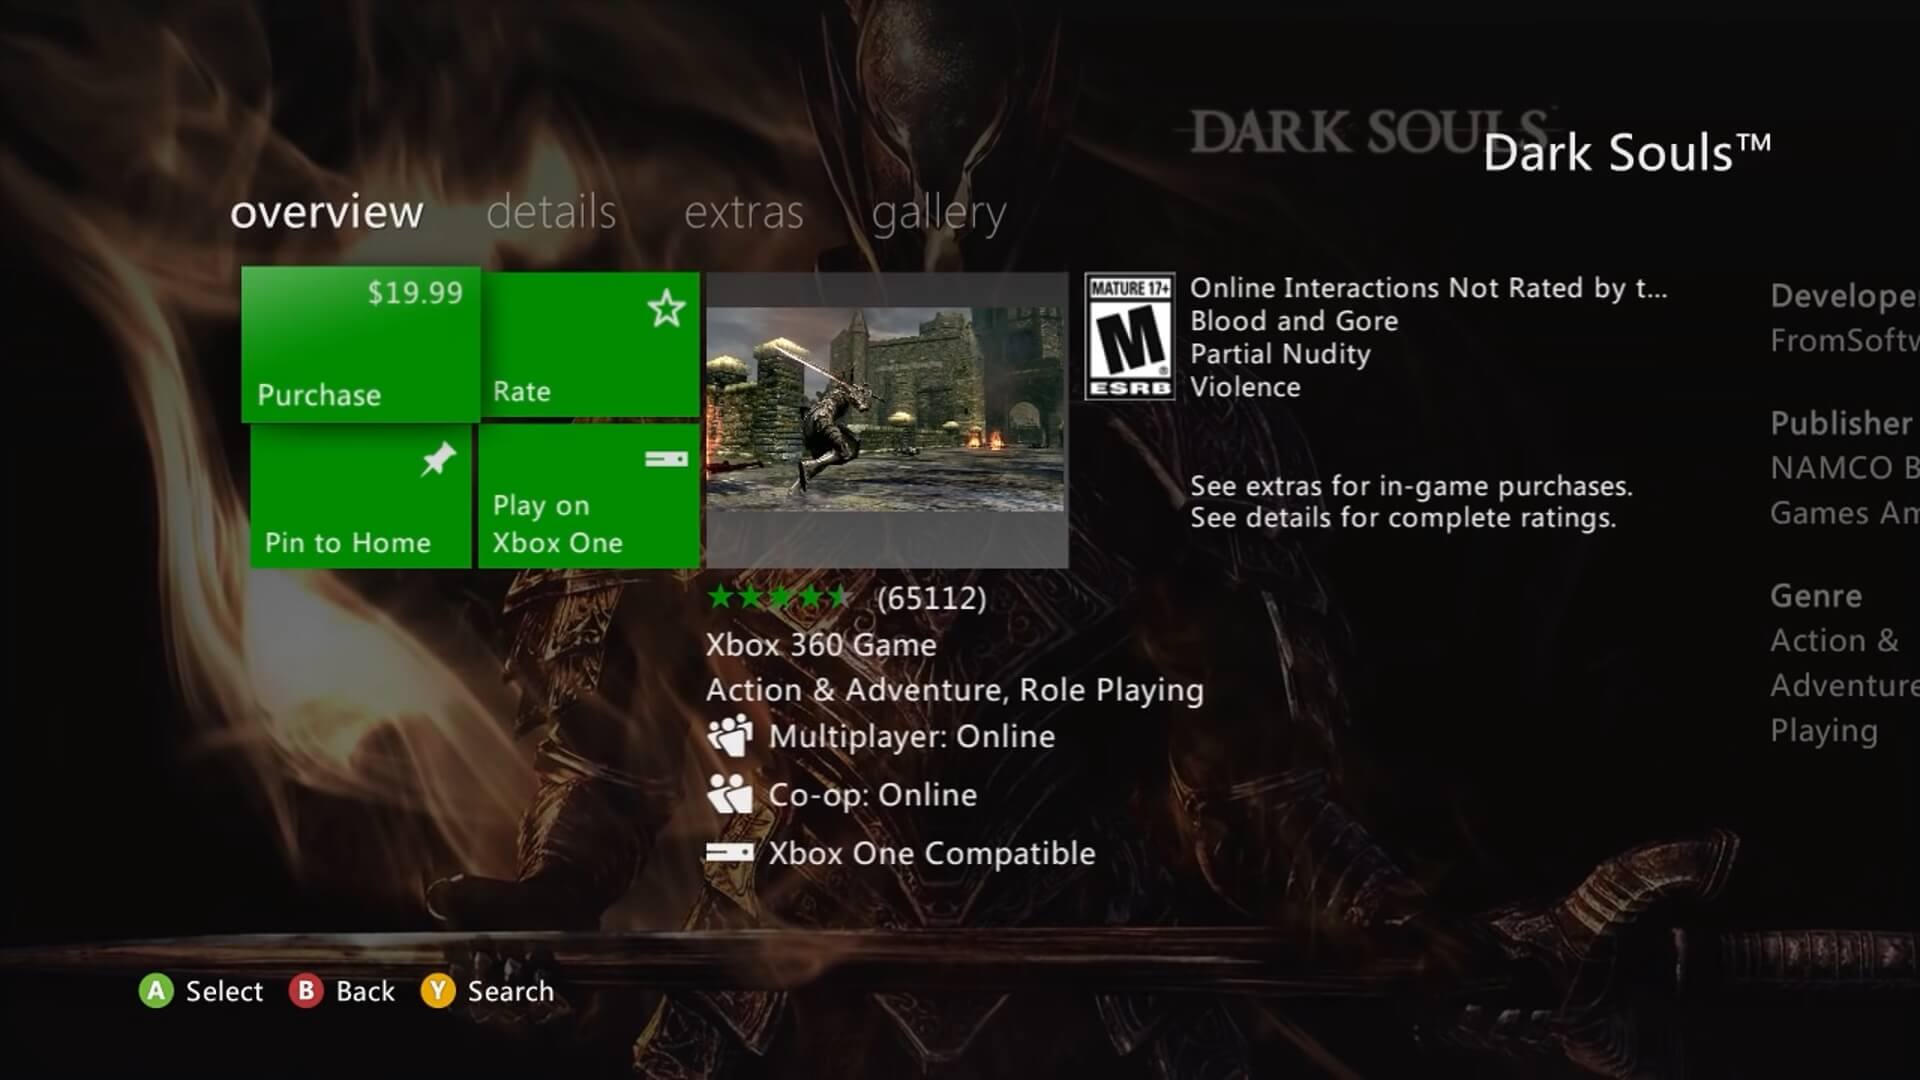
A new emerging space that Microsoft began experimenting with, until it became a full-blown competitor to retail stores, was the online marketplace.
Originally named Xbox Live Marketplace, this portal arrived in 2006 as a new Blade/category called ‘Marketplace’ in the original dashboard [101]. Users would then find a subset of retail games to purchase and free demos to try out. In later months, a further update added a new group called ‘Arcade’ which encompassed games, often small, exclusively found in the online store. As time went by, more updates would arrive to expand the territory of the Xbox Live Marketplace, which now sells TV episodes, movies and original Xbox games [102] as well.
Moreover, in another update, Microsoft promoted a dedicated section for indie developers, this was called ‘Xbox Live Community Games’ [103] and separated those developers using the XNA platform from the big studios already possessing retail space.
In the final years of the Xbox 360 and the consolidation of other media platforms (smartphones, smart TVs, the Xbox One and online streaming), Microsoft rebranded part of the marketplace to offer content available to use from other devices (that weren’t necessarily an Xbox 360).
The Blu-ray competitor
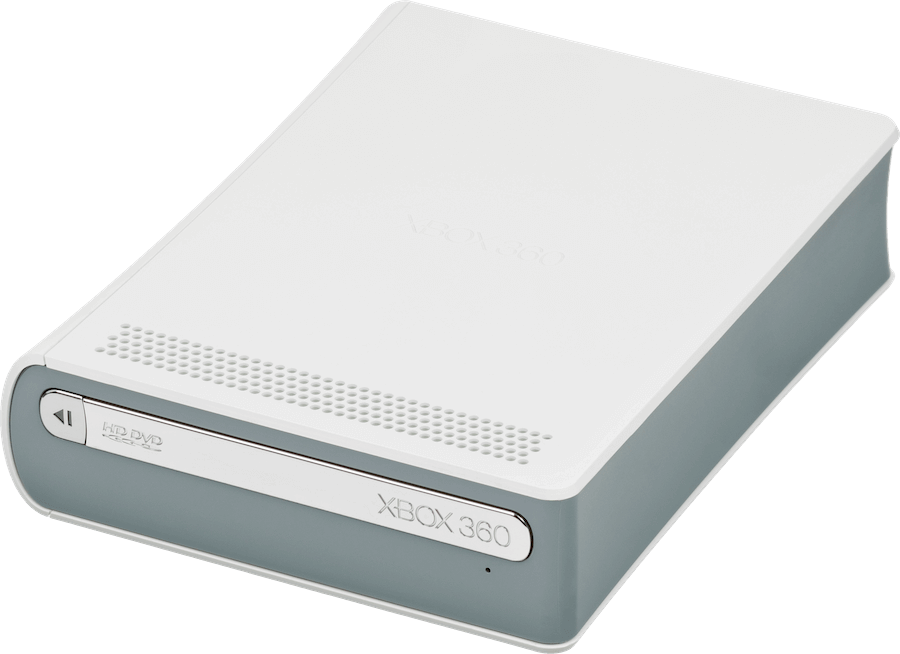
Not so much related to games, but the film industry had an unusual influence on this console too (or maybe the other way around? we’ll soon see). As Microsoft imposed the DVD for games, the company was also pushing a new format that could compete with the Blu-Ray for space on the movie shelves. I’m talking about the HD-DVD which, conveniently enough, uses Microsoft-owned API for interactive features (menus and such).
Thus, Microsoft’s goal lead to a separate accessory called Xbox 360 HD DVD Player, an external reader placed next to the console and requires its own power supply (so expect all the annoyances that come with it). Anyway, the reader connected through USB and shipped with an ‘HD DVD installation disc’ that installed an additional media player on the console. Although, its behaviour differs depending on the Dashboard version: on the Blades Dashboard, the HD-DVD player integrated itself with the UI [104]. On newer dashboards, it showed up as a separate app [105].
Internally, HD DVD stores pits and lands at a higher density than conventional DVDs, allowing it to store up to 15 GB of data if single-layered or 30 GB if dual-layered. While both Blu-Ray and HD-DVD rely on blue-light diodes, the latter exhibits a sparser distribution of pits; and the focal point of its laser is larger than the Blu-ray’s [106]. Consequently, HD-DVDs can’t reach the competitor’s 25 GB/50 GB milestone.
After only two years sitting on shelves, both HD-DVDs and the player were phased out in 2008 [107]. If you ask me, this duality between HD-DVD and Blu-Ray was just a battle of royalties, manufacturing costs and disagreement between distributors. None of which mattered to the end-user, and yet they had to pay the high price for an experimental technology that would soon be rendered ‘not worth it’ by distributors.
Network service
At the heart of this low-priced console was its highly-promoted online capabilities, which materialised in the form of a paid subscription service called Xbox Live (the name also encompasses the marketplace, software updates and other internet-based services).
As Xbox Live enjoyed successful adoption with the original Xbox, the successor would be no stranger in following the footsteps and even offer more commodities to get users to join online gaming. I presume the low-price point of this console and continuous marketing efforts - including all the accessories that Microsoft shipped (webcams, headsets, etc) - meant that Microsoft’s main source of profit relied on paid subscriptions and marketplace purchases. With the advent of 3D avatars, the company also found ways to capitalise on avatar customisation [108].
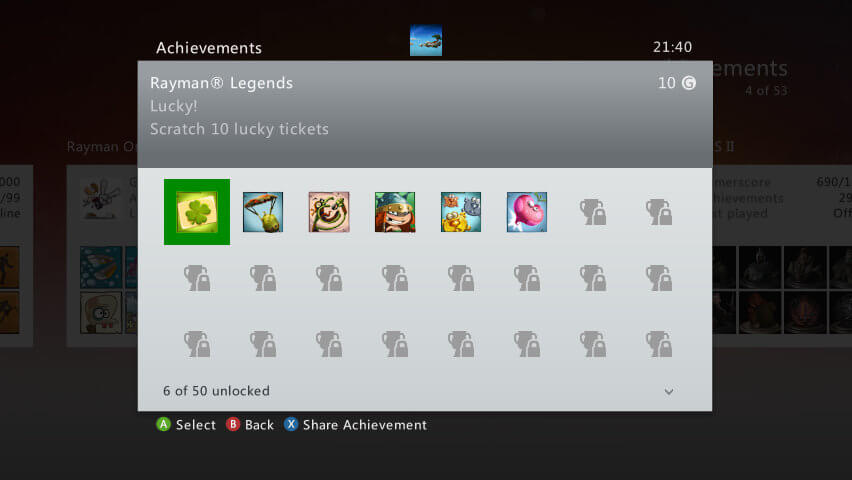
From the developer’s point of view, Xbox Live servers provided the infrastructure required for multi-playing, voice chat, profile management and so on. Xbox 360 games used a REST API (documented on the SDK) to talk with each endpoint. To authenticate with those servers, developers received a custom ‘Xbox Secure Token Service’ to be embedded with their REST requests.
Anti-Piracy and Homebrew
As the end of the article looms, I still haven’t set out how this system was absurdly protected. This console has an incredibly long and diverse history [109] involving interesting discoveries, unexpected methods of exploitation and aggressive forms of retaliation. Most importantly, this saga led to many third-party documents detailing the construction of the hardware and the peculiarities of the software. So, it’s fair to say that half of the content in this article wouldn’t have been possible without the countless hours that many hacking groups dedicated to researching and documenting their findings - a task not necessarily done to enable piracy.
Main targets
The first thing is to introduce the two main targets. As soon as the Xbox 360 reached the stores, Microsoft found itself defending two big fronts:
- The Hypervisor, which holds control of the CPU and enforces signed executables, both of which had to be tackled if Homebrew or booting another OS (i.e. Linux) were to ever be possible.
- By extension, this also affects user data (i.e. profiles stored on the hard drive and/or Memory Unit) but they implement extra layers of security. These are not mentioned here so we can focus on the main targets.
- The DVD drive, which enforces the copy protection system and prevented burned discs from being executed as games. DVDs are inexpensive and most PCs of that era were equipped with a DVD RW drive, so cracking the drive looks extremely rewarding. Although, it would only lead to piracy, but not Homebrew (as the code is still signed). That is, unless someone discovers an exploit that depends on the DVD drive but once ‘triggered’ enables to execute Homebrew… we’ll see!
- Curiously enough, the hypervisor and the rest of the operating system have no awareness of the state of the copy protection [110], that’s delegated to the disc drive, which has the upper hand on accepting the inserted disc as a valid Xbox 360 game or not.
The hypervisor front
We’ll now learn how the hypervisor is protected and, in turn, how it protects the rest of the system.
A hidden cryptographic system
Remember how complex was the L2 subsystem within Xenon? Well, there’s one more thing to explain, and that is the inclusion of a hidden cryptographic block in it. I define it as ‘hidden’ since it’s not documented at all by Microsoft or IBM. I was made aware of it thanks to an incredibly insightful talk called ‘The Xbox 360 Security System and its Weaknesses’ by the Free60 group (lead by Michael Steil and Felix Domke, the former also did ‘The ultimate Game Boy talk’!) [111] and ‘Security offence and defence strategies’ by Mathieu Renard [112], which is where I rely on for a big part of the information described here.
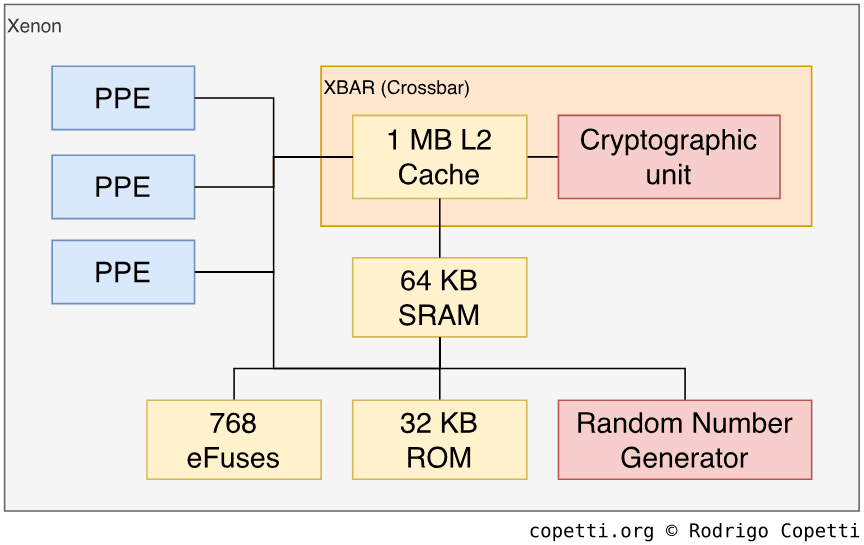
Moving on, the cryptographic subsystem is split into distinct areas that perform unique functions:
Rand unit
The random number generator unit (or just ‘rand’) produces random sets of numbers without exposing a predictable pattern, or at least it attempts to. This is useful for supplying extra parameters to encryption routines, so they are difficult to trace back, and thus reverse engineer or replicate.
You may now ask ‘Why can’t this be done with software?’ and, well, in the world of traditional computing, there’s no such thing as ‘pure randomness’. Computers can only generate pseudo-random numbers using arguments that may be potentially traced. So, having a dedicated unit for this task obfuscates its reverse engineering further and protects the CPU from possible snooping (as this block is hidden within the CPU and not scattered across the motherboard).
I guess the most optimal solution would be to connect the CPU to a quantum computer, but we are not there yet! (somewhat close though).
Extra storage
Furthermore, this subsystem provides two extra memory blocks.
Firstly, 32 KB of ROM, identical to the Secure ROM found in Cell. It’s used for storing unencrypted data that the CPU can read without fear of being exposed or traced by a third party. As you’ve seen before, this is where the first boot stage is found.
Secondly, 64 KB of SRAM are provided as fast general-purpose memory that the CPU can use to work out a sensible operation (most probably cryptographically-related) without fear, again, of being spied on.
eFuses
Speaking of storage, we’ve got another special medium called ‘eFuses’ embedded within Xenon. eFuses are microscopic switches that the CPU reads as 0 or 1, such as any transistor. The peculiar thing about eFuses is that, once they are switched to 1, their state is unchangeable (as writing a 1 blows the eFuse, like traditional fuses). This enables Microsoft to encode permanent counters or store encryption keys which can’t be changed once the console leaves the factory. Well, only 0 values may be changed, but their sequence is different on each console. Moreover, once the key is altered by a third party, the console can’t decrypt its data anymore!
In total, there are 768 individual eFuses installed and each is treated as a ‘bit’ by the CPU, where 0 means ‘active’ and 1 means ‘blown’. The block is grouped into 12 ‘fusesets’, where each group contains 64 eFuses.
When eFuses are read or written to, they are done so in groups of 8 eFuses (like 8-bit/hexadecimal values) and not individually. Albeit, sometimes, information is only encoded in the form of binary values (0 and 1) as opposed to hexadecimal format (from 0x0 to 0xF). In those cases, the whole 8-bit word is blown at once and treated as a single binary value instead.
Cryptography unit
Next to the L2 cache, Microsoft and IBM added some hardwired logic to perform AES-128 encryption and hashing functions without requiring the CPU at all. Using the previous 64 KB of SRAM, the L2 block automatically decrypts or encrypts data as it enters or leaves Xenon, respectively.
The L2 block can also hash memory pages on their way to main RAM, store the hash on SRAM and then compare it against the new hash when the page is fetched back from RAM. If the check fails, the system locks up [113].
All of this is done to fend off any type of meaningful analysis on the memory buses (using encryption) and make sure RAM hasn’t been tampered with (through hashing).
To prevent replay attacks (which rely on duplicating old but valid blocks of data to fake authenticity), the Rand unit generates an unpredictable value every time the console boots up. Then, the L2 block mixes it with its encryption logic [114].
Security implementations
Let’s see what Microsoft came up with the use of all those components.
Chain of Trust
The convoluted boot process you’ve read before was designed to implement a sophisticated chain of trust. This makes sure that, once the hypervisor is ready to execute userland code, the latter is always encrypted and signed by none other than Microsoft.
To efficiently obfuscate the boot process, multiple types of cyphers are employed. For instance, The second bootloader (2BL/CB) is decrypted using RC4 (a fast algorithm), whose decryption key is constructed at run-time using HMAC-SHA. Then, the decrypted code is hashed (using SHA1 and ROT). Finally, to check that 2BL hasn’t been tampered with, the calculated hash is compared against a stored hash pre-signed with Microsoft’s private key (using RSA).
For increased protection, each console embeds a unique CPU key imprinted on the eFuses just before the console leaves the factory. At runtime, the CPU key is mixed with other parameters to devise part of the bootloader’s keys. All in all, this means cracking one CPU key won’t affect other consoles.
Once the Hypervisor is loaded into main RAM, the chain of trust is in place and no code will be executed without the Hypervisor’s permission, especially since the latter possesses W^X abilities.
Irreversible and unique numbers
To further protect the chain of trust and prevent external alterations, boot stages also query the cluster of 768 eFuses to find the following information [115]:
- The aforementioned CPU key, which is used to encrypt the other keys stored in the console.
- A flag that states whether the console is a retail model or a development kit, which affects the availability of many debugging pins on the motherboard (i.e. JTAG).
- Two update counters (one for the updates applied on 2BL/CB and the other for the updates applied on the Hypervisor and Kernel). Every time Microsoft releases a ‘system update’ and the user installs it, the updater blows an eFuse. During boot, the CPU compares the eFuses value with the patches applied, if the values don’t match you get a famous ‘Red light of Dead’. This has prevented users from downgrading to exploitable revisions of the system.
- There are 5 fusesets reserved for the update counter. The counter is encoded in binary form, so eight fuses are blown after each update, which means the Xbox 360 can sustain up to 80 updates throughout its lifetime. Conversely, Microsoft only started blowing eFuses after the
2.0.4548.0update shipped. - Furthermore, there are 16 eFuses available for updates on CB.
- There are 5 fusesets reserved for the update counter. The counter is encoded in binary form, so eight fuses are blown after each update, which means the Xbox 360 can sustain up to 80 updates throughout its lifetime. Conversely, Microsoft only started blowing eFuses after the
Secure communication
Xenon has a 64-bit address bus, yet, there’re only 512 MB of RAM (and a lump of I/O) to be addressed, meaning it can be wasteful to make use of 64-bit addressing. As a result, one half of the address space is used for a more practical purpose: cryptography flags.
In essence, programs only use 32-bit virtual addresses. Then, the MMU uses a page table to convert virtual addresses into 64-bit addresses, where the lower 32 bits encode the virtual address and the upper half store flags that denote whether the selected memory address is (or needs to be) encrypted and/or hashed.
The flags are automatically read by the L2 block, which then carries out the encryption/hashing operations accordingly.
Because there’s only 64 KB of SRAM to store the page table and hashes, all main RAM can be encrypted but only the hypervisor is hashed. This means that CPU-RAM communication is always protected, but the L2 block can only verify the integrity of the hypervisor. This seems like a good compromise, right?… we’ll see how it pans out!
The hypervisor’s duties
Once the hypervisor is fully running with Level 1 privilege, it dips into the internal SRAM of Xenon to provide the following functions:
- Act as a Memory Management Unit (MMU) by handling its private virtual memory page table, where it keeps track of the memory boundaries of every program and whether they are executable or not. This protects the hardware from buggy software producing buffer overflows.
- In cooperation with the L2 block, it ensures all executable code is encrypted when stored with RAM.
To execute any userland application, the Kernel copies the (unencrypted) code into memory and the hypervisor checks that it’s been signed with Microsoft’s private RSA key [116]. If the signature is valid, the Hypervisor proceeds to duplicate the executable code in memory, and in doing so the L2 block automatically encrypts it. Finally, the Hypervisor marks the respective memory pages as ‘executable’ and the rest is history.
Protecting the DVD reader
Due to the choice of a highly popular and affordable medium for game distribution, concerns about piracy resonated at Microsoft’s headquarters. The anti-piracy system became a joint project between Microsoft and their suppliers, with varying results depending on the manufacturer of the DVD reader.
First-party security
From Microsoft’s control, DVD drives authenticate with the system using a unique DVD key that must match an internal key handled by the Hypervisor. The DVD key is derived from the CPU key [117]. If the check fails, the reader still works but won’t be able to launch Xbox 360 titles.
Additionally, to avoid being read by conventional DVD readers and preclude exact duplicates, games are mastered using the new Xbox Game Disc 2 (XGD2) data format, which engraves a couple of anti-piracy tricks [118]:
- A misleading table of contents that deceives conventional DVD players into loading a static video, this asks the user to insert the disc into an Xbox 360 console.
- Within the file system, there’s a database stored that contains multiple checks called challenges or ‘security sectors’ the driver performs to confirm that the current disc is valid. When referring to the DVD drive, these challenges simply enumerate faulty sectors deliberately made during mastering that the drive needs to find. As conventional burners don’t account for them, a duplicate would never pass the verification process.
- The outer area of the disc exposes a burst-cutting area, although it doesn’t appear to include meaningful data for copy protection.
Finally, add to the fact the hypervisor only launches executables signed with Microsoft’s private keys.
Second-party security
In practice, the entity responsible for implementing Microsoft’s copy protection protocols is not Microsoft but the DVD drive manufacturer. In most cases, manufacturers just altered the firmware of their off-the-shelf hardware to abide by Microsoft’s requirements. In any case, the Hypervisor blindly trusts the drive on detecting which disc is genuine and which is not.
As the copy protection subsystem is subsequently delegated to a third-party, multiple concerns arise. For instance, drives still communicate using standard ATA commands [119], so they must find ways to obfuscate sensitive exchanges of data. Furthermore, drives must be prepared to overwrite their firmware in case Microsoft revises a new copy protection mechanism. All of this, while preventing unauthorised parties from accessing this functionality.
While going through each security measure of each manufacturer is beyond the scope of this article, it’s important to note that during the cat-and-mouse games that ultimately emerged, Microsoft had little control over how they were protected and subsequently patched [120], and this evident gap cost the company an early wave of piracy distribution.
Fallback techniques
As it’s obvious by now that anti-piracy measures can only protect for so much time. The Xbox 360 was designed to have a mostly-overridable operating system. Anything but the boot ROM could be updated as long as the correct encryption keys were used (for which Microsoft was the sole owner).
Thus, throughout the console’s lifecycle, the company issued software updates that patched the CB (second-stage bootloader), the Kernel, Hypervisor and the DVD reader’s firmware. You will soon see the reasoning behind each one of these areas.
Additionally, Microsoft promoted (or actually, enforced) such updates by only permitting Xbox Live access from consoles running the latest system. This discouraged users from holding on to old versions and, combined with the anti-downgrade eFuses, reduced the availability of exploitable consoles, even for research purposes.
Finally, in the event of a modified console having access to Xbox Live services, Microsoft implemented many protections behind the scenes to keep hacked consoles and/or cheaters out of their network, including the use of ‘Phoning home’ routines to help Microsoft to detect ‘special’ consoles; and the subsequent application of ‘permanent bans’ by console blacklisting.
Defeat
If you’ve been following the Xbox 360’s scene for some years, you probably know by now that this console enjoyed one of the most creative exploits of its generation. What initially started as simple arbitrary execution techniques (although they aren’t particularly simple), was soon followed by commercial hardware sold for these purposes.
I’ll try to give a proper summary of events now, but if at the end you feel hungry for more, well-known hacker ‘15432’ wrote a very informative three-part article that dives into every breakthrough until 2020 [121] [122] [123].
The DVD drive saga
History seems to impose that whenever a console includes a widely-adopted medium like the CD or DVD, it’s just a matter of time before that area is cracked. Especially since piracy is easier to deliver than homebrew.
In May 2006 (before the PlayStation 3 reached the stores), user ‘commodore4eva’ released the Xtreme Firmware, a replacement DVD reader firmware for the Xbox 360s bundled with early Toshiba-Samsung drives [124]. The new firmware instructed the drive to look for hardcoded security blocks instead, which pirated copies would have relocated.
The firmware was flashed through the use of ATA commands, but it required a computer with a spare SATA socket and special flashing software. Consequently, users had to open up the console and connect the SATA data cable to their computer, run the flasher while the console supplied energy to the drive and then re-assemble everything back. The act of flashing emerged from a hidden ‘maintenance mode’ that was discovered in the drive’s firmware, this was subsequently reversed and re-enabled. If the process was carried out successfully, the Xbox 360 would now read pirated games just like any genuine one.

That’s pretty much how the DVD drive got cracked. As time went by, the techniques evolved but the fundamental idea remained the same (flash a custom firmware). Subsequent readers increased their security to seal backdoors and Microsoft helped by bundling DVD drive firmwares within their ‘software updates’ to undo any unauthorised work done by the user. In later years, readers levelled up to the point the user had to drill a hole into the drive’s System-on-Chip to enable flashing [126].
From Microsoft’s headquarters, a new disc format called XGD3 was devised to improve the collection of challenges. Additionally, XGD3 increased the data capacity by expanding the writing limits beyond the standard area (hindering duplication along the way) [127].
The hypervisor saga
The fundamentals of the hypervisor may seem flawless at first, however, there’s a technical compromise hidden underneath it: external components (the southbridge, the GPU, etc) need access to main RAM too. Yet, they don’t understand the hypervisor’s encryption mechanisms (as that’s a matter between the CPU and main RAM). So, how can the I/O make use of RAM? Simple, through direct access (DMA) and unencrypted data. This is not a security breach per se, as the hypervisor still enforces its security on CPU-executable pages.
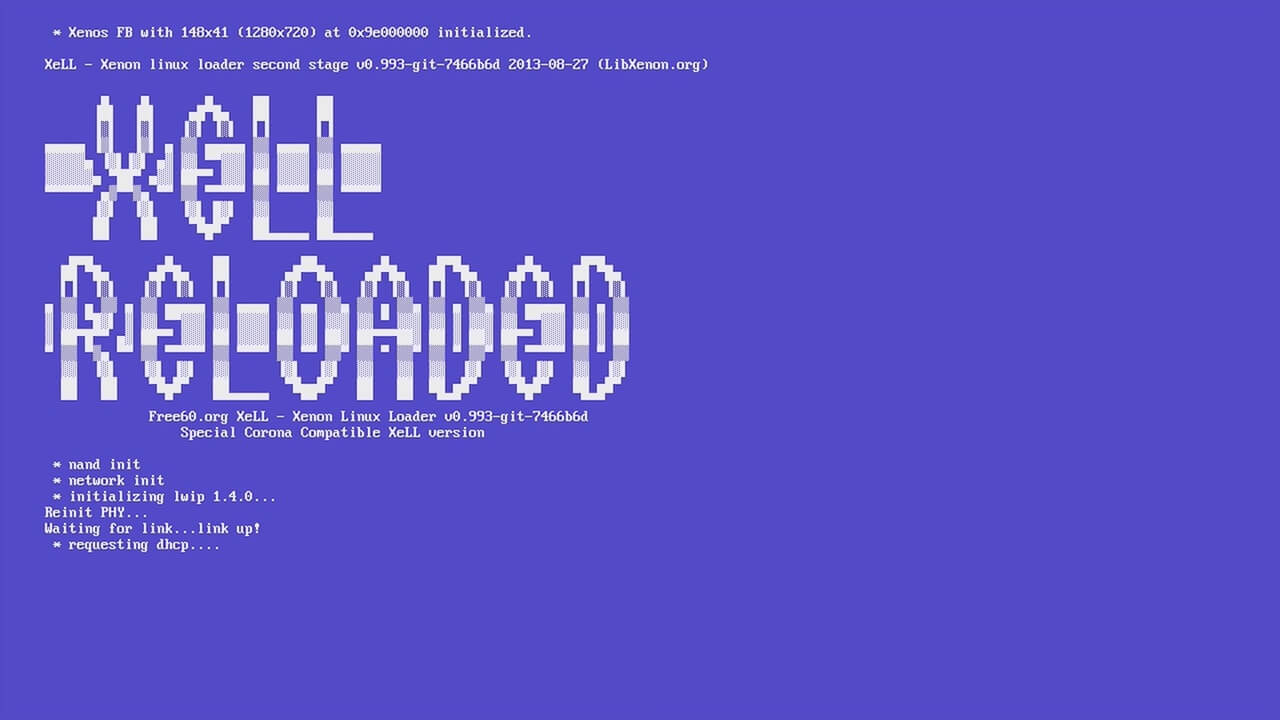
Nonetheless, this is what the early intrusions focused on. In other words, can we inject unsigned code into main RAM and then trick the hypervisor into executing it? Well, in February 2007, an anonymous hacker published a privilege escalation exploit that relied on the 2005 game King Kong [128]. In the report, a clever chain of events was outlined to get arbitrary code execution at the hypervisor level (meaning full hardware access). The way it works is not simple to explain, but I’ll try my best. Let’s see…
The compare flaw
To organise all the routines available, the hypervisor stores a syscall table in main RAM [129], along with a handler that traverses such table.
When a program invokes a syscall, the handler starts by making sure the requested syscall number is valid. This is done by checking that its value is less than 0x61 (meaning there are up to 96 syscalls available). Finally, the handler translates the syscall number to a virtual address in memory (where the routine is found) and the CPU continues execution there.
Another concept to remember is that the hypervisor is stored in RAM in an encrypted form, and by extension all syscalls routines are encrypted too. Consequently, the resulting virtual address pointing to a routine has the encryption flag set. Thus, the L2 block seamlessly decrypts the data fetched from RAM before handing it to the CPU.
With that in mind, hackers took a look at the assembly code of the syscall handler and found a major flaw. Essentially, the syscall number is passed through a register. Registers in Xenon are 64-bit long, yet the validity check is implemented with the cmplwi instruction (used for unsigned 32-bit values). This means that if a program (previously authorised by the hypervisor) were to request a syscall with a value greater than 0xFFFFFFFF, like 0x20000000.0000002A, the hypervisor would only verify 0x0000002A and that would pass the check.
Now, where am I going with this? Well, if you recall, the upper 32 bits on 64-bit virtual addresses are used as flags to instruct the L2 block to encrypt/decrypt or hash the memory values, and if the flags are all zeroes, the L2 will interpret the data as unencrypted and pass it right away. That being said, if by some chance an external piece of unencrypted code were to be inserted in RAM through external means, there might be a way to execute it through the flawed syscall handler…
A new syscall
The previous discovery seems promising, but there are still many loose ends. For instance, we still need a way to craft an arbitrary syscall that doesn’t get corrupted by the L2’s decryption block.
Well, to make a long story short, it was discovered that, while the syscall handler converts the syscall number into a virtual address, if the most significant bit of the resulting virtual address happens to be anything but 0, then the converter won’t add the encryption flag. Thus, the L2 block won’t mangle the syscall function fetched, whether it’s encrypted or not.
This was the missing puzzle that would allow hackers to execute a crafted and unencrypted syscall number, leading to arbitrary code execution. But it’s not over yet, as we still need:
- An entry point that enables to inject the arbitrary syscall routine into main RAM.
- Another entry point to request the crafted syscall number, so the arbitrary routine can be executed.
And that’s what we’ll discuss now.
King Kong exploit
Enter the famous King Kong title. Like any other typical game, its disc stores vertex and pixel shaders files which are loaded at some point during gameplay. However, for some unknown reason, these files are found in completely plain (unencrypted) and unsecured form.
If you combine this with the fact the DVD drive can be modified to load duplicates, you could now make it load a King Kong game with modified shaders. Why would this be worth it? Well, do you remember the ‘memory export’ function I mentioned in the ‘Graphics’ section? Shaders can DMA to main RAM! Oof.
I guess you see where I’m going with this, if you craft a special copy of King Kong with custom shaders and insert it in an Xbox 360 with a flashed drive, you can start filling main RAM with arbitrary values. Hence, you can inject custom syscalls into main RAM.
This solves the first task of filling main RAM, but we still need a way of invoking the custom syscall…
Privilege escalation
Recall that the Xbox 360’s kernel provides a scheduler to handle multi-threading. This apparatus takes care of dispatching virtual threads to the CPU cores and saving idle threads into memory for later use. Well, for another unexplained reason, the scheduler stores thread states in RAM as unencrypted data!
Combining all explained, one could now craft a shader that corrupts an idle thread in RAM which, once restored, would continue execution with custom parameters. This process would carry on until all parameters are finally in the hacker’s control [130] so execution can be redirected to the syscall handler and, combined with the use of calculated parameters, would finally jump to the crafted (and unencrypted) syscall.
And this is pretty much how the hypervisor got hijacked by arbitrary code. A common payload bundled with this process consisted of a Linux launcher, as using Linux with full hardware privileges allowed users to extract sensitive information from their console, like the CPU key (which could come in handy in the future, you’ll soon see).
Protecting King Kong
The King Kong exploit was a huge step for the Homebrew scene. I’m not sure if you noticed, but no encryption keys were needed whatsoever (so much for having a strong security system in place…).
Be that as it may, Microsoft was already made aware of it and subsequently patched it in January 2007 (one month before the report was published). Nonetheless, efforts continued in finding similar exploits for updated consoles. Additionally, hackers could now obtain an outdated console and make use of the King Kong exploit to expand their research.
As a result, throughout the same year of the King Kong events (2007), new discoveries were made:
A hidden maintenance mode
Once CB, the second stage bootloader, was reverse engineered, a new backdoor was discovered. One of the checks CB performs is comparing a string stored in CB’s headers against checksums in NAND. Well, if that string (called ‘pairing information’) turns out to be all zeroes, then the check is skipped and the boot process continues while ignoring the CPU key. The only downside is that no update packets are applied and the Kernel ends up launching an alternative app called MfgBootLauncher (presumably used during manufacturing) instead of the Dashboard.
Initially, this discovery didn’t attract attention as it didn’t seem to lead to any interesting development. However, this changed after Microsoft noticed mentions of MfgBootLauncher and subsequently released a new system update, which ended up attracting too much attention, even to the point this special ‘manufacturing mode’ became an opportunity to homebrew!
Before we continue with this story, there’s one more hack that needs to be explained…
The timing attack
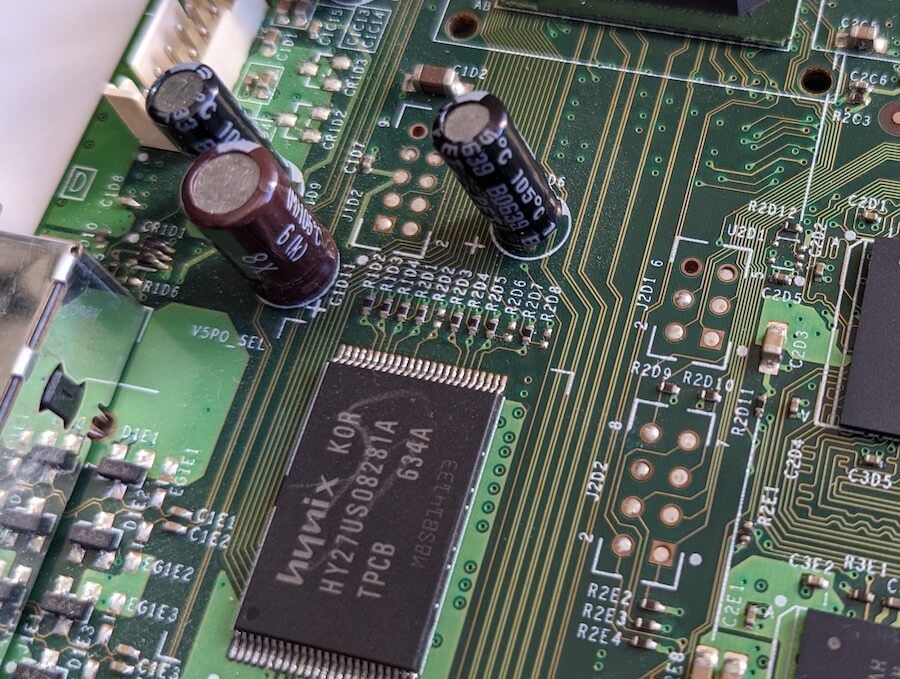
In August 2007, XboxHacker user ‘Arnezami’ published the timing attack method for downgrading any console to a King Kong-vulnerable firmware version [131].
This time (pun intended), the new attack expects the user to extract the contents of the NAND (a.k.a produce a dump) and use an automated script that merges console-unique information from the dump with a generic image of the system 2.0.1888 (the first revision of the operating system).
To get past the second-stage bootloader checks (which compares the update counter from the eFuses with the updates installed), the crafted firmware needs to match the value of the eFuses’ counter. Yet, it’s not that simple to tweak, as the counter in NAND is signed (with HMAC) using the CPU key [132], and the CPU key can’t be extracted if the Xbox 360 is running a patched firmware…
Well, for manufacturing purposes, the motherboard exposes Serial Peripheral Interface (SPI) pins to write and read from NAND; and POST pins that output different values representing the current state of the boot process. It so happens that during the eFuses validation (implemented with C’s memcmp()), the comparison is done on a byte basis. Most importantly, during each comparison, successful matches always take 0.22 ms to complete and failed ones take 0.21 ms [133].
Combining all this, one can automate a trial-and-error guesser until the whole signature is brute-forced. This is what the timing attack consists of. Once the secret code is extracted, it can be applied to the altered 2.0.1888 image which, once flashed into the console’s NAND, the console will take as valid. From there, the user may update to a King Kong-vulnerable version.
In the end, Microsoft fixed this bug in early 2008 with a new software update that slightly changed the memcmp() function in CB.
More CB research
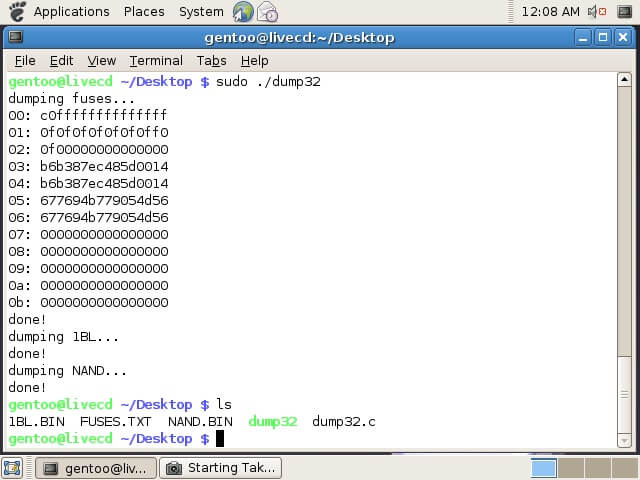
One day, Microsoft published a new CB update (version 1920) that aimed to tackle the discovery of the then-harmless manufacturing mode.
In an obfuscation attempt, Microsoft decided to add the CPU key as a parameter for encrypting/decrypting 4BL (the stage responsible for loading and updating the Kernel and Hypervisor), making it impossible to reverse engineer it. However, thanks to the timing attack, CPU keys could be ultimately extracted. Thus, hackers were able to decrypt 4BL and proceed to find new holes in it. Luckily, they found a major change in the ‘manufacturing mode’: if the update packets have their pairing information zeroed out as well, then the updater will apply them.
All of this led to a very important milestone: it was now possible to boot arbitrary versions of the system without knowing the CPU key. Yet, this wasn’t exploited until much later, which brings us to our next saga…
Setting King Kong free
As homebrew development kept evolving and the King Kong method became too cumbersome, the focus shifted to finding new techniques for automating the hypervisor exploit, and the results were astonishing, to say the least.
A suspicious update
Two years after the King Kong exploit publication, in August 2009, Microsoft released an unexpected software update 2.0.8498 that, once again, overwrote the CB (second-stage bootloader) and increased its respective eFuse counter [135]. Not only this update surprisingly writes over crucial parts of the system (with the risk of breaking it irreparably), but it also caught the attention of many hackers to find out what was Microsoft trying to patch.
The Free60 group, in their continuous efforts to deliver Linux on the Xbox 360, advised users to hold on to their current system and not succumb to the update. Behind the scenes, they already knew about the implied exploit and were preparing to release a new technique that the public could take advantage of.
The JTAG/SMC hack
In November 2009, the Free60 group published their technical report which was later known as the SMC/JTAG hack [136]. With this, the Xbox hacking community were made aware of two big discoveries.
The first one exposed the zero-pairing exploit that allowed to boot any system version, this is what I explained a couple of paragraphs before. The second one described how to automatically trigger the Hypervisor exploit and inject a payload in a console running a King-kong-vulnerable system version, meaning there would be no need to keep a modified copy of King Kong and a flashed drive anymore.
Because I’ve already explained the first exploit, let me go over the second one, as it’s quite uncanny. Remember the System Management Controller (SMC)? That wee Intel 8051 running inside the Southbridge to handle I/O tasks? Well, during boot, the SMC loads up its firmware from NAND, and that’s what Free60 exploited to take over the SMC.
As the motherboard exposes GPIO pins from the SMC and JTAG pins from the CPU and GPU, hackers found out that they could perform the following technique:
- Make an image of the NAND’s contents using a NAND reader.
- Using the zero-pairing backdoor, modify the image to only apply updates leading to a King-Kong exploitable Hypervisor.
- Modify the SMC firmware area (in the NAND’s image) so, during boot, the SMC commands the GPU to DMA the same block of code used in the King Kong disc.
- Flash the modified NAND image back into the console using a hardware NAND writer.
- Solder two wires with switching diodes between the SMC’s GPIO and the GPU’s JTAG.
- Turn on the console and wait for the payload to show up.
With this, a permanent and automatic homebrew launcher was obtained! (as long as you didn’t update to 2.0.8498).
The dawn of Homebrew
Even though the aforementioned discoveries were outraced by Microsoft’s updates, the homebrew community kept gaining momentum and new applications emerged to become a ‘must have’ for any modding enthusiast:
- XeLL (from Xenon Linux Loader), later forked as XeLL-Reloaded, is the de-facto payload used with the Hypervisor exploit [137]. It sits as a second-stage bootloader with an amount of functionality analogous to a Victorinox for Scouts. XeLL enables to boot up Linux or an ELF executable written with libxenon, an alternative SDK designed for homebrew development. Furthermore, upon loading, its text interface automatically displays the eFuses data and other low-level information on-screen so the user can write it down if needed. If that’s not enough, its self-hosted HTTP site provides extra controls to dump the contents of the eFuses and NAND on-the-fly.
- freeBOOT is a modification of the official operating system that disables the signature verification of the Hypervisor and removes hardcoded caps set by Microsoft (i.e. the Security sector checks preventing to use of third-party hard drives), among other things [138]. freeBOOT is loaded from XeLL and proceeds to boot the official system as any other unmodified console, except that non-signed executables can be launched from the Dashboard from now on. At the time of this writing, applying Freeboot remains the main goal for most homebrew users.
- To produce a ‘freeBOOTed’ image (eventually flashed into the NAND), the CPU key of the console is needed. This means the console needs to first load XeLL (using a previous exploit) so the key can be extracted. Then, a new NAND image with Freeboot’s patches applied can be generated.
- FreeStyle Dashboard and Aurora are two replacements for the original Dashboard that provide enhanced controls for executing homebrew apps, loading up game dumps and tweaking low-level settings (i.e. fan speed). While they are meant to overtake the official Dashboard, they are still loaded as any other XEX executable.
- XeX Loader and XeX Menu are homebrew launchers that can be run from the official Dashboard.
- Dashlaunch is another program that provides a collection of patches for the official system [139], except they are loaded at runtime (avoiding the need for flashing NAND). One of Dashlaunch’s functions includes the ability to automatically load an executable after the Dashboard boots, this is often used to quickly load the alternative homebrew-friendly FreeStyle Dashboard or Aurora.

To facilitate the process of building a NAND image with XeLL and/or Freeboot, many Windows programs like XeBuild, J-Runner and AutoGG were developed to automatise this process as much as possible.
Outracing Microsoft’s advantage
As joyful as the previous events may seem, I’m afraid to say that the SMC/JTAG trick was released just after Microsoft patched it! If you are curious, the software update blacklisted King-Kong vulnerable Hypervisors so they can’t be loaded at CB. Moreover, the new CB also blew a new eFuse counter, so it was made impossible to fight back… unless a new unimaginable hack were to be published…
The glitcher

After two idling years since the last major breakthrough, in August 2011, user ‘GliGli’ submitted a technical report outlying the discovery of a Reset Glitch Hack (RGH) [141]. This new technique allowed any type of Xbox 360 (no matter its update installed) to run an arbitrary version of the Hypervisor, just like the SMC/JTAG hack, except that it will now need an external chip soldered in.
In a nutshell, RGH exploits a fundamental flaw in the CPU’s circuitry: if the CPU receives a short pulse (4 to 60 ns long) on its RESET line, the CPU will not reset but continue execution in a corrupted state. In other words, if the CPU is in the middle of executing an mr (move register) instruction when the glitch happens, the destination value will be 0 instead of the content of the source register. This can work to the hacker’s advantage if the CPU is in the middle of asserting something crucial, like verifying the bootloaders. Additionally, user ‘cjak’ found out that by latching a special line in the motherboard called CPU_PLL_BYPASS, the CPU is slowed down to ~25 MHz, thereby making room to glitch it.
With this, GliGli and a group of hackers grabbed a generic but fast CPLD board (similar to an FPGA), soldered it to many useful points on the motherboard and programmed it to:
- Keep track of the Xbox’s POST signals to know when and where to latch the buses.
- Slow down the CPU when CB is about to validate CD’s hashes.
- Latch the
RESETline when CB is in the middle of amemcmp()function (related to the hash verification). - Revert the CPU’s original speed and hope that the
memcmp()has magically succeeded. - If the process worked, a custom payload is executed.
With this, a board programmed to glitch the Xbox 360’s CPU became known as a glitcher.
Because the process relies on correct timings (from a combination of POST inputs and hardcoded timers) and very precise signalling, success is not guaranteed anymore. Although to automate the process, the SMC’s firmware is altered to keep rebooting the console if the boot stage has failed.
And with this, the homebrew community was gifted with an unfixable exploit to load homebrew.
Microsoft’s retaliation

While the RGH hack attacks the fundamental construction of the CPU at an early stage (thereby making it impossible to tackle it with a software update), Microsoft never displayed any sign of weakness and released further updates of CB (the second-stage bootloader) and new motherboard revisions in an attempt to garble the glitching process.
For instance, the new Slim edition of the console released in 2010 (ironically, a year before the publication of RGH) codenamed Trinity moved the CPU_PLL_BYPASS point to a location hackers couldn’t find (yet). Meanwhile, the RGH team found out they can fiddle with the PLL signal of the video encoder chip via I²C, and this will condition the speed of the CPU. Unfortunately, the video encoder can only slow it so much (just ~3 times [142]) so the precision and success rate is reduced. Nonetheless, it’s still a huge accomplishment.
Additionally, Slim consoles split the CB stage into CB_A and CB_B, where CB_B is further encrypted with the RC4 algorithm and relies on the CPU key. To add more to the despair, the zero-pairing backdoor got completely removed. Finally, all of these changes would soon be extended to older models as Microsoft publishes more software updates. Be that as it may, hackers never gave up and found out they could modify CB_B in its encrypted form. Thanks to a mathematical flaw in RC4, encrypted information can be altered just by applying XOR with an unencrypted delta patch [143], thereby allowing to disable encryption routines on CB_B without knowing the CPU Key!
Selling RGH

During the following three years, the resilience of the RGH hack managed to resist all of Microsoft’s efforts to mitigate it. Meanwhile, what remained was a good-old cat-and-mouse game, with Microsoft trying to make the task unfeasible. And so, new variants of RGH were scattered across many forums to face the incoming wave of software updates. The variants shared the fundamentals of the RGH hack, but each used an alternative program for the glitcher and the modified SMC image to improve the success rates.
Initially, the RGH hack, as a program for the glitcher, materialised into two different variants: RGH1, which depended on the PLL line, and RGH2, which relied on the video encoder. The latter could be enjoyed by any motherboard revision and was continuously fixed to tackle Microsoft’s attempts to break it; and while RGH1 couldn’t get past old hardware (Trinity) and software (update 2.0.14699), it enjoyed greater reliability.
In any case, the success of RGH paved a wave of commercial glitchers and installation kits. These promised that, at a higher price point, would provide easiness of installation and better success rates. I believe Team Xecuter is one of the best examples that greatly capitalised on the RGH fever. The company sold customised versions of Xilinx’s ‘CoolRunner’ development boards to compete against other programmable glitchers on the market. Most notably, Team Xecuter’s boards came either pre-programmed or with support for their new variants of RGH:
- As a result of Microsoft’s attempts to fix the XOR exploit with update
2.0.15572, in December 2012, Team Xecuter shipped a new board called DGX (Double Glitch Hack) to focus on extracting the CPU Key [144], and then proceeding like any other RGH method. In this way, Microsoft’s update was addressed by flashing old unencrypted bootloaders and then using DGX to glitch the boot process twice to bypass both comparison and validation of the modified CB_B.- It was later found out that Team Xecuter’s method was more of a brute-force attack. A more reliable procedure only requires to glitch when CB_A is preparing to copy data from NAND [145].
- The R-JTAG glitcher for non-Slim consoles [146]. Released in May 2013, this new method for updated consoles attempts to approximate the old success rate of RGH1. Basically, R-JTAG glitches the CPU to load an old version of the Hypervisor vulnerable to the JTAG/SMC exploit, and then proceeds as the latter hack did.
- With their new flagship ‘CR4 XL’ glitcher, RGH2+ was presented as a new mode to improve over the classic RGH2. This time, the CPU slowdown process was delegated to the SMC [147].
For one reason or another, Team Xecuter didn’t provide any documentation to replicate these new techniques on other devices. So users took matters into their own hands to deliver cheaper and/or better alternatives:
- First, ‘DrSchottky’ managed to create an open-source implementation of R-JTAG called R-JTOP for any glitcher to enjoy [148].
- Secondly, developer ‘blaKCat’ bundled the double-glitch routines in his flashing utility, so any board could be programmed without depending on the expensive DGX.
- Thirdly, in December 2014, hacker ‘15432’ published the ‘Speedy RGH’ (S-RGH) [149] as an alternative to CR4’s proprietary RGH modes. S-RGH even gained faster speed by reducing the slowdown periods during the glitching process.
- Later on, in April 2015, 15432 did it again and published a new method called RGH 1.2, combining RGH2 and the use of the CPU’s PLL line [150], achieving similar success rates to RGH1.
- Finally, in August 2021, engineer Josh Davidson managed to port RGH 1.2 to Slims by finding the missing PLL line on the new motherboards [151], resulting in a new variant named RGH 1.2 V2.
The endgame
With the approach of the Xbox 360’s successor, Microsoft took one last breath and shipped a redesigned version of the console called ‘E’, and within it, another motherboard revision called Winchester. In retail models, Winchester finally disables the POST and PLL signals and filters the CPU RESET line from external disturbance [152]. This rendered the RGH hack, after three years since its discovery, obsolete.
However, for the compatible motherboards (which are still found in abundance), only wonderful things awaited. Apart from the mentioned RGH variants, there was still a golden discovery to be uncovered. Fast forward to November 2021, 15432 surprised the community again by publishing RGH 3.0, a universal RGH variant to rule them all. Behind the scenes, the new technique is an evolution of RGH 1.2 V2 that doesn’t require a glitcher anymore [153]. This was done by implementing the glitching stage into the SMC, which now only needs two wires soldered on the motherboard (in particular, the newly located CPU_DBG1_POST1 and CPU_PLL_BYPASS) to execute the hack.
That’s all folks
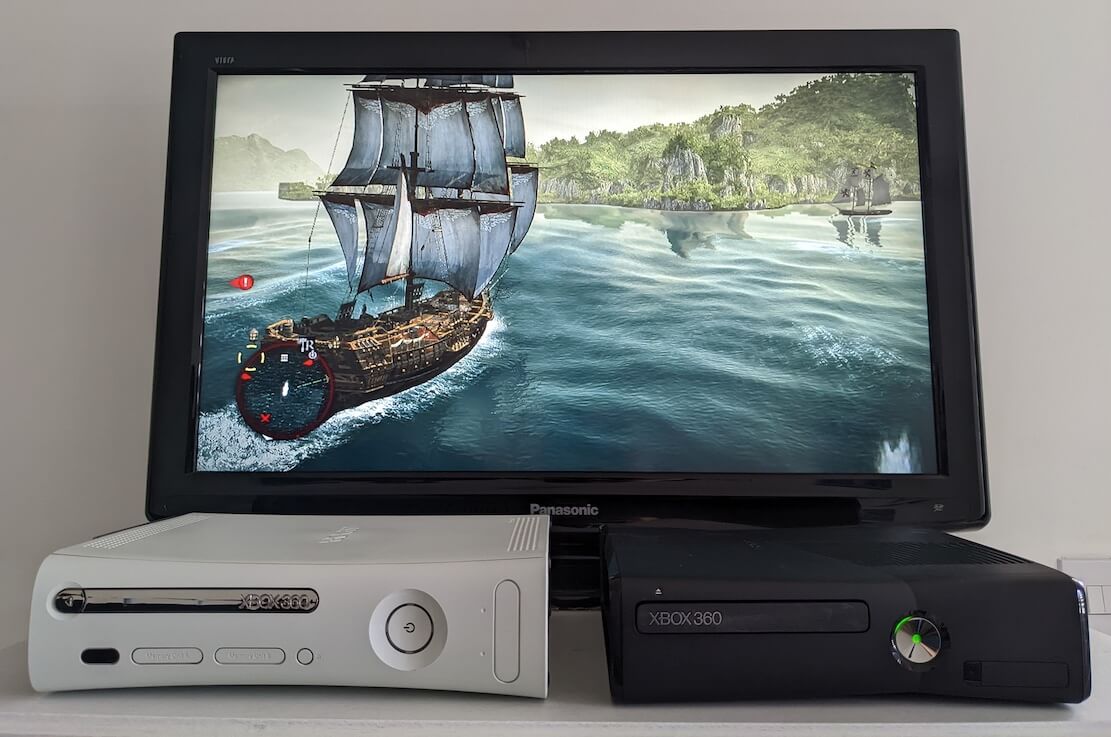
Congratulations on reaching the end of the article!
I think this writing has shown us again that you don’t need an expensive technology to conquer the new generation. Don’t get me wrong, I still consider Cell a great invention that brought many technical advancements to the consumer market, but I perceive its capabilities differed drastically compared to the rest of the chips in the PS3. By contrast, the Xbox 360 presented a more harmonious mix where all components could work together to unlock each other’s potential. In any case, every console carries its unique set of strengths and weaknesses. That’s why I like writing about all of them.
By the way, to gather materials for this study, I ended up hoarding an absurd amount of models, mainly because I needed to find consoles with specific operating versions installed (as they could not be downgraded). This later became a hit-or-miss challenge and, to make matters worse, my old one broke just before I started this site. Anyhow, in the end, I found myself surrounded by:
- An unused Xenon from 2005 that the owner was afraid to open the box. To my surprise, it’s running
2.0.1888(too relic-like for me to fiddle with), so I had to let it be… - A Zephyr model that the previous owner sent for repair, but by the time Microsoft shipped it back, the owner had already bought another one. It’s got an NXE system installed.
- A Jasper from a store clear-out that never got used as well, it’s running NXE too.
- A Falcon with RGH 1.2. I bought it to attempt to downgrade it to a Blades-era system, which turned out to be impossible without proper tools. Fortunately, thanks to the software provided by Octal’s Console Shop, it’s now straightforward to do so.
- My old Trinity that I had since I was a teenager. Unfortunately, it got cursed with the Red Lights of Death and I couldn’t manage to repair it. Luckily, after RGH 3.0 came out, I bought a cheap spare Trinity, applied RGH and transplanted the internal Flash unit to recover my old profile and saves. All of the game screenshots in this article come from this model.
With the write-up now finished, I’m glad I can finally put this search to rest. As a side note, this is the last article of the 7th generation saga!
So, regarding my next steps, I’m considering returning to the 90s era to pay tribute to historical consoles that slipped my mind, or maybe do some more work on the site… we’ll see!
Until next time!
Rodrigo


